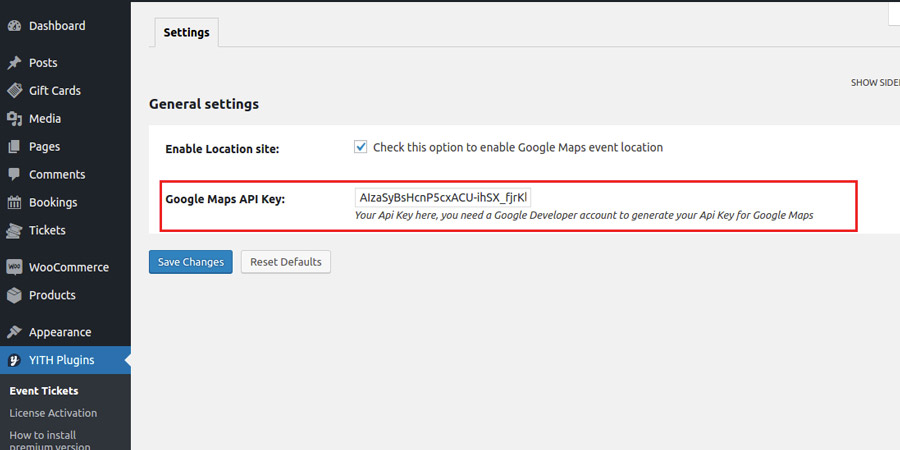
General settings
In the general settings of the plugin you will find options you’ll need to enable/disable so you can use them when publishing/creating an event ticket.
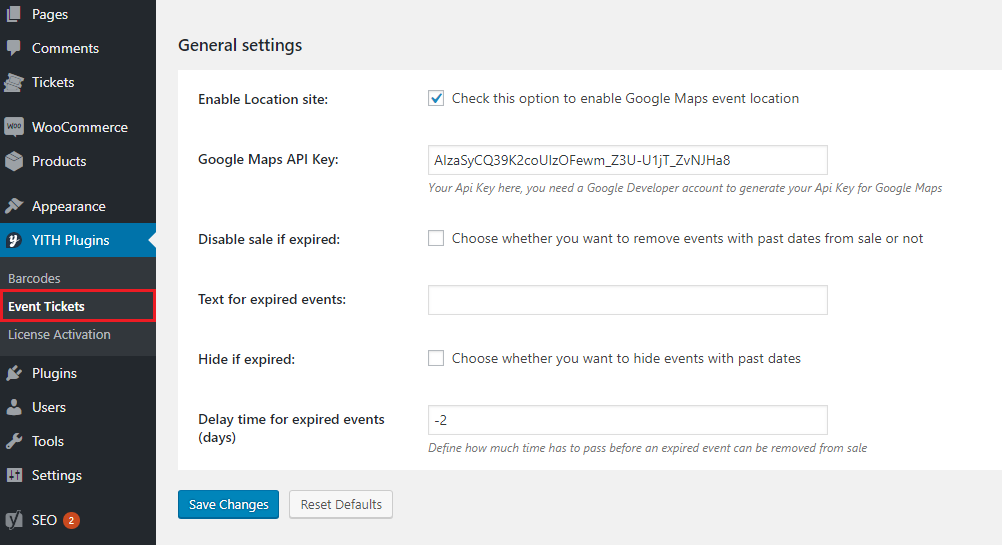
- Enable Location Site: to show the events location on the ticket
- Google Maps API Key: insert the API key in order to make the location option work. You can check this page to see the settings.
- Disable sale if expired: if enabled, the event with a date in the past will be removed.
- Text for expired events: will be shown for expired events.
- Hide if expired: if enabled, events with a date in the past will be hidden.
- Delay time for expired events (days): choose the number of days that have to pass before an expired event will be removed (use – for days before event takes place).
Create event tickets
Add a new product to your shop and assign the Event ticket type to it.
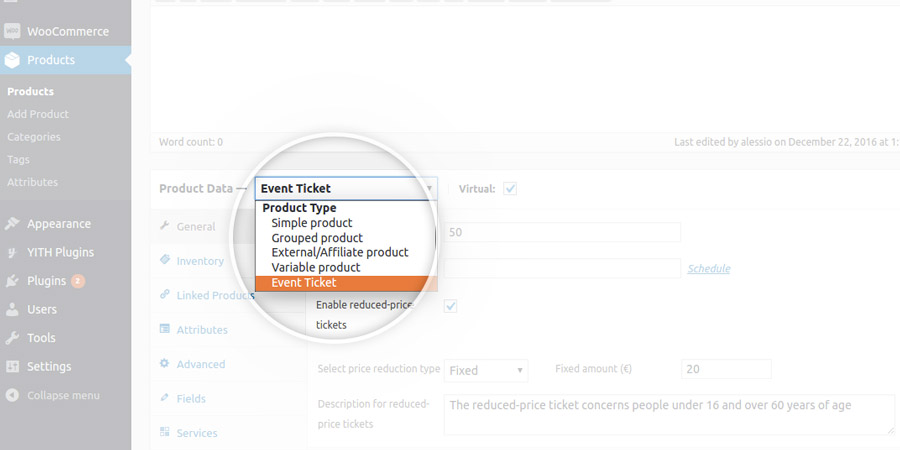
The ticket can be both virtual and physical.
If a physical ticket (therefore, virtual checkbox disabled), you can add the shipping cost to the purchase just like for any other physical product of your shop.
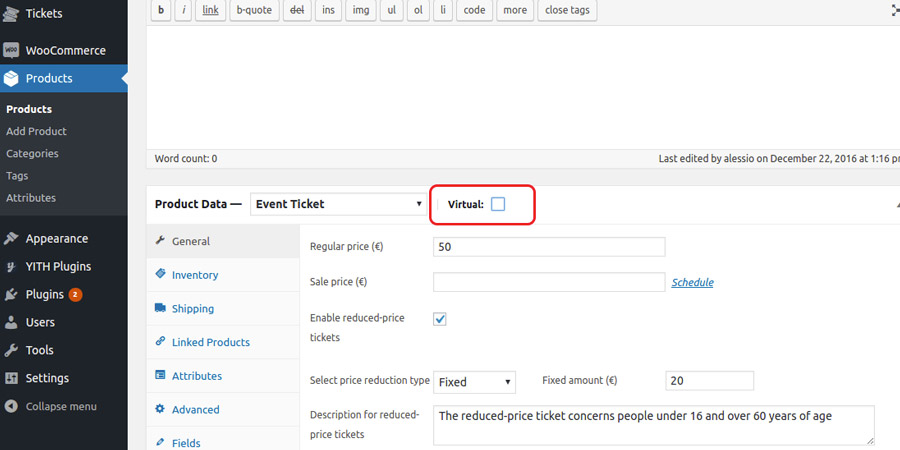
Set the regular price of the ticket like for any other WooCommerce product.
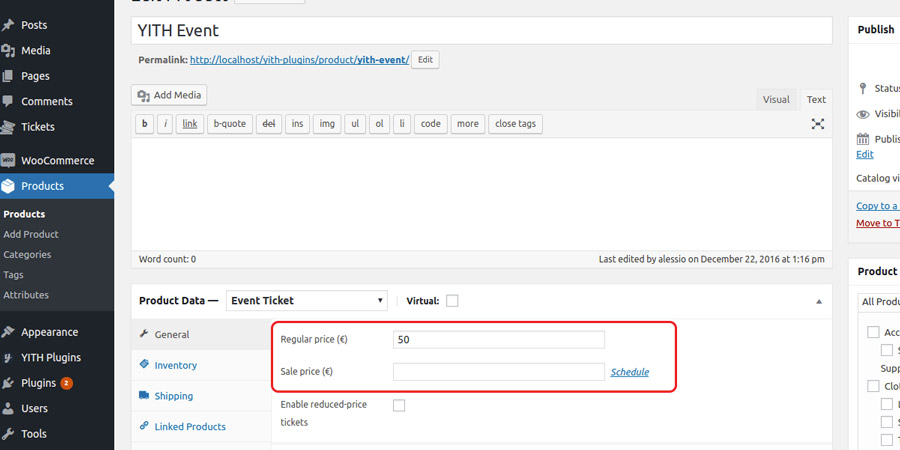
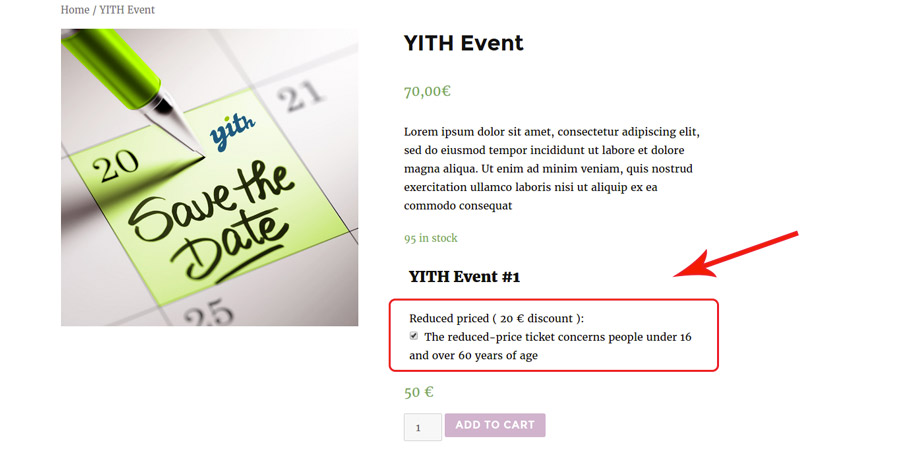
Optionally you can enable the reduced-price for the ticket. To do it, activate the Enable reduced-price tickets entry and insert the amount to deductfrom the price (percentage or fixed) and a short description with additional information related to reduced-price ticket purchase.
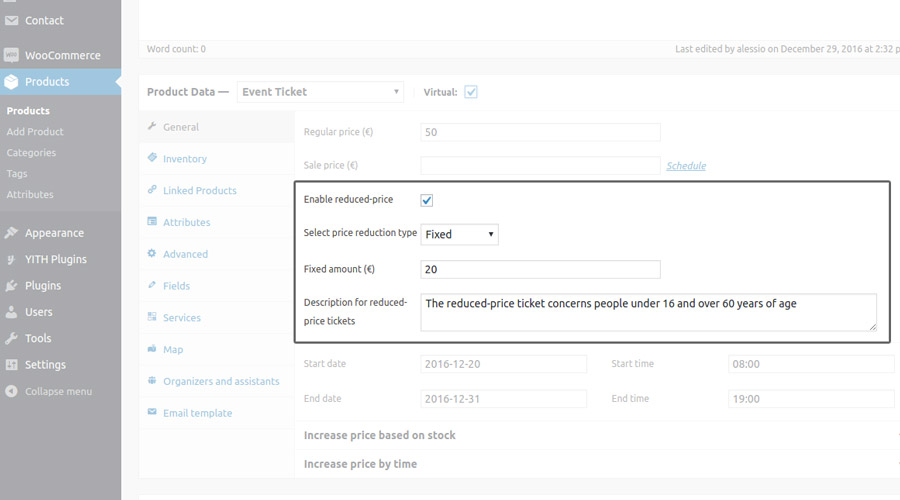
In the example, the users can purchase the reduced-price ticket with a $20 discount in comparison to the full price.
How to increase the ticket price automatically
The unit cost of each ticket can be automatically increased based on two variables:
- number of tickets left (available only if the stock management in the product is enabled)
- number of days left to the event
The plugin gives you the possibility to configure several increase rules that apply at the same time. The increase cost is always calculated on the ticket base price before any service costs are applied.
Let’s look into the two different type of increase separately.
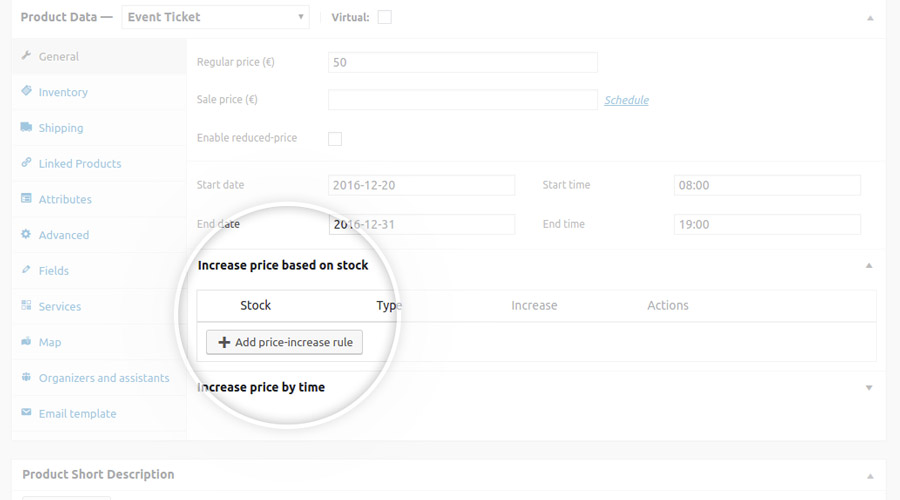
Increase price based on stock
First of all, ensure the stock management has been enabled on the product.
Then, open the section Increase price based on stock and click on the Add price-increase rule button to add a new rule.
Configure the following paraments as follows:
- Stock: threshold below which the price will be increased
- Type: choose whether to increase the base price by a fixed value or a percent value
- Value: increase value
- Description: note down how the rule works (for your convenience; not visible to users)
Let’s make an example.
Suppose we want to add a 50% markup on the ticket base price when less than 50 tickets are left.
We will configure the rule as follows:

Increase price by time
First of all, ensure you have associated a start date to the event (see the image below).
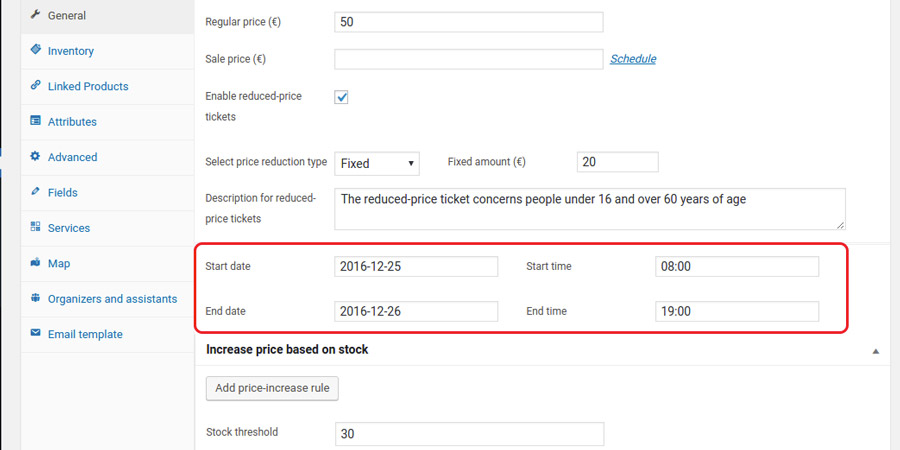
Now, open Increase price by time section and click on Add price-increase rule to add a new rule.
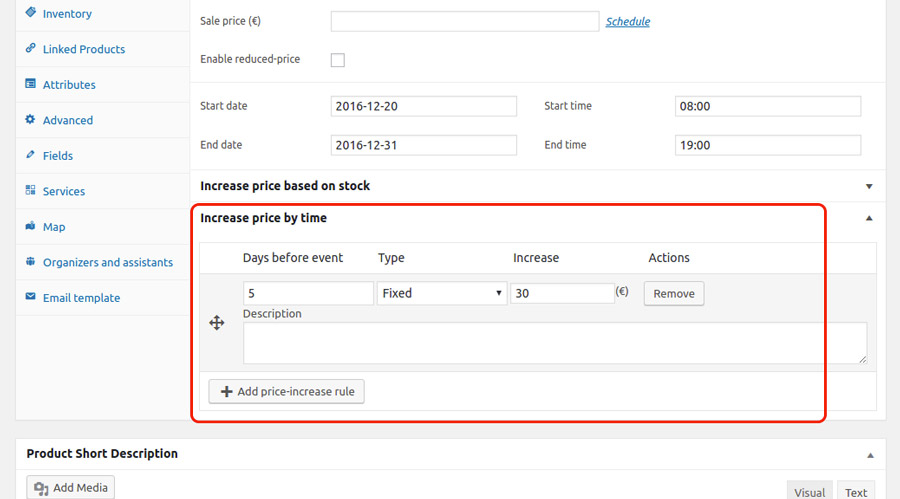
The configuration shown in the above image will let the price automatically increase by €30 exactly 5 days before the event start date.
Event ticket information form
For every ticket bought, you can ask users details about the ticket holder.
In order to do that, you have to create the fields of the form that will be later shown on the product detail page.
Go to the product edit page, click on the Fields tab, and add all the new fields you want to show in the form.
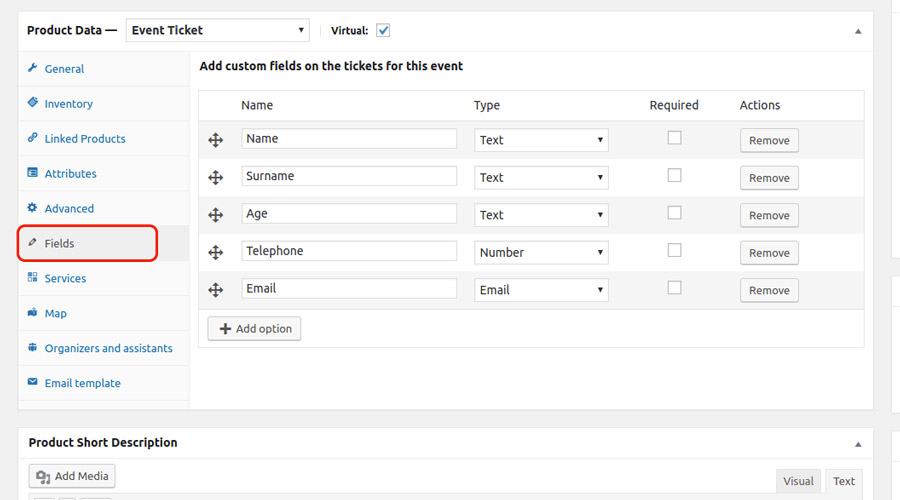
There are 6 types of field available:
- text
- textarea
- number
- date
- yes/no
If you want to make the field mandatory, check the Required box.
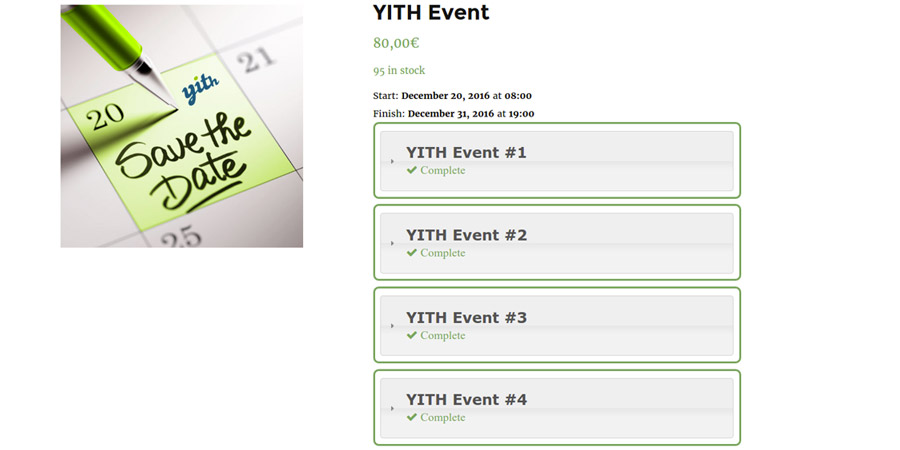
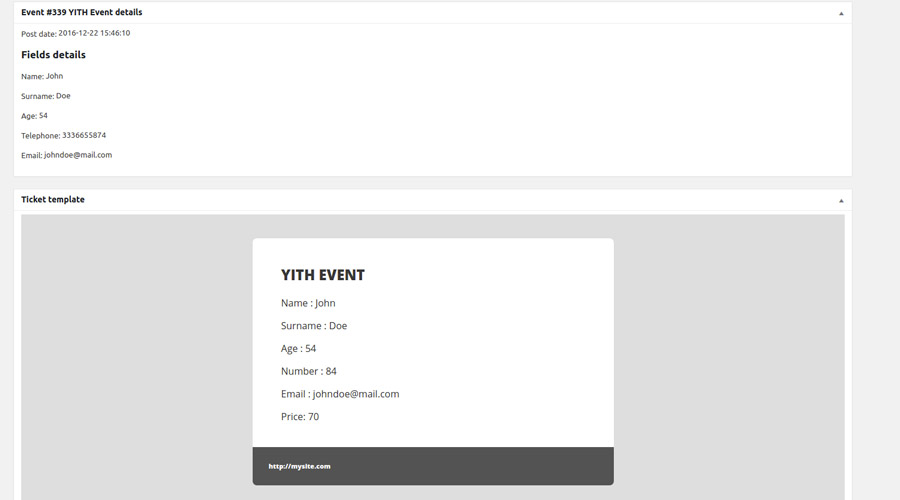
The fields will be shown in the event detail page, as shown in the following image.
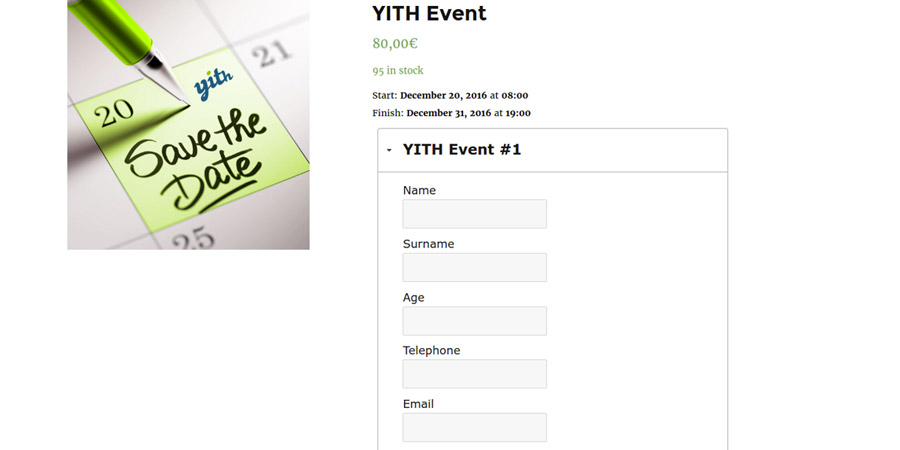
The same information form will be replicated for the number of tickets ordered.
Ticket stock management
Do you want to limit sales to a specific number of tickets only?
We’ll show you how to do in this page.
Open your Event Ticket product and select the Inventory tab. Enable the Manage stock option and set the available quantity as in the following image.
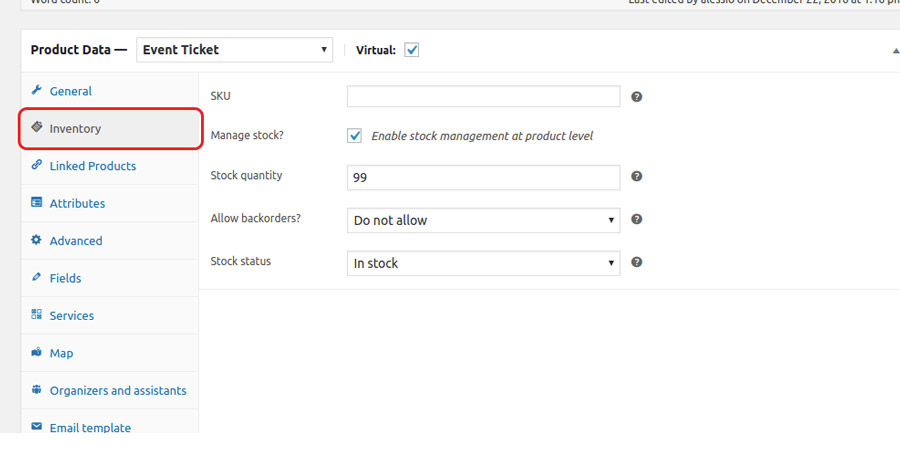
WooCommerce will automatically decrease the quantity upon each new sale.
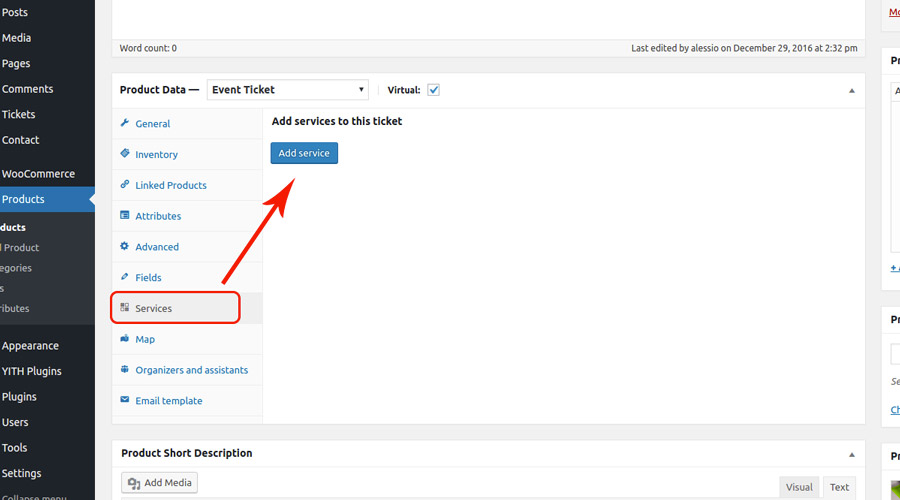
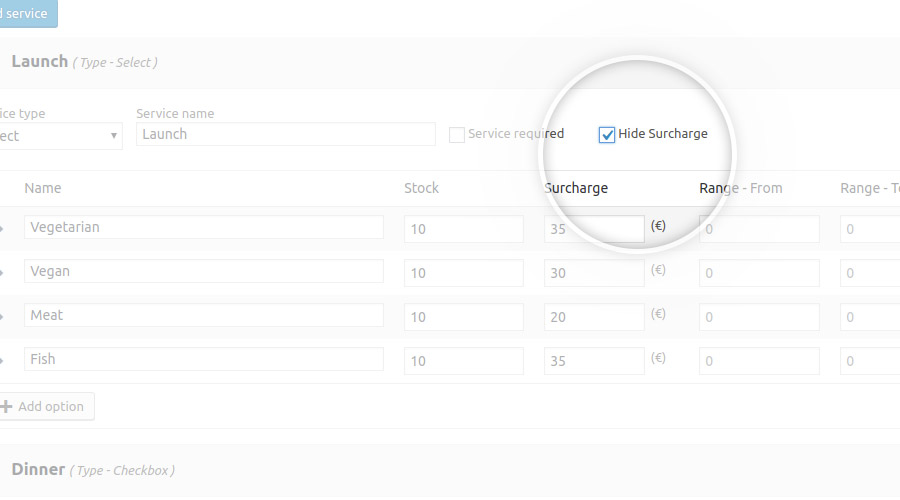
Services
Extra services can be added to the Event Ticket product and, if selected by the user, they will increase the ticket unit price based on the value you have specified for each service.
To add a new service, go to the product edit page, click on the Services tab and add a new element.
Services can be shown either as a select dropdown or as checkboxes.
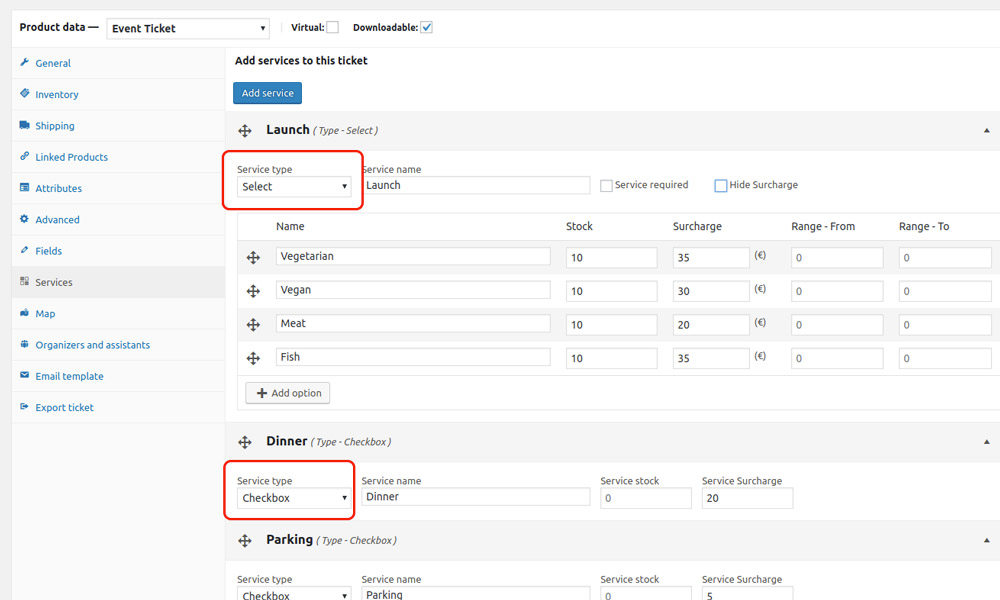
For every service you can set the following options:
- service name: (give a name to the service)
- service stock: (the service will be purchasable as long as there is stock availability)
- service overcharge: (the cost of the service will add to the ticket base price)
- required service: if a service is set as required, users are bound to buy the service alongside the ticket. (available only for “select” service type)
Once done, users can select the services from the product detail page.
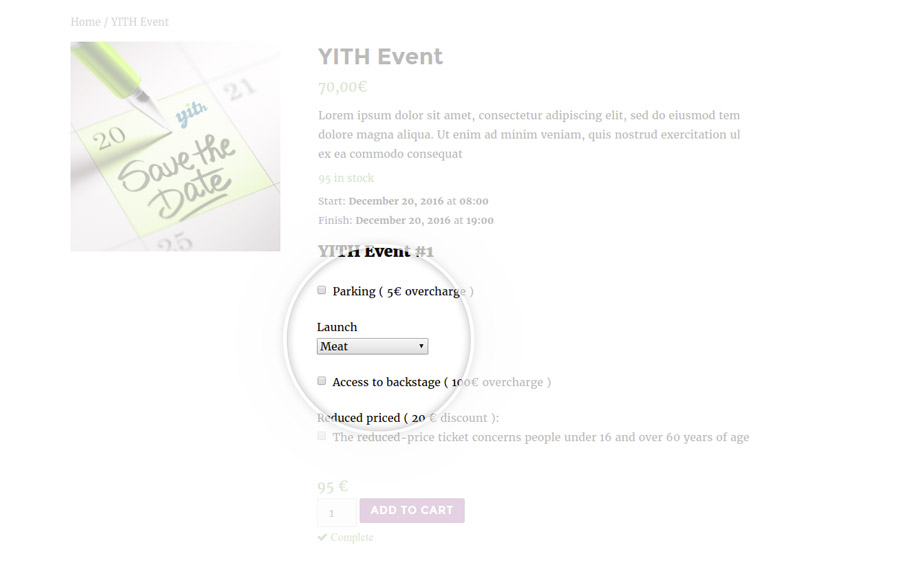
If you want hide the service surchase, enable the option “Hide surcharge”for the service.
Event location
Let’s see together how to associate an event to a Google Map step by step.
First of all, go to the plugin settings panel (YITH Plugins > Event Tickets), check the Enable Location option and enter your Google Maps API Key.
Then, open the product edit page, click on the Map tab and enter the location address.
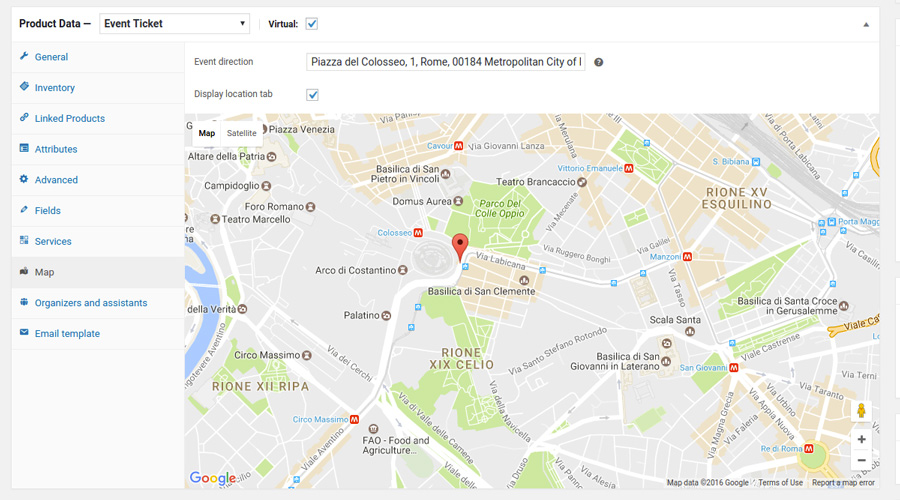
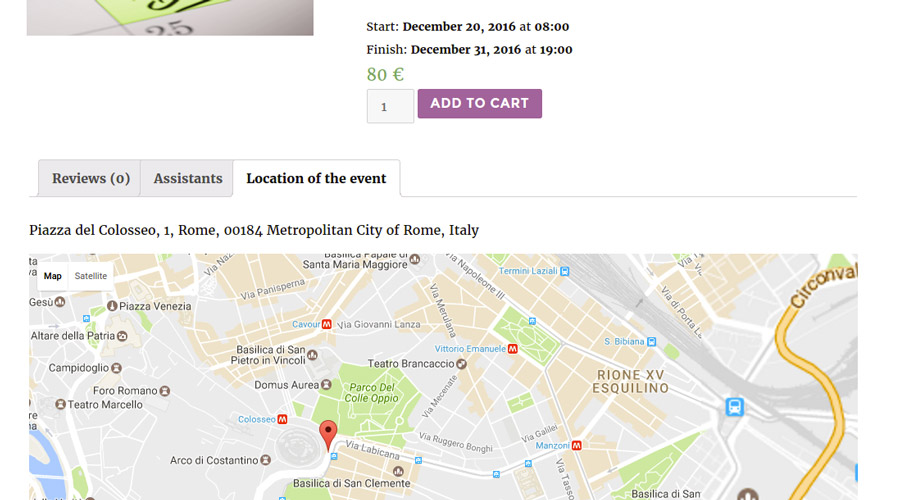
If you have enabled the option called Display location tab, the map will show up also in the event details page, specifically in the dedicated Location of the event tab.
Organizers and participants
The plugin gives you the opportunity to show organisers and/or participants for each event, as shown in the image below.
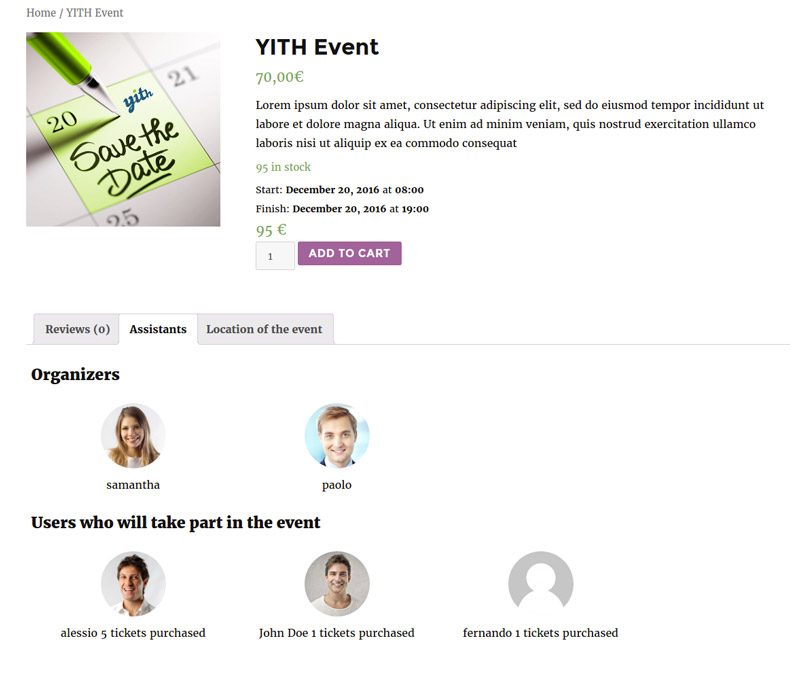
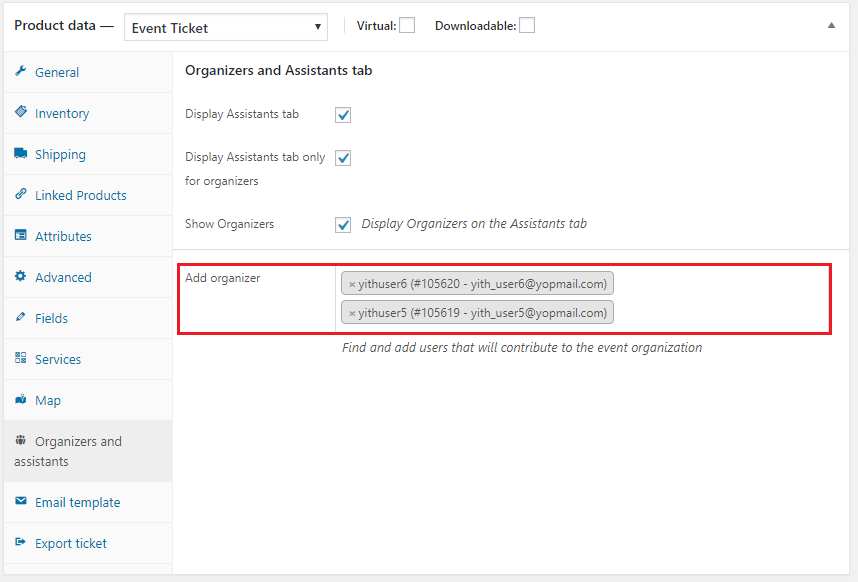
In order to show a list of organizers, you’ll have to enter their names in the Organizers and assistants section in the product edit page.
Organizers must be registered on the website already.
The list of participants will also contain all the users that have completed an order containing the ticket.
Users who buy a ticket will be added to the list of participants automatically as soon as the order switches to Completed.
With the Display assistants tab only for organizers you can choose if the lists will only be displayed for organizers (using filters).
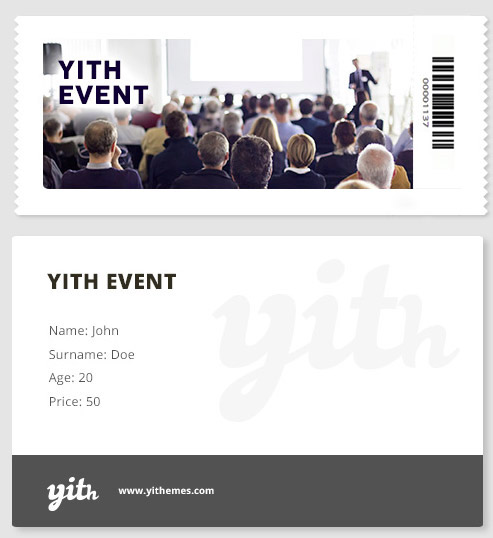
Ticket template
The ticket template can be customised at will for every Event Ticket product created.
In the Email Template tab in the product edit page you can:
- add an image for the ticket header
- add a background image
- add a footer with custom text and logo
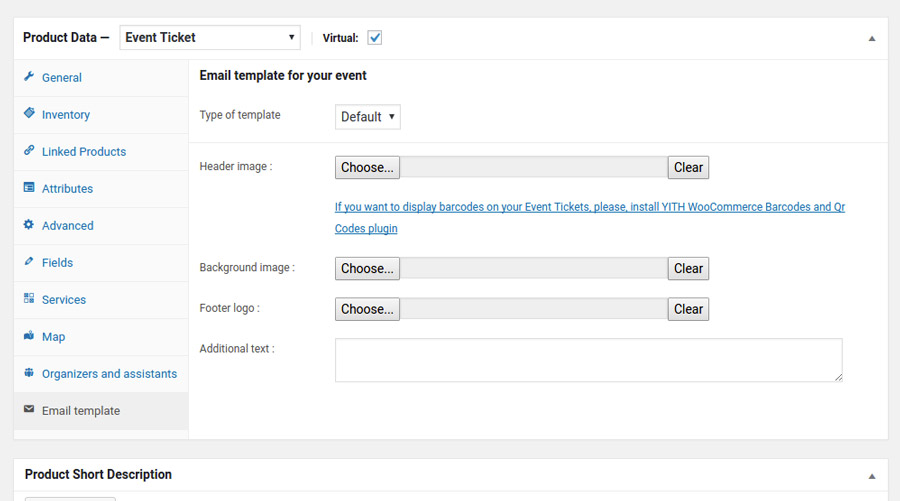
– Header image: 420 x 203px
– Background image: 525 x 297px
– Footer logo: 66 x 43 px
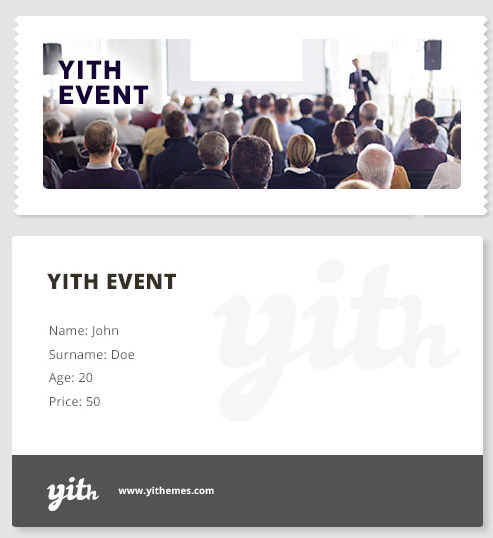
These images sizes are recomended to use for ticket templates.
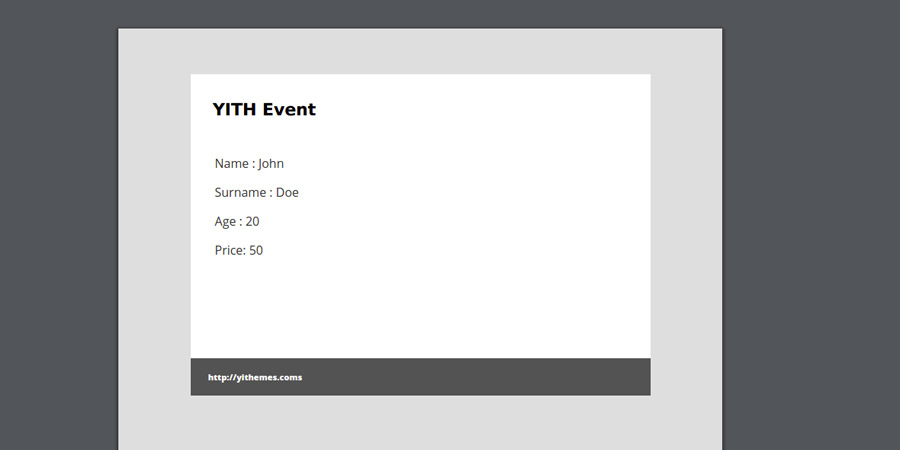
This is a sample ticket with header image and footer.
How to get the tickets purchased
The ticket will be available to the user as soon as the associated order is set to Completed status.
At this stage, users can access the ticket in two different ways:
- from within the Order Complete email they get
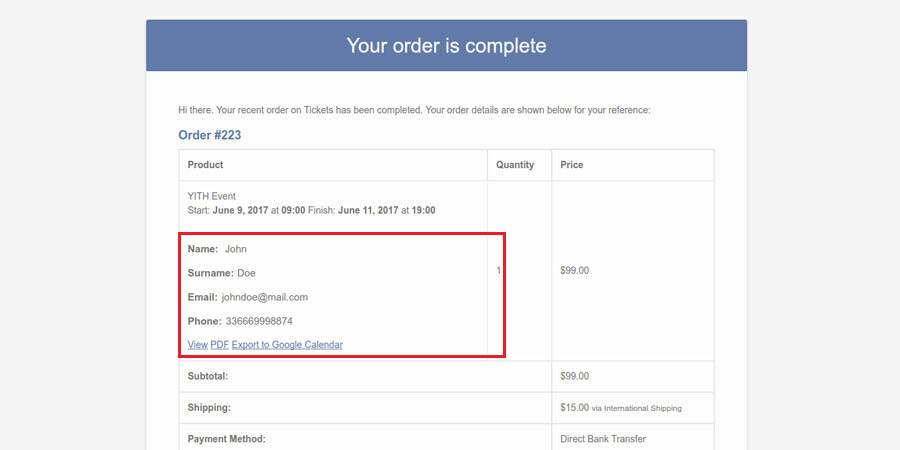
- from the Orders Details section in My Account page
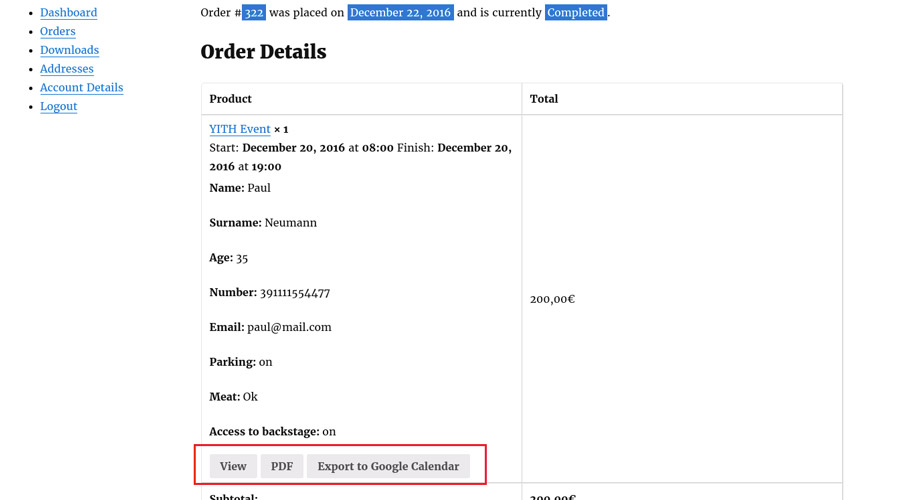
Every ticket can also be available as a PDF file.
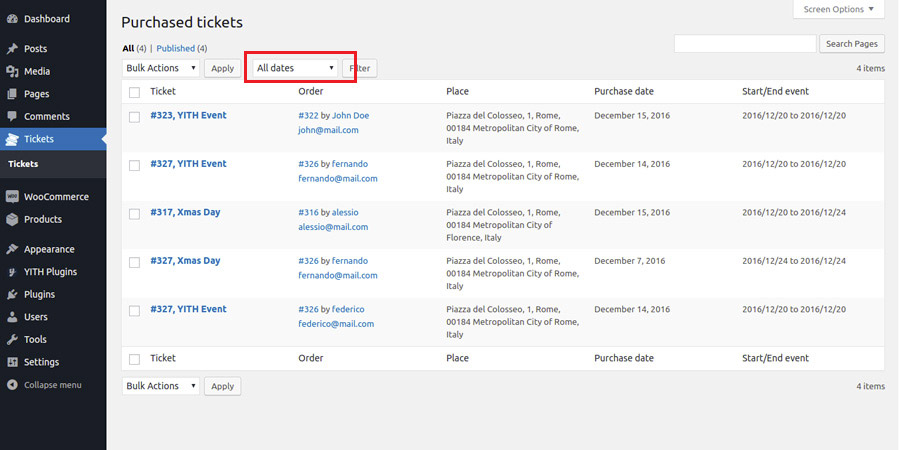
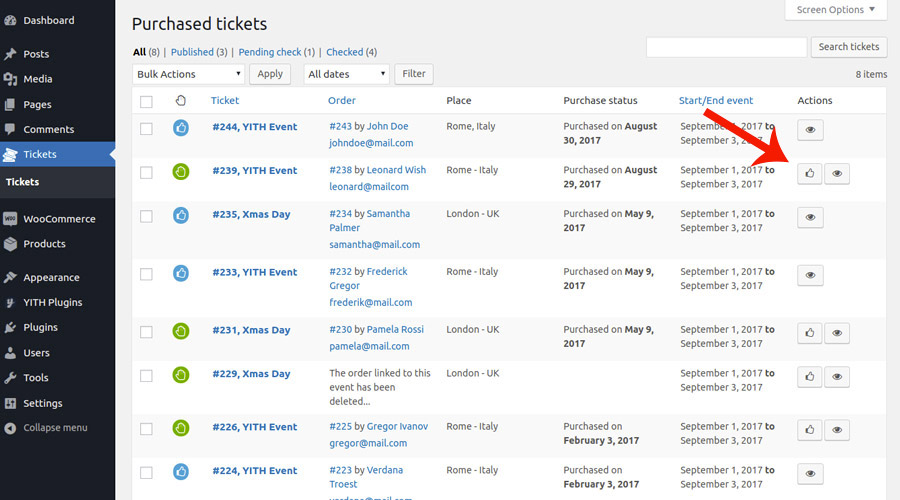
Purchased tickets
In order to view the complete list of all tickets purchased so far, you can access to the Tickets section in your WordPress backend.
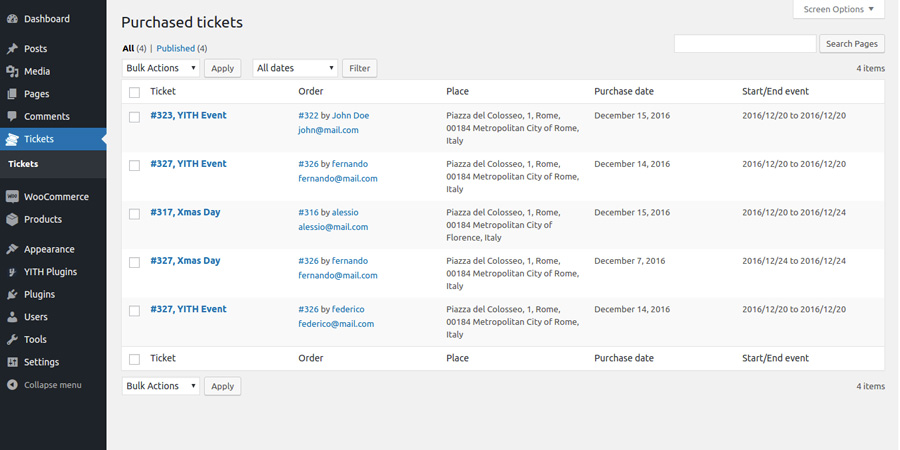
By clicking on each ticket, you can view the details.
Tickets can be filtered by date of purchase.
Google Calendar
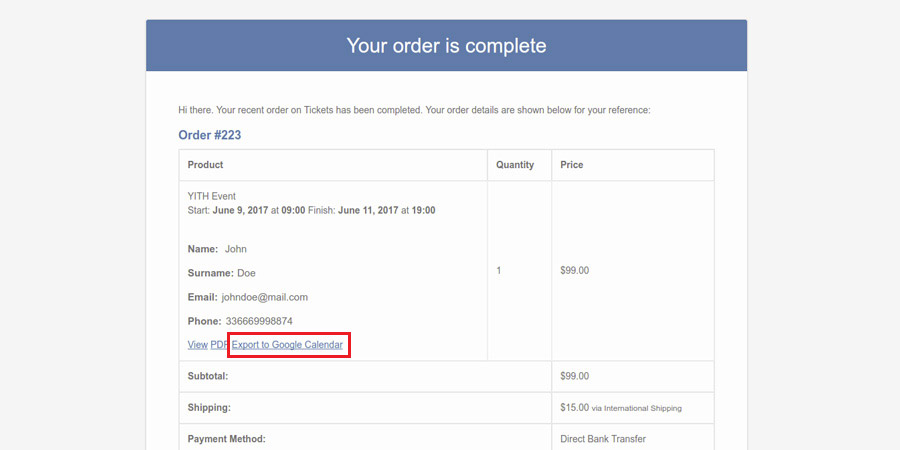
Thanks to the integration with Google Calendar, users can add the event to their own Google Calendar just with one click.
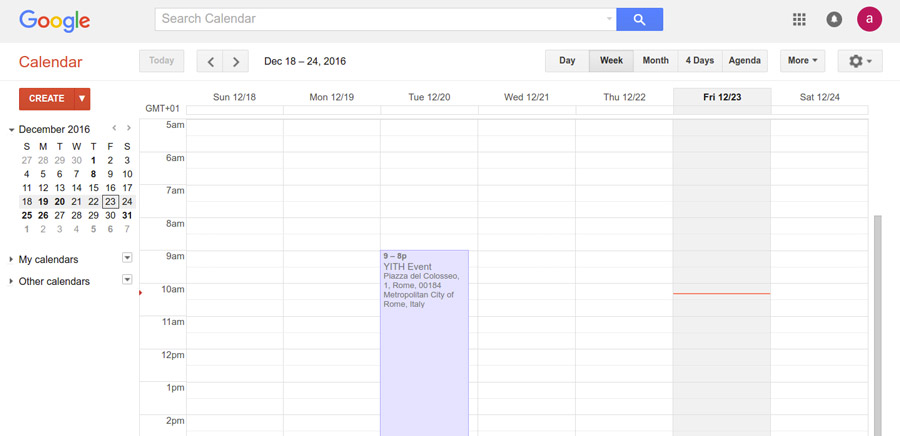
The event will be synced to Google Calendar only if users explicitely ask for that by clicking on the Export to Google Calendar option that can be found both in the order confirmation email (as shown in the following image) and in the Details page of the related order.
When you click on it, the Google Calendar page will automatically open and the event will show up as well.
Barcode on the ticket
By using the plugin in combination with YITH WooCommerce Barcode and QR Codes, you can generate a barcode automatically for each new ticket created.
To do it, it is essential to enable the entry “Display barcode” for the event product.
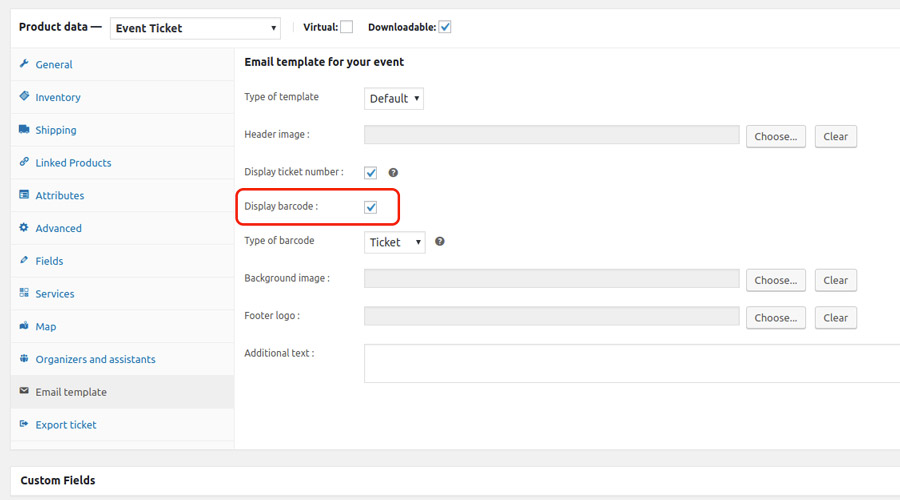
Choose what you want to show on the ticket from:
- ticket barcode
- event barcode
- order barcode
With YITH WooCommerce Barcodes enabled, you can search and check-in the tickets by scanning the barcode in the search form shown with the shortcode of YITH Event Tickets plugin.
For further information about the shortcode, go to this page.
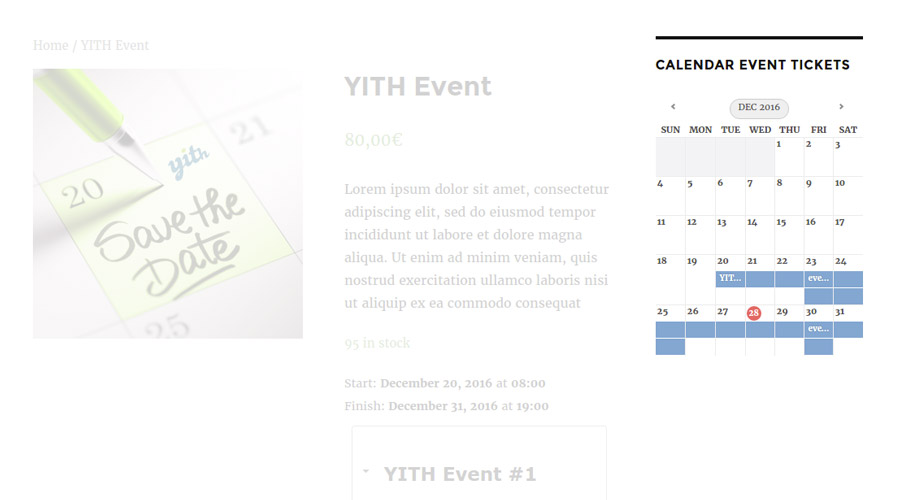
Event Calendar
The YITH Event Tickets Calendar widget allows you to show a calendar with all scheduled events on your website sidebar.
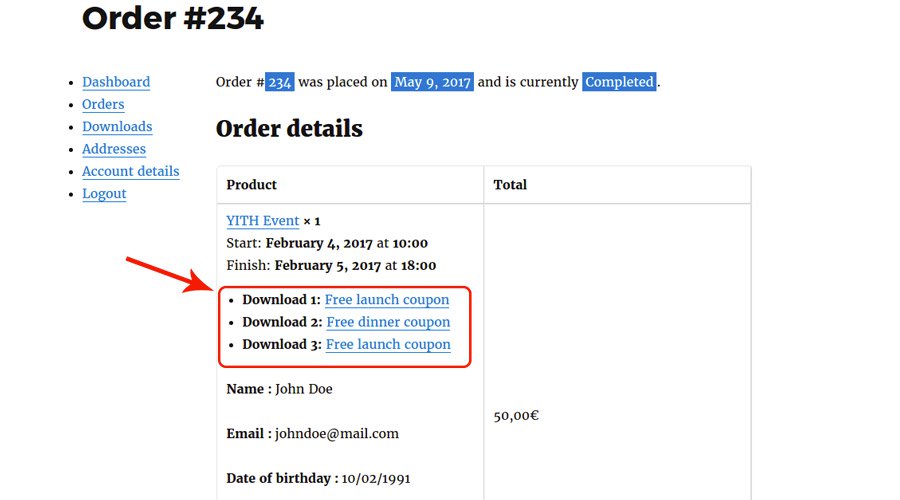
How to enable the file downloading for an event type product
Go to the product and enable the entry Downloadable.

Add one or more files to the product as shown in the image below.
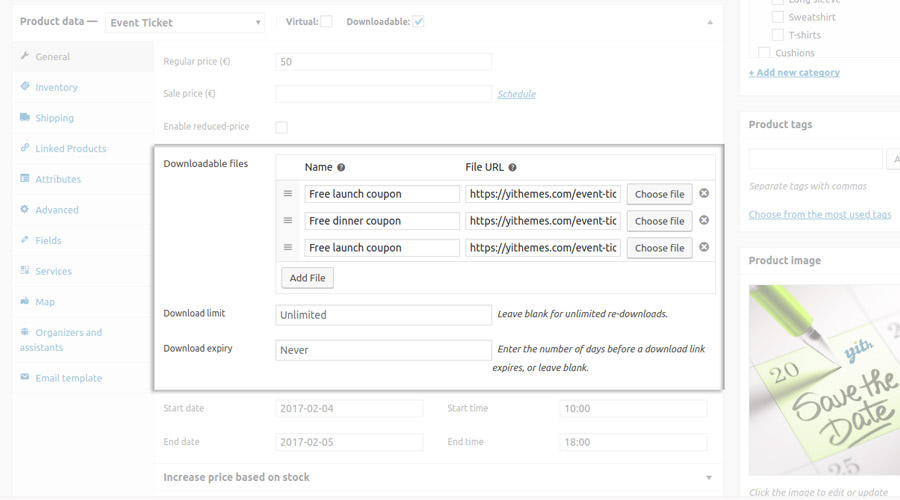
After completing the purchase, users can proceed with the file downloading from the site My Account page.
Check-in ticket
You can mark tickets as “checked” both from the backend and frontend, taking advantage of the shortcode “Check-in Event ID”.
From the front end, you can also apply the automatic check-in for the tickets.
Enable the checkbox “Automatic check-in” highlighted in the following image.
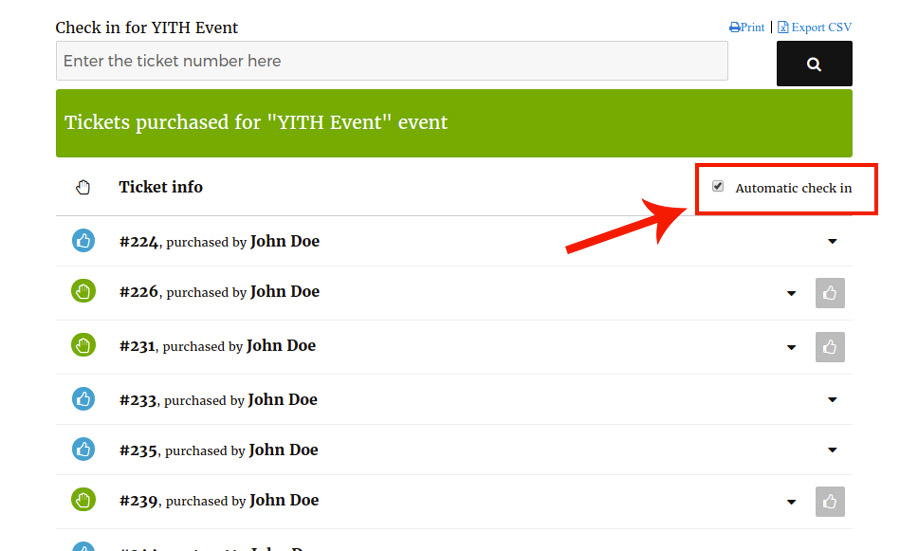
From now on, all the tickets returned as a search result will be marked as “checked” automatically.
How to export tickets to CSV file
The export feature allows exporting data of several tickets to a CSV file simultaneously.
There are two ways to export the tickets.
1. EXPORT FROM BACKEND
Export all the tickets purchased for an event.
Go to the event product page, click on the tab “Export Ticket” and then on the button “Export to CSV”.
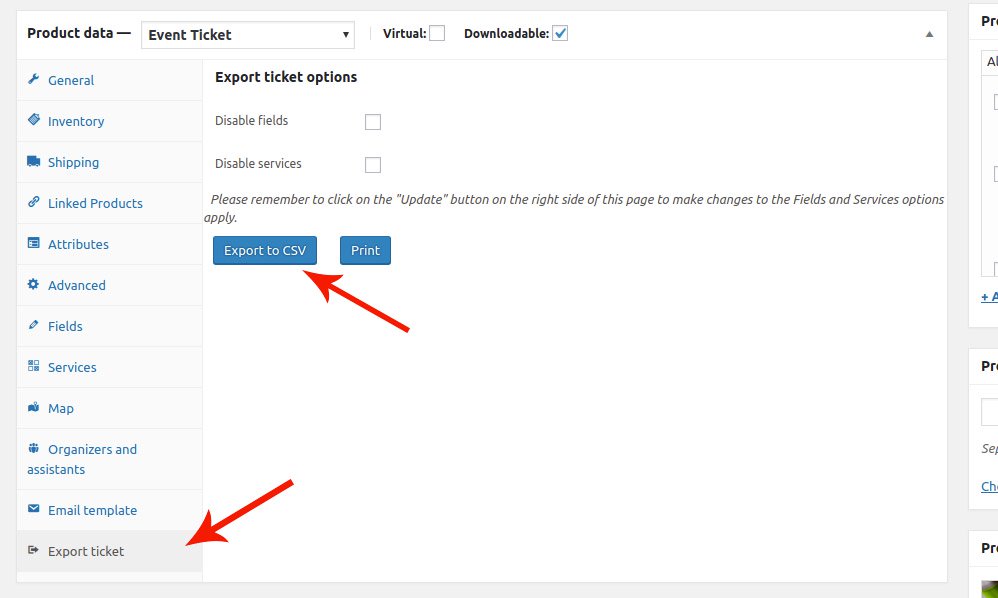
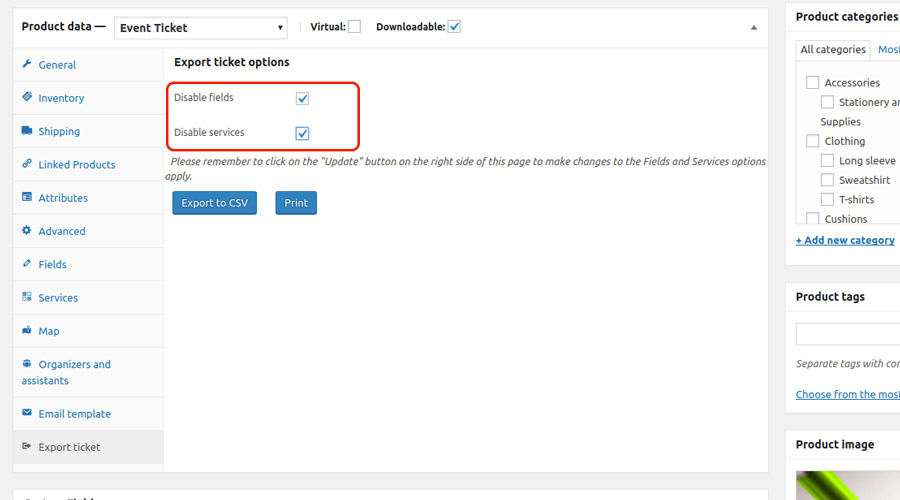
While exporting, you can exclude additional fields and services.
2. EXPORT FROM FRONTEND
The other way is to export from the front end by taking advantage of the shortcode [check_in_event]. For further information related to the shortcode, click here.
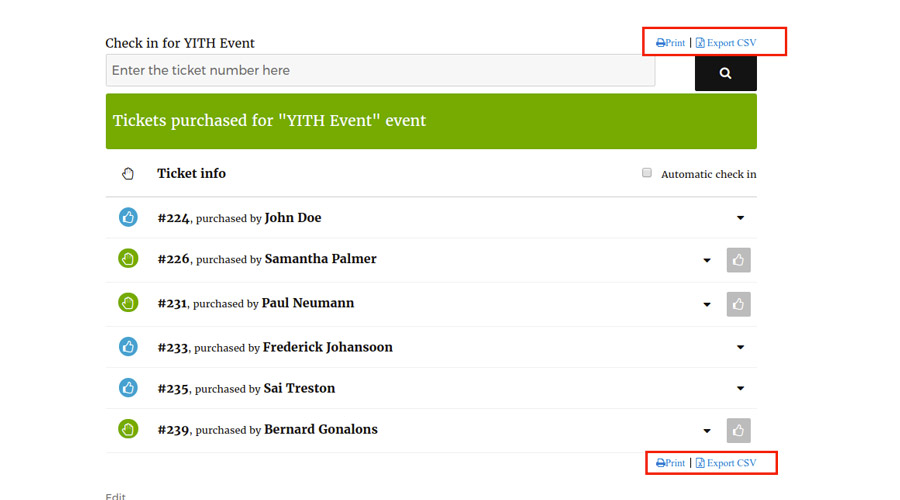
The shortcode creates the complete list of tickets linked to the specified product.
By clicking on the button “Export CSV”, you will get the CSV file including all the tickets available in the table.
Shortcode
Learn about how to use the shortcode available in the plugin.
Add the shortcode [check_in_event id =
For example, [check_in_event id = 220]
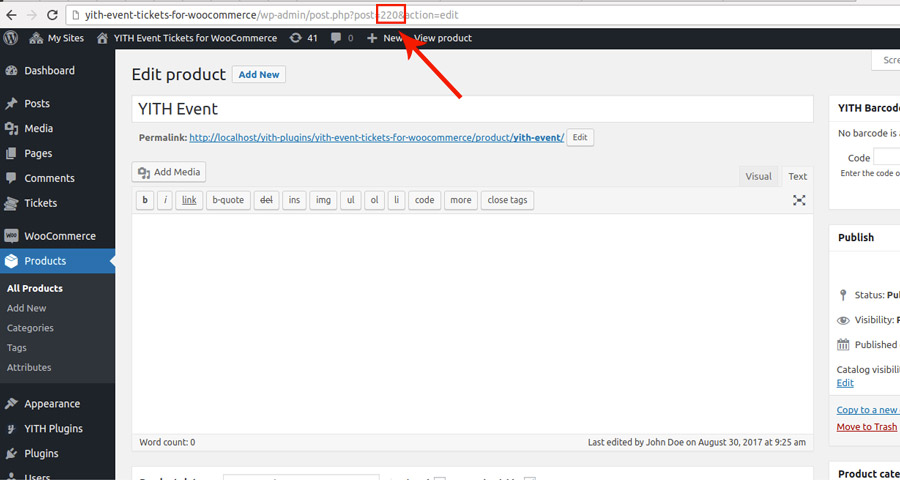
A Table, visible only to users accessing the site as administrator or shop manager, will show in the front end, including the complete list of the tickets linked to the selected event product.
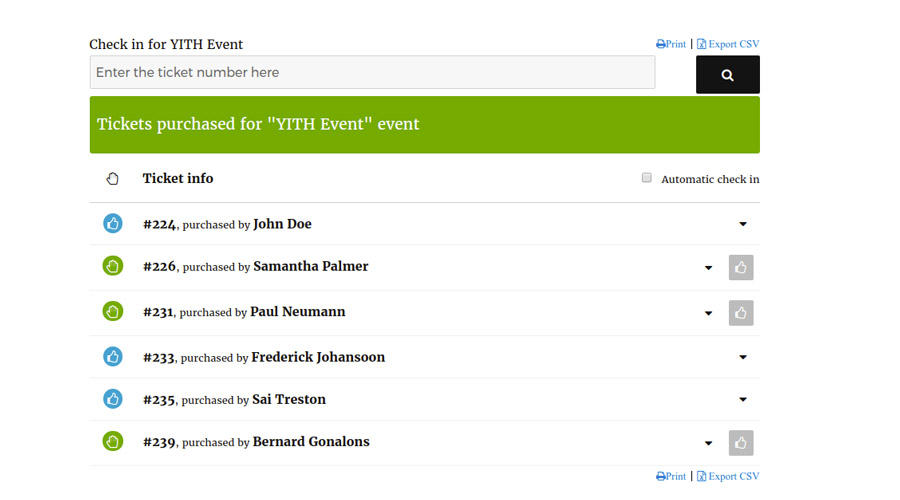
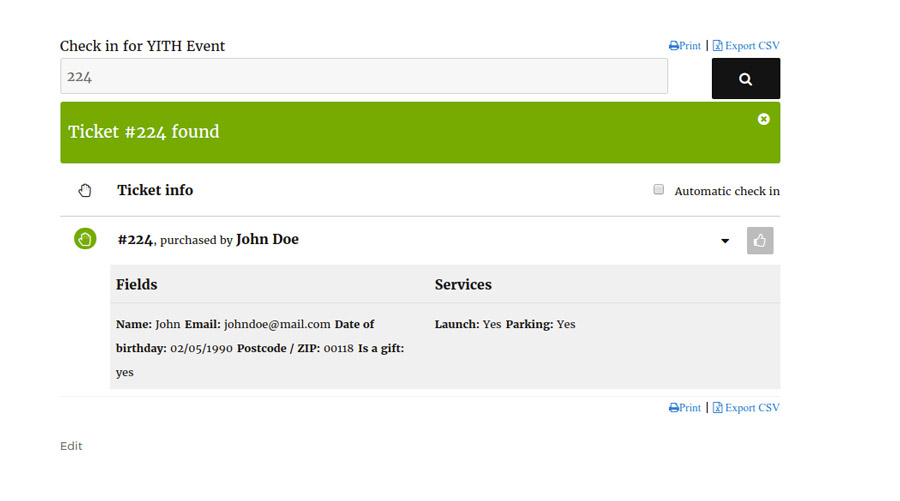
Click on the ticket to access its data.
By default, the search occurs by inserting the ticket number.
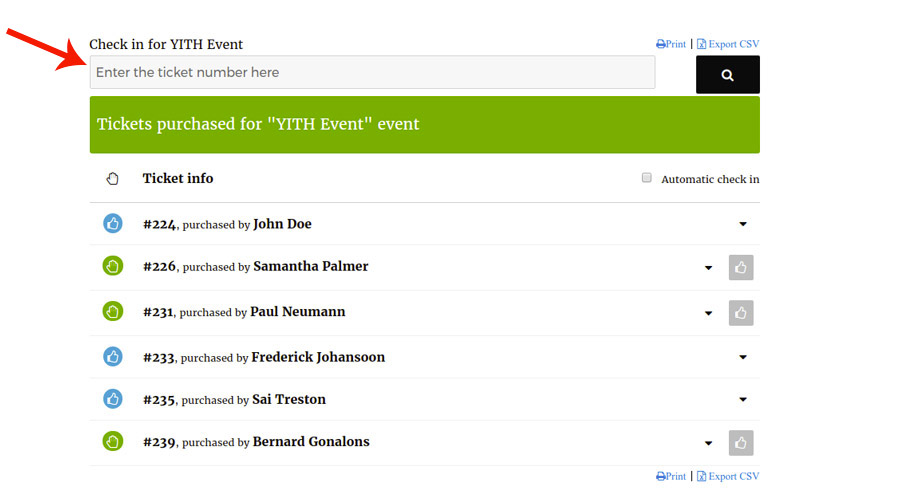
If you are using the plugin in combination with YITH WooCommerce Barcodes and QR-Codes, the search can be done by scanning:
- the order barcode: this returns the list of tickets linked to that order (the order must include the event product used by the shortcode)
- the ticket barcode: this returns ticket data if the selected event includes a ticket with the barcode
Export
From the table, you can export a single ticket or all the ones included in the list.
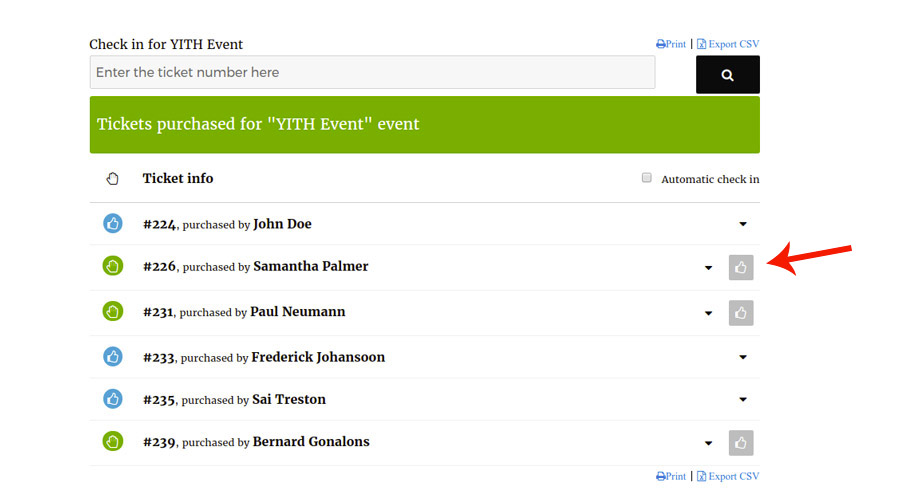
Check-in
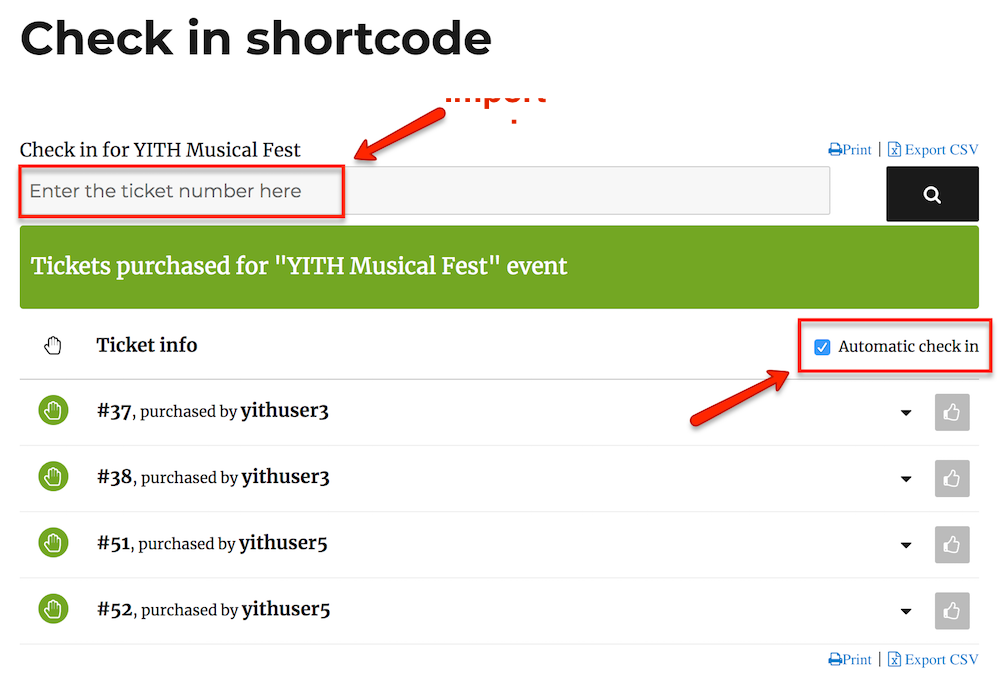
The check-in for the tickets can be applied manually or automatically.
When manual, you have to click on the related button available on each ticket.
If you choose the automatic check-in, you need to enable the checkbox “Automatic check-in” highlighted in the following image.
From now on, for each search, the automatic check-in will apply to all the tickets shown as search result.
YITH WooCommerce Barcode and QR Codes
By using the plugin in combination with YITH WooCommerce Barcode and QR Codes, you can generate a barcode automatically for each new ticket created.
To do it, it is essential to enable the entry “Display barcode” for the event product.
Choose which type of barcode you want to display on the ticket:
- ticket barcode
- event barcode
- order barcode
With YITH WooCommerce Barcodes enabled, you can search and check-in the tickets by scanning the barcode in the search form shown with the shortcode of YITH Event Tickets plugin.
For further information about the shortcode, go to this page.
In order to automatically check-in the scanned tickets, you need to enable the ‘automatic check in’ option.
Note: click on the ticket number field, before you start scanning
If you do not select that field, click on that field, the number will not appear. The number will appear in the input you have selected.
With the ‘automatic check in’ selected, the scanned ticket number will automatically appear as ‘checked in’.
Check-in through a mobile app?
We don’t offer an in-built application to scan the code, but there are many apps that allow connecting your website with your mobile phone, and make the phone work as a scanner.
Both the PC and the phone have to be connected to the same Wi-fi network. This way, the phone will become a barcode scanner, and you will see the result in your PC.