How to create a Multi-Inventory
CREATE A MULTI-INVENTORY IN A SIMPLE PRODUCT
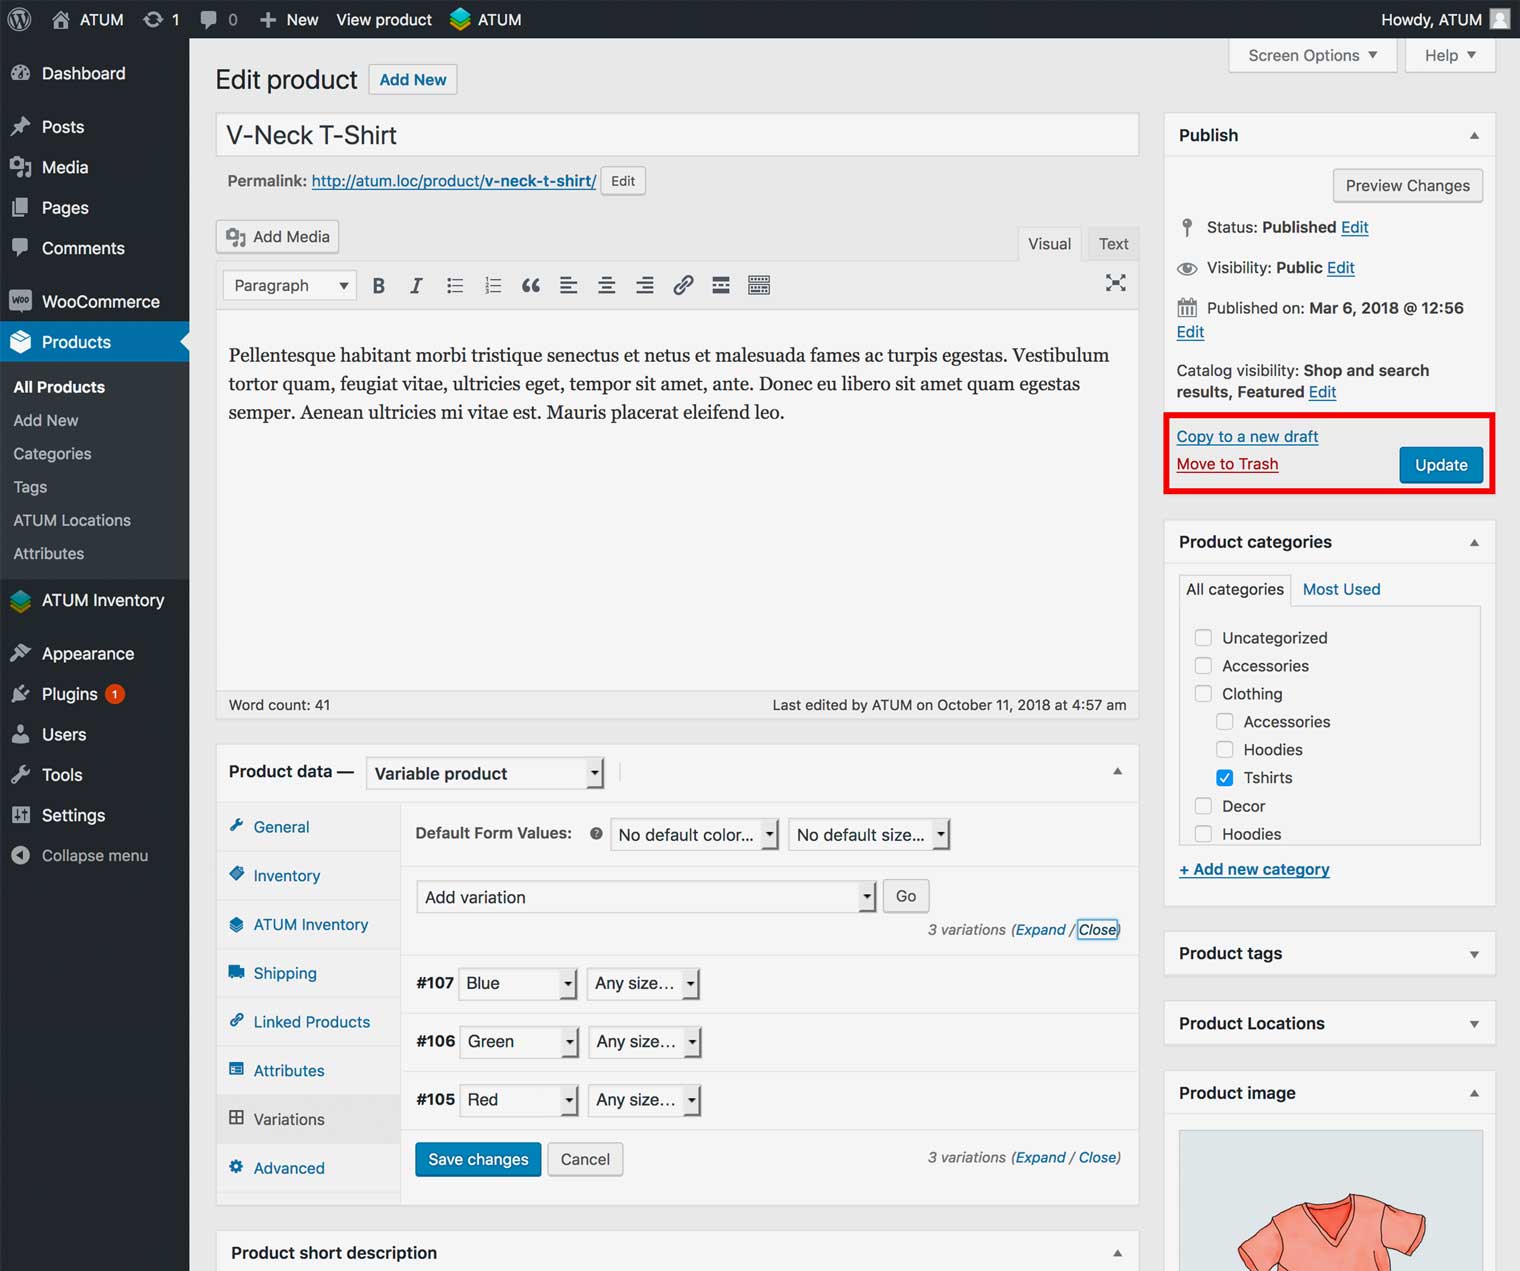
- In WordPress admin panel, go to Products > All Products and open a simple product for editing or create a new one.
- If Enable Multi-Inventory for all products is disabled in ATUM Settings, navigate to Product Data section and select the tab called ATUM Inventory.
- Chose Yes to enable your simple product for Multi-Inventory.

- Now navigate to the tab called Inventory.
NOTE:If you had inventory data in this simple product already, ATUM will add those automatically and make it the default inventory called Main Inventory.
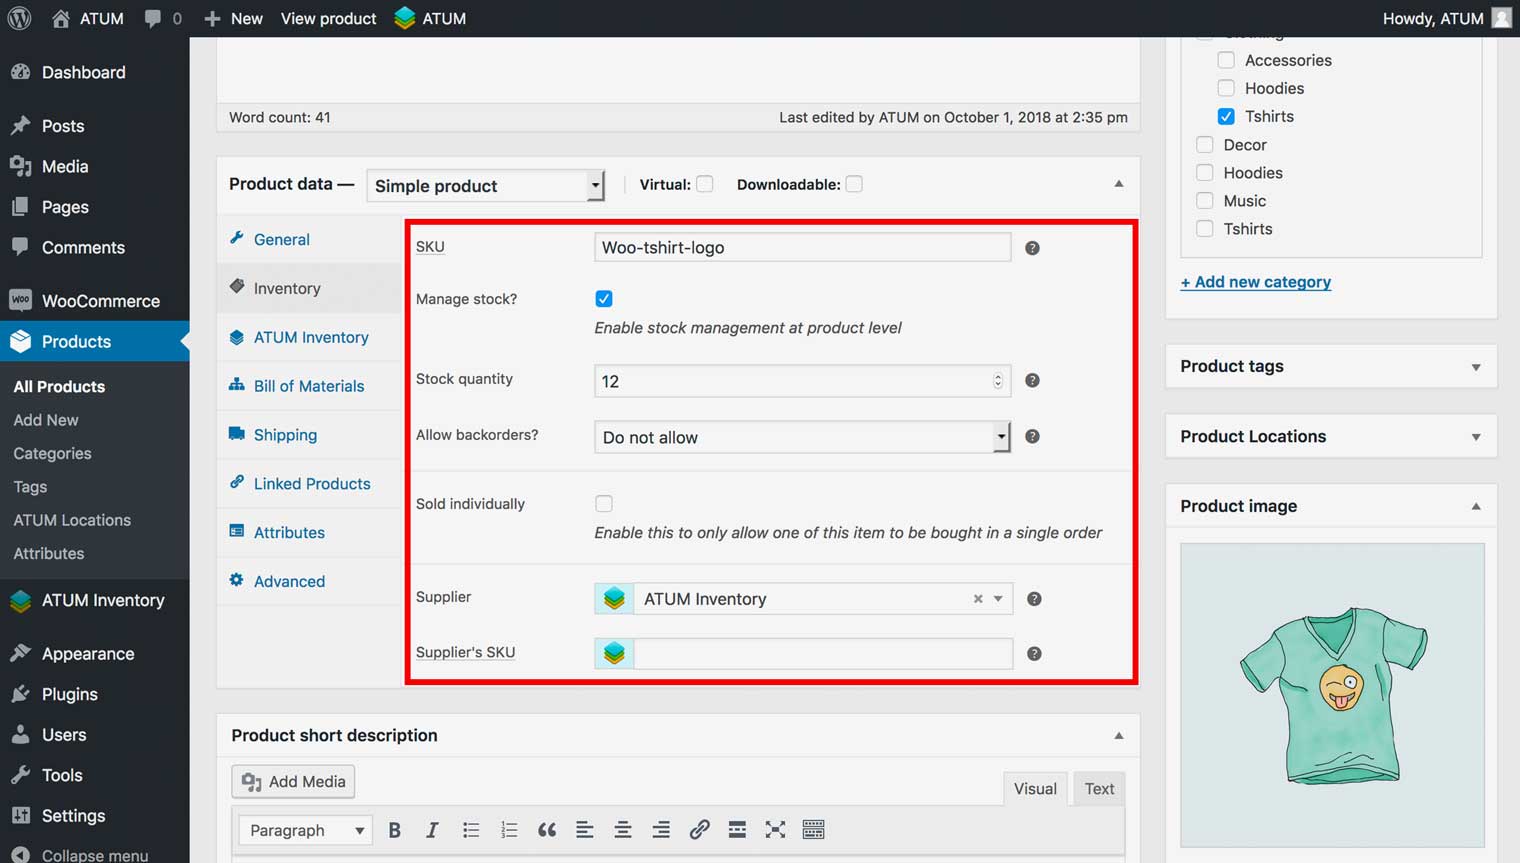
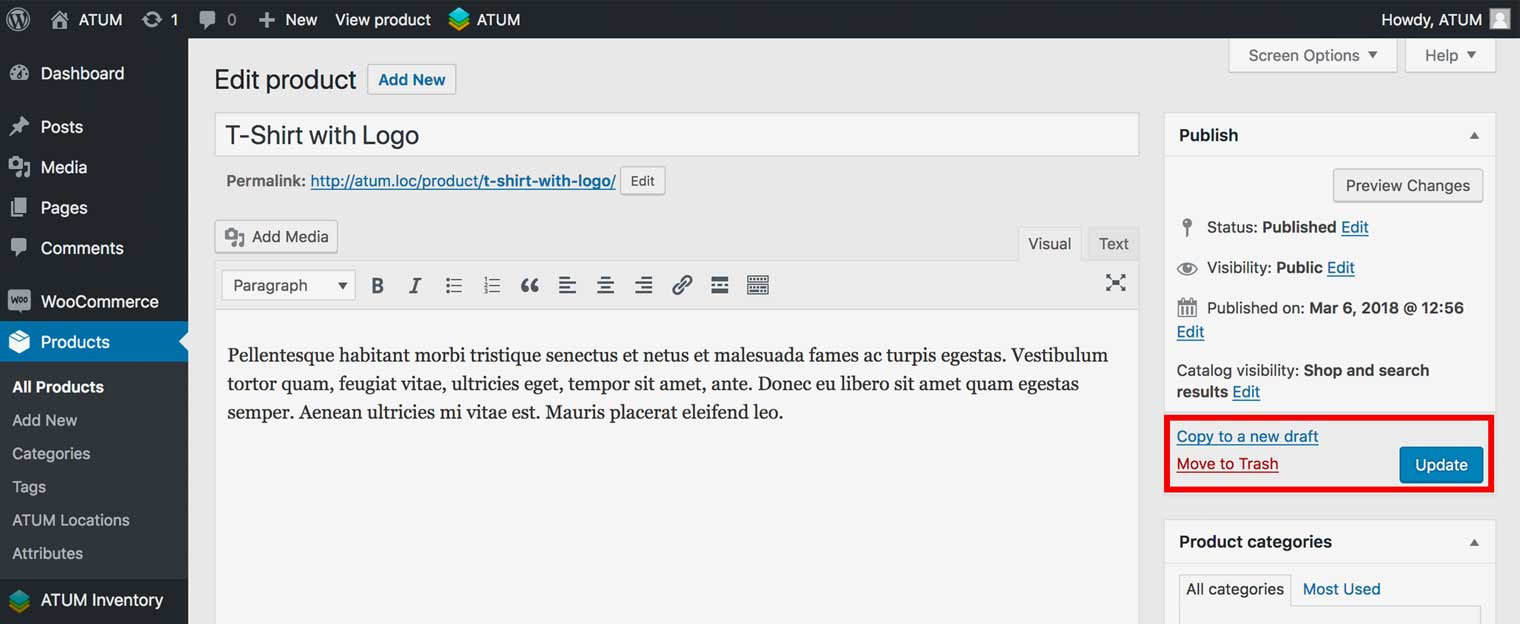
Example of a product containing inventory data but has the Multi-Inventory option disabled.
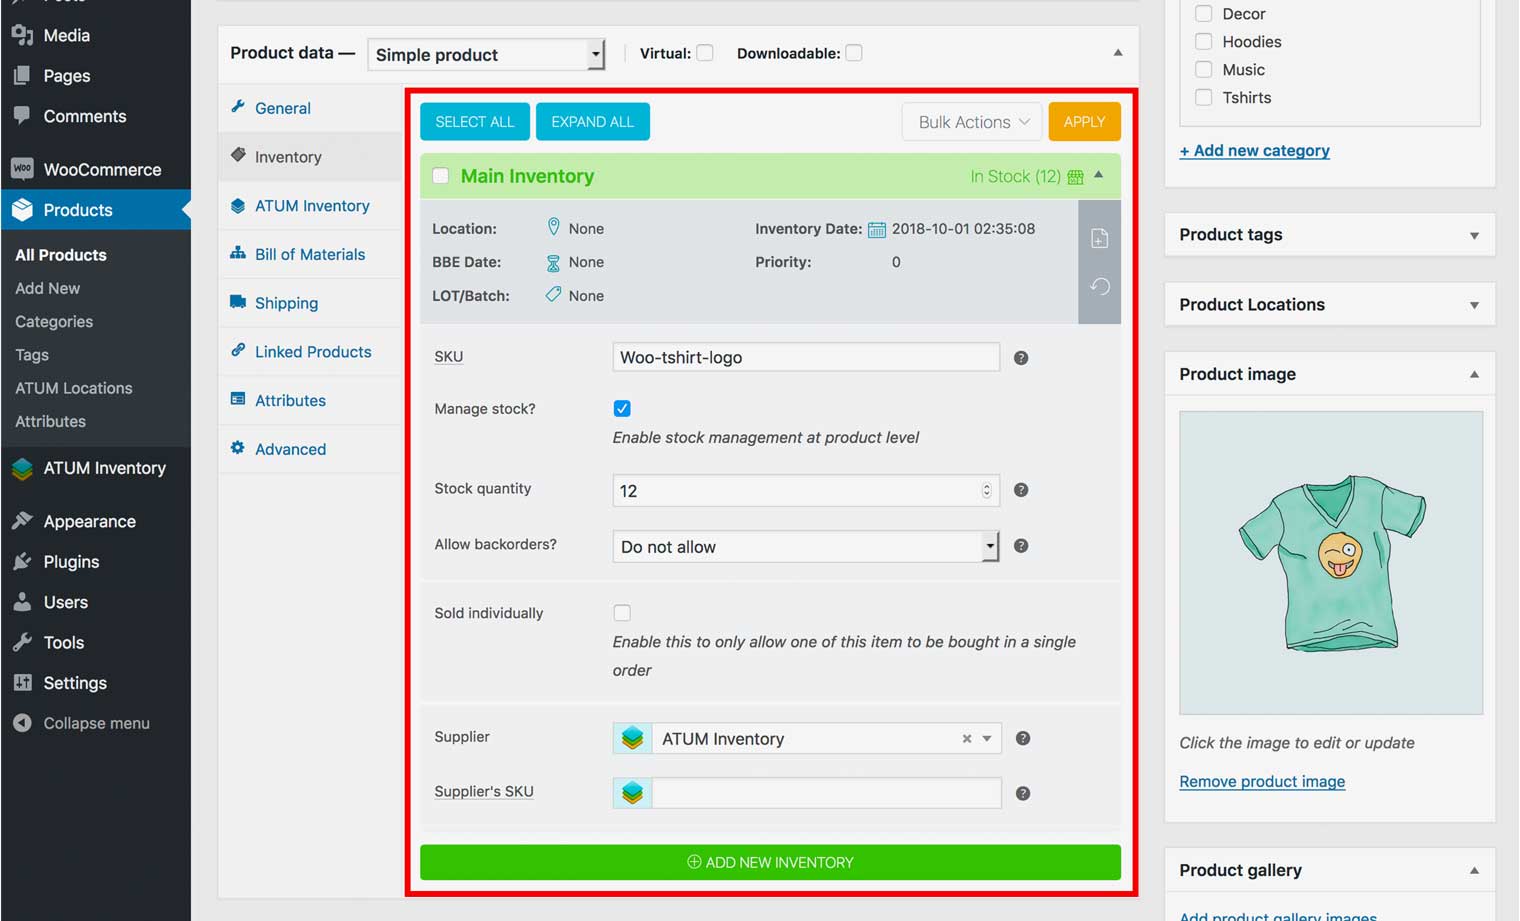
Example of a product containing inventory data and the Multi-Inventory option enabled.
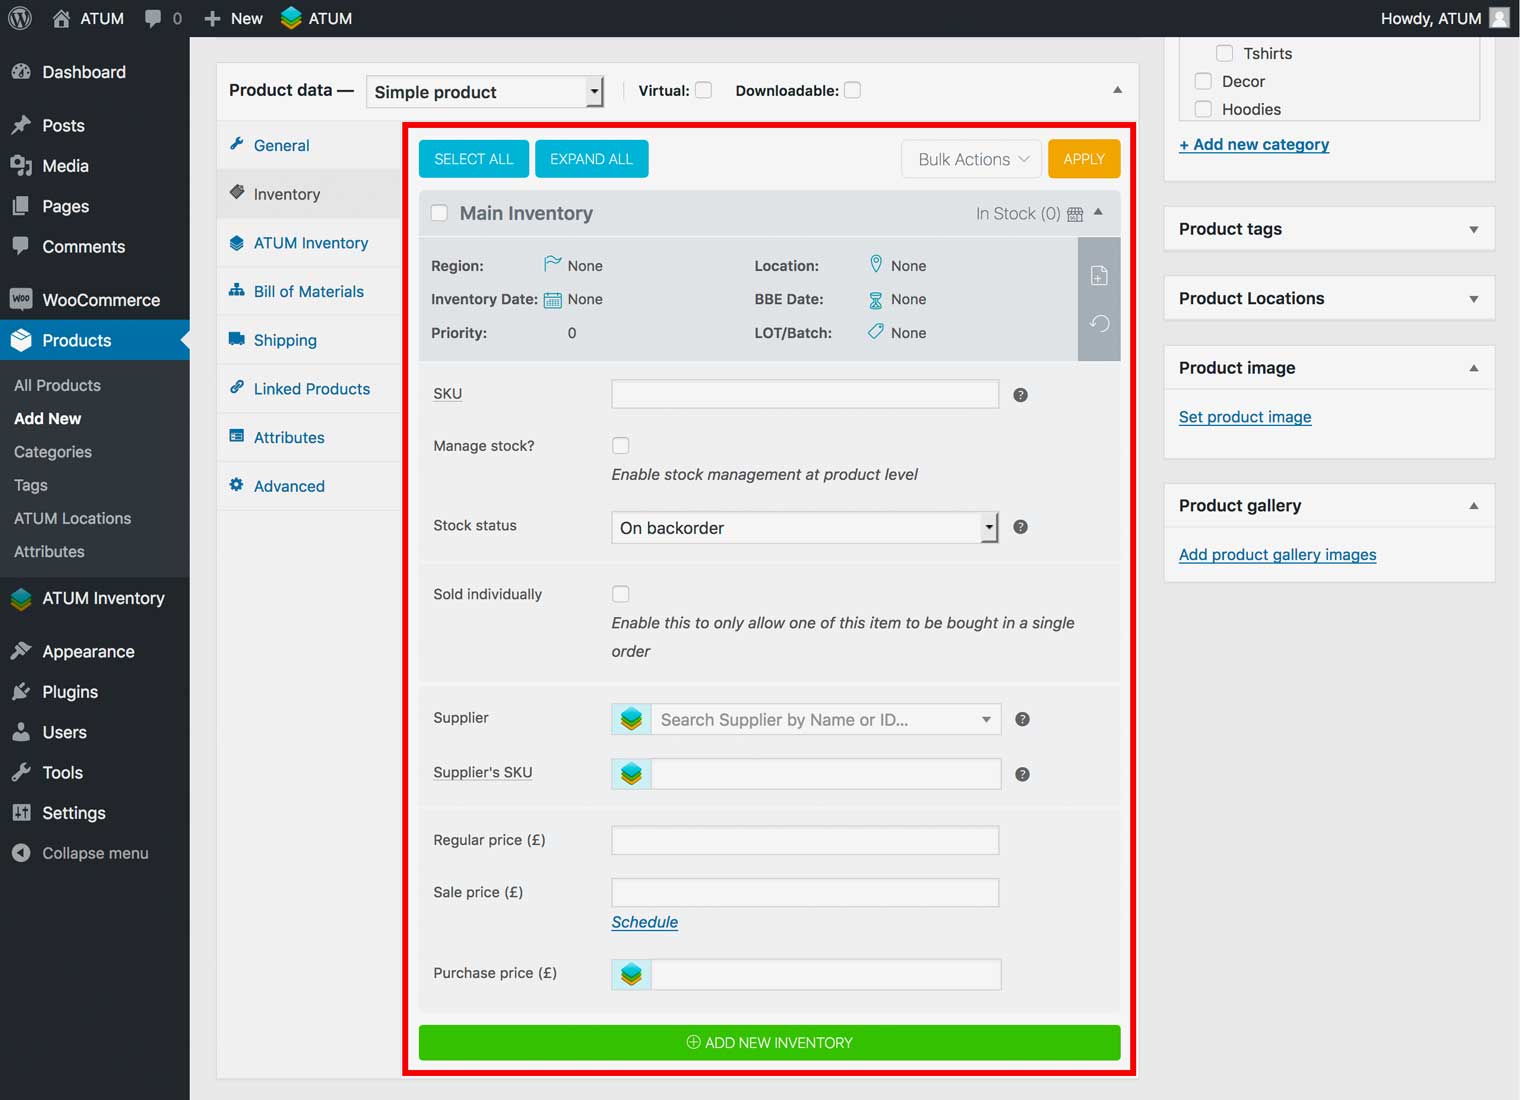
Example of a product NOT containing inventory data and the Multi-Inventory option enabled.
- Fill or replace the Main Inventory data within fields (You can rename the inventory by clicking the name itself).
NOTE:The TOP inventory is the default WooCommerce inventory. You can edit it, but you can not delete it.
- If you want to add a new inventory click Add New Inventory button.
- Type a name for your new Inventory within the popup that appears.
- Add any new inventory data.
- To activate changes click Update the product at the top right.
CREATE A MULTI-INVENTORY IN A VARIABLE PRODUCT
- In WordPress admin panel, go to Products > All Products and open a variable product for editing or create a new one.
- If Enable Multi-Inventory for all products is disabled in ATUM Settings, navigate to Product Data > Variationstab and scroll down to Multi-Inventory Settings.
- Chose Yes to enable your variation for Multi-Inventory.
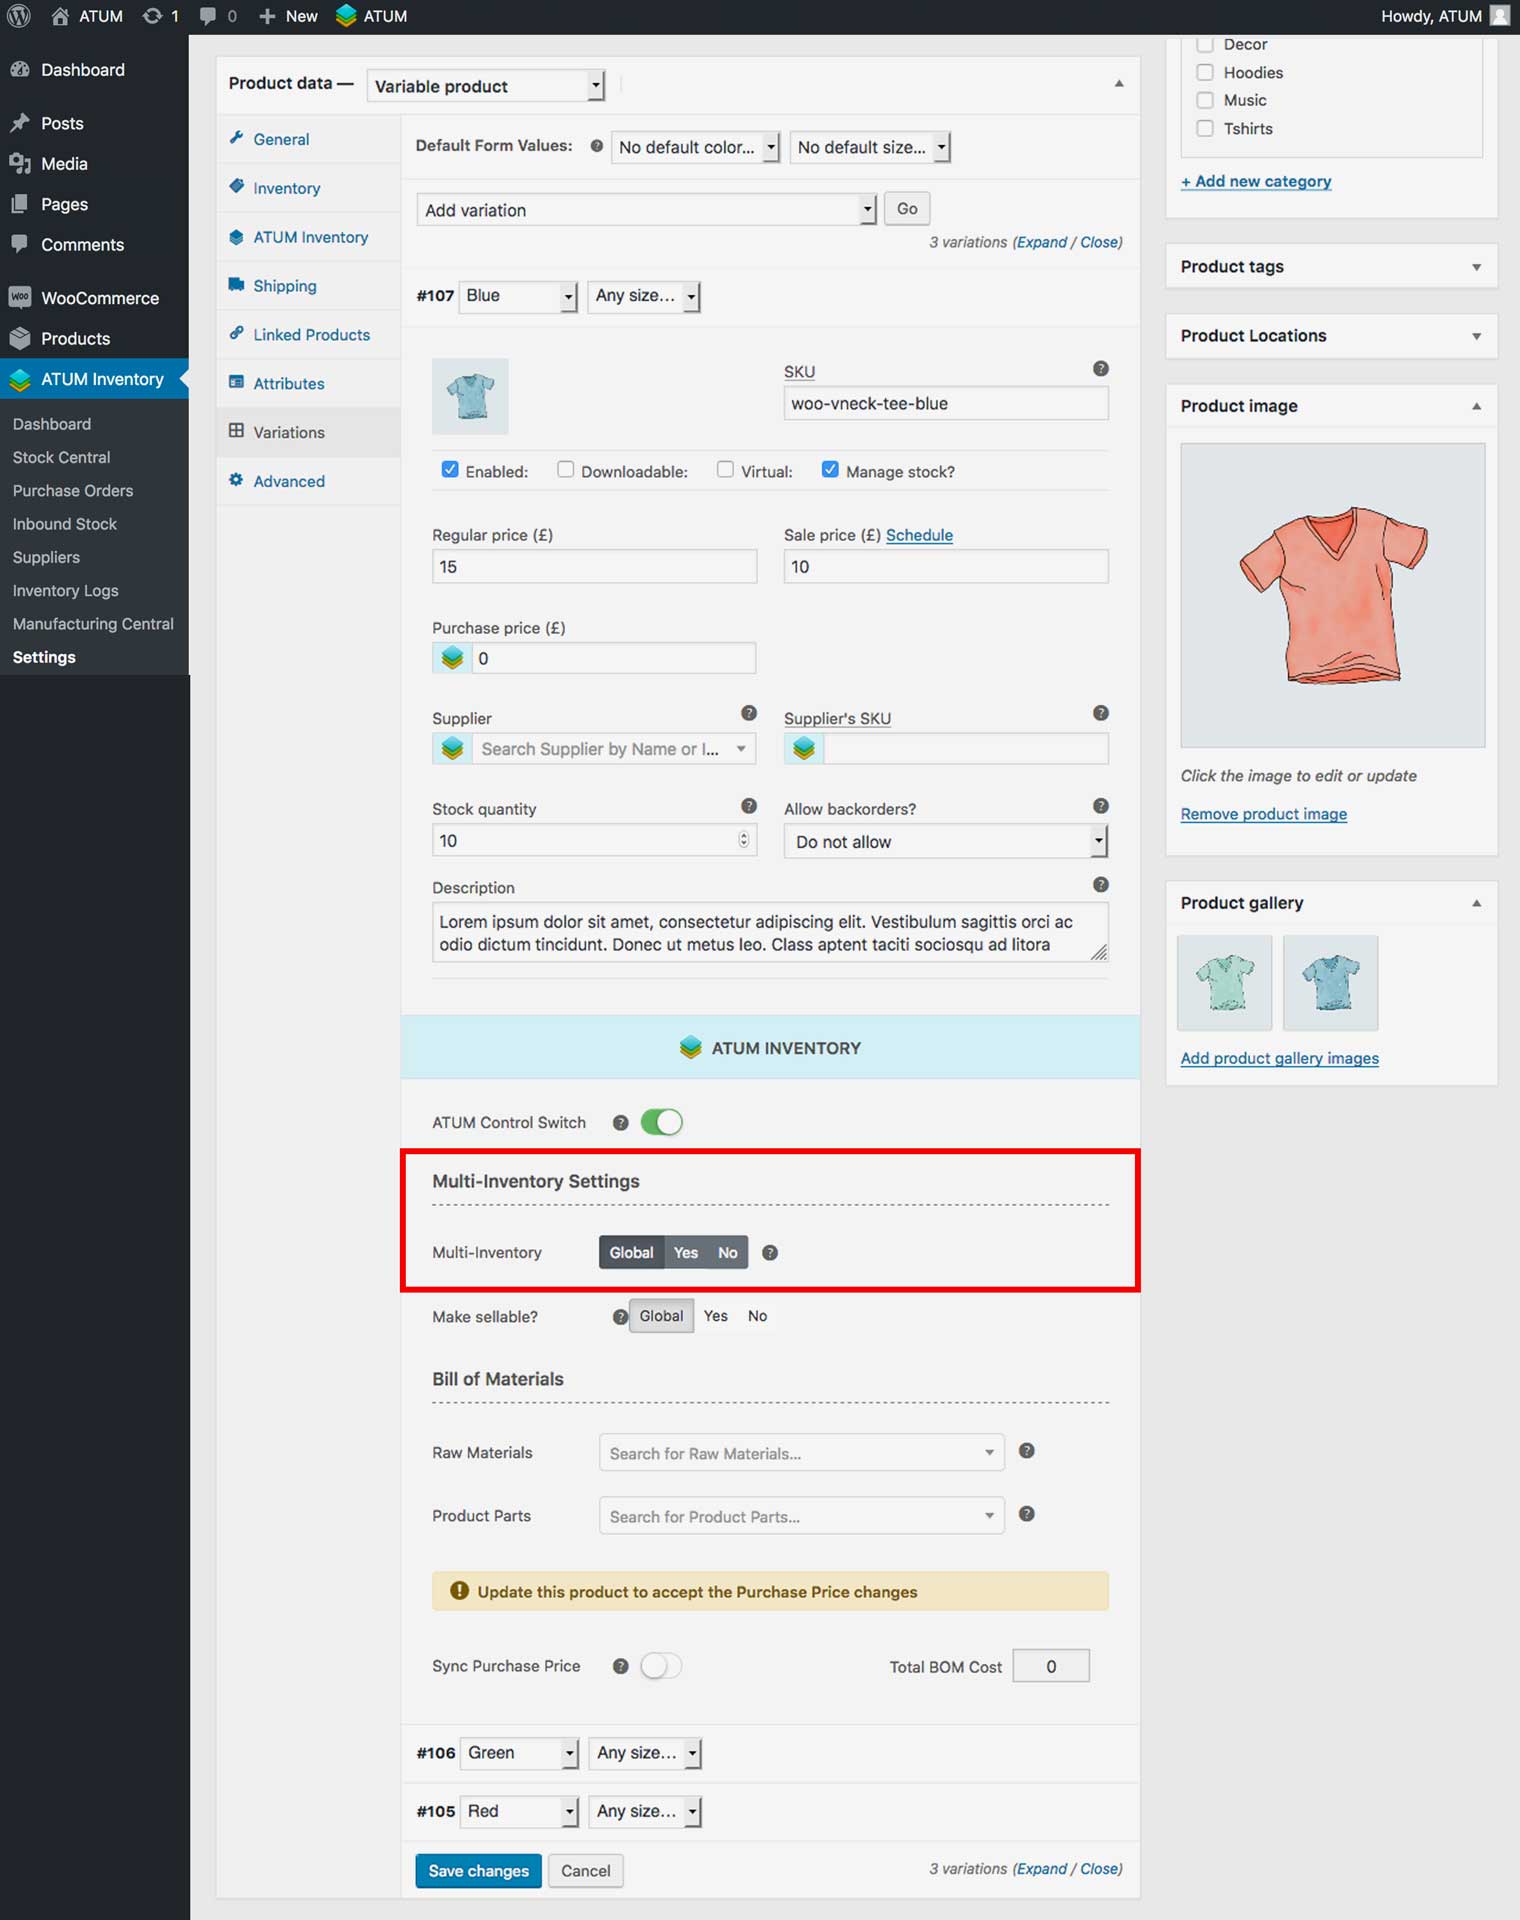
You can find the Multi-Inventory section further down.
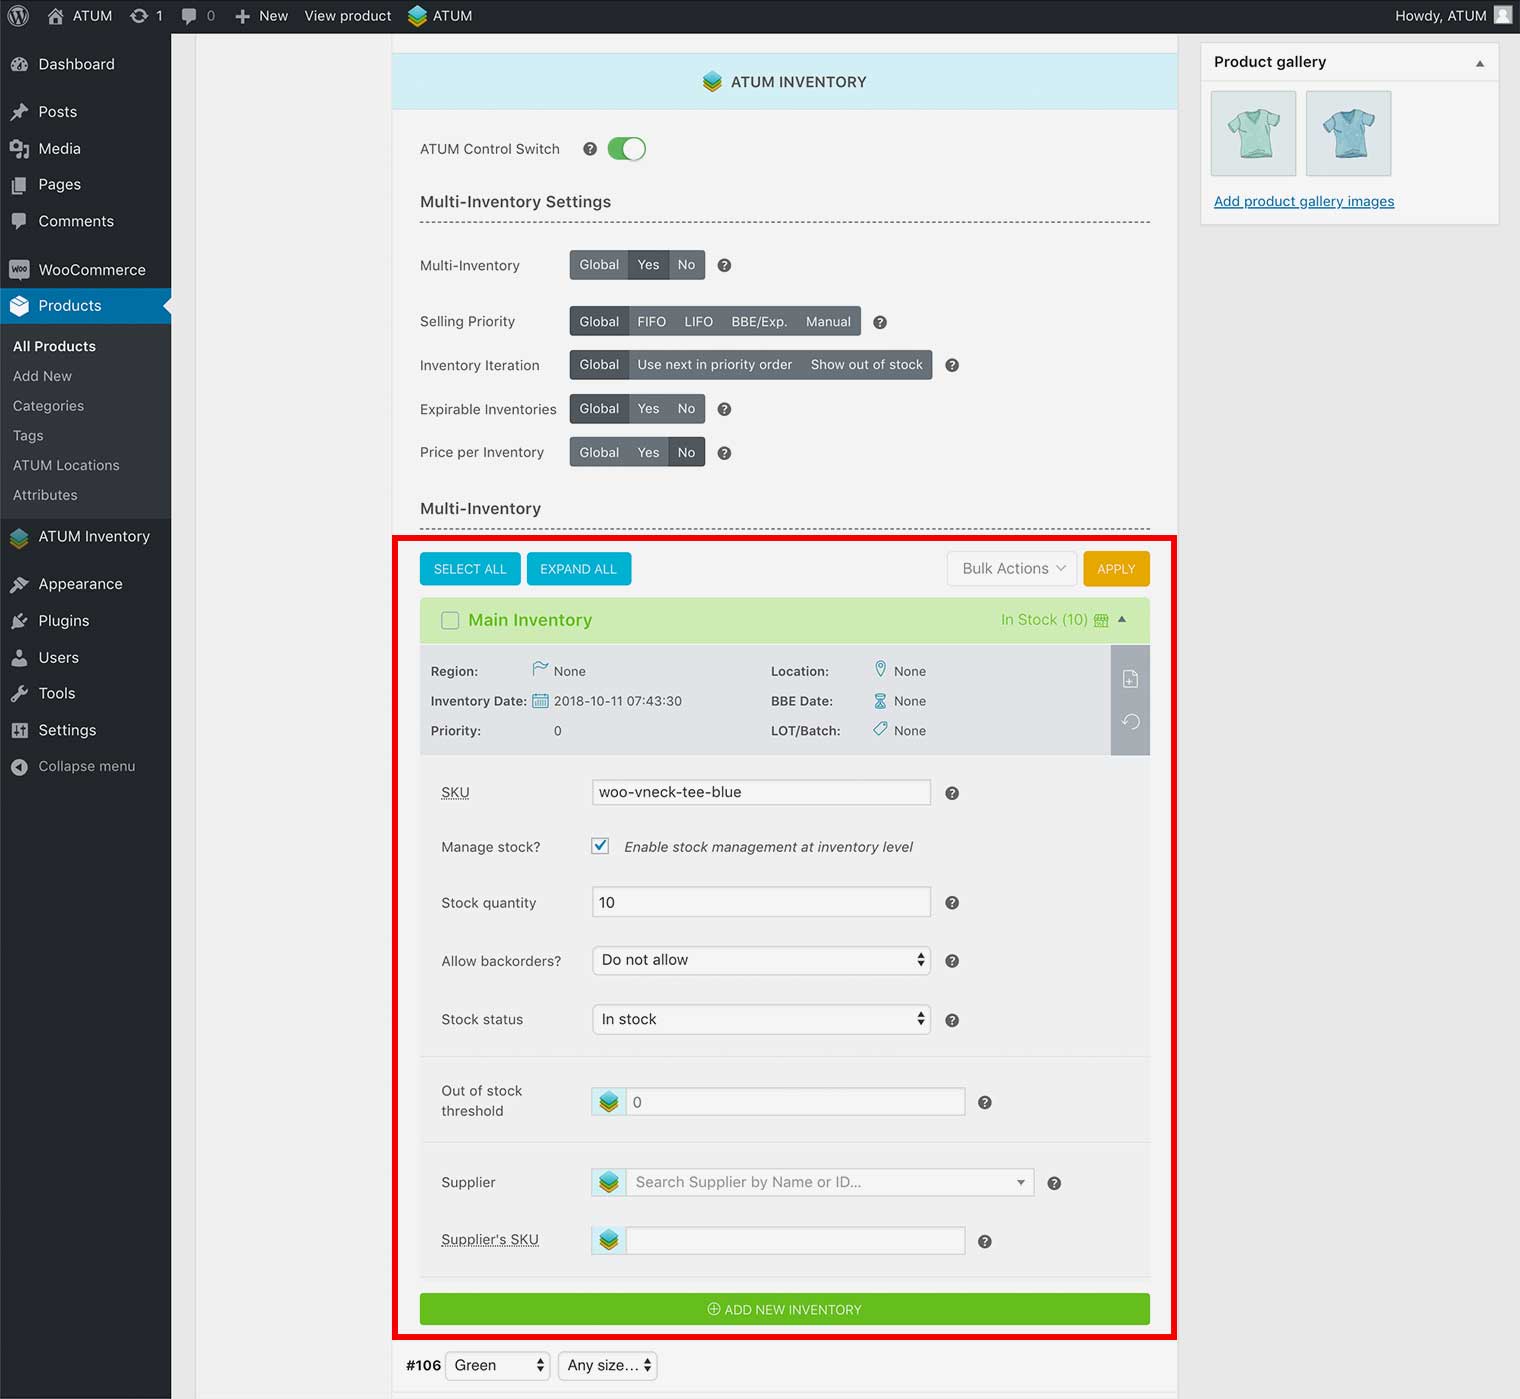
NOTE:If the variation has inventory data this will be added automatically to the Main Inventory.
Example of a variation containing inventory data and the Multi-Inventory option enabled.
- Fill or replace the Main Inventory data within fields (You can rename the inventory by clicking the name itself).
NOTE:The TOP inventory is the default WooCommerce inventory. You can edit it, but you can not delete it.
- If you want to add a new inventory click Add New Inventory button.
- Type a name for your new Inventory within the popup that appears.
- Add any new inventory data.
- Click Save Changes.
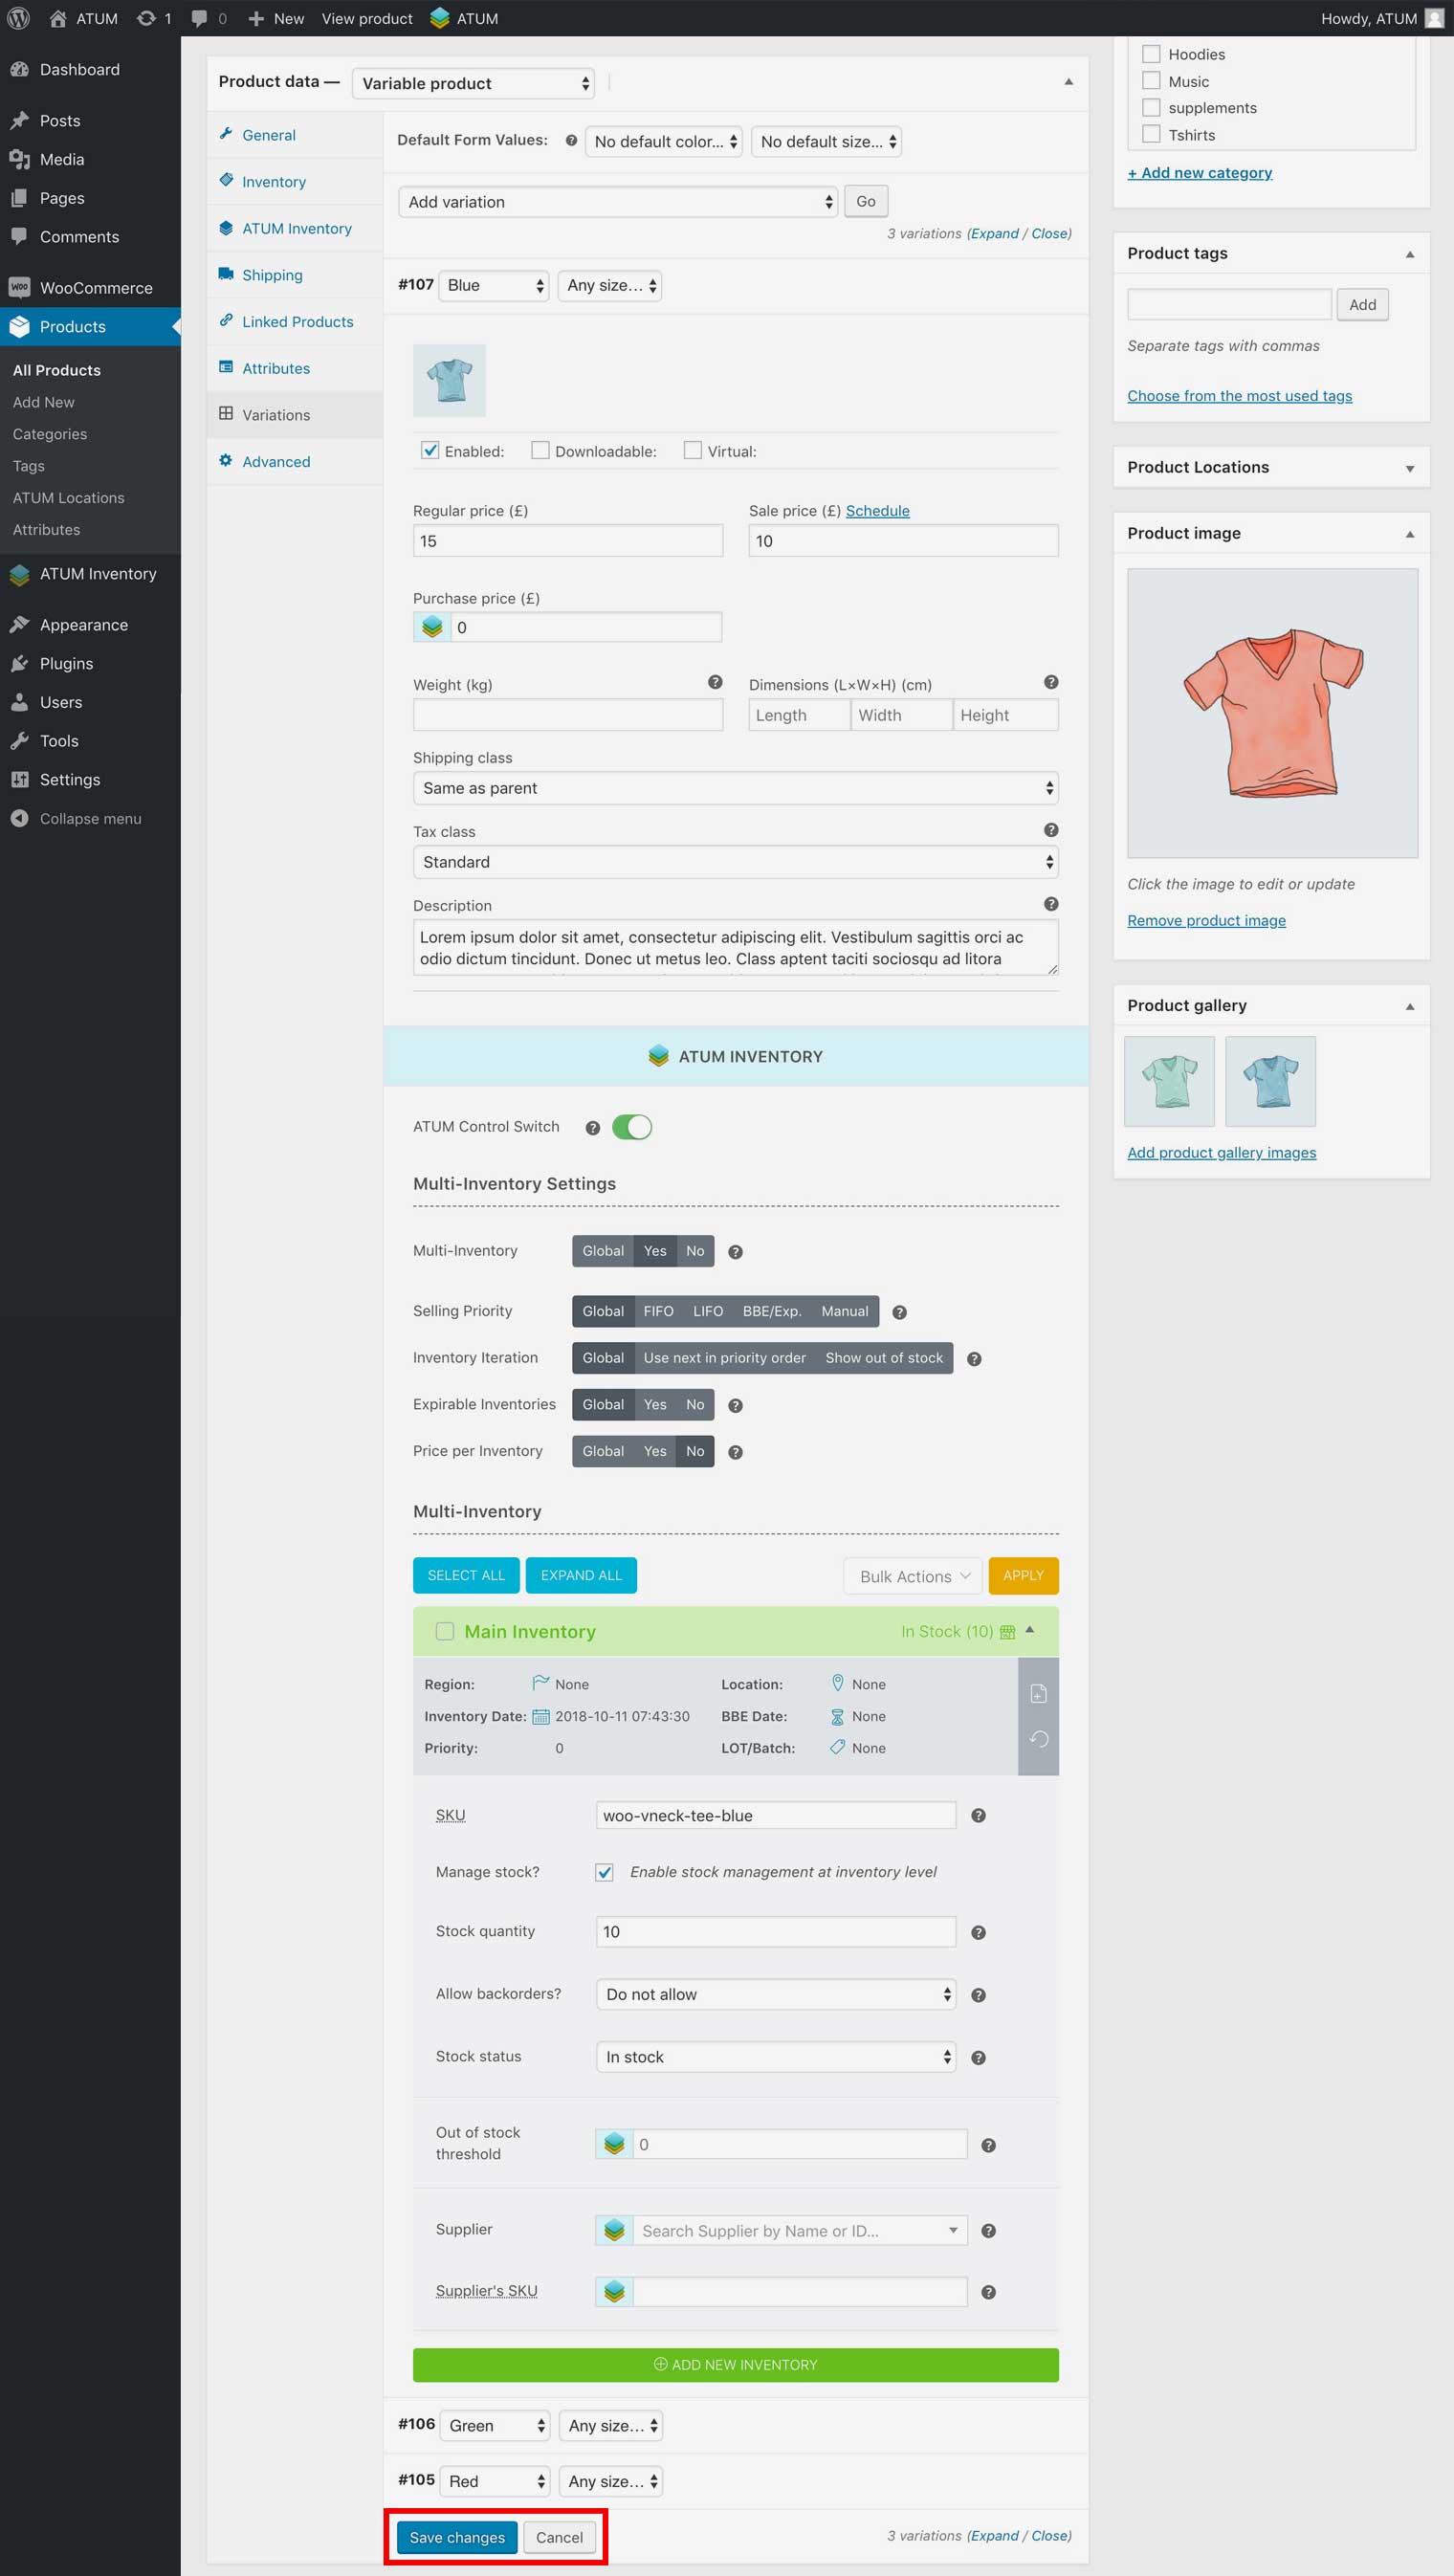
- To activate changes click Update the product at the top right.