How to use Shipping Zones Restriction Mode
The Shipping Zones Restriction Mode allows you to sell inventories in specific zones only. The Multi-Inventory add-on will try to detect the visitor’s zone and will use the inventories linked to that zone in this order:
- Checks if the user is logged in and has shipping destination saved in their profile.
- If one fails, it tries to get the zone from a cookie ATUM saves from the Geo Prompt or the User Destination Form Widget.
- In the case of one and two fails, add-on gets the zone from the Default Shipping Zone set in ATUM’s Settings.
- If all the above fails and there is no default shipping zone set (see below a tutorial of how to set one up), ATUM will try to geolocate the country within a created zone (this will only work if there are countries assigned to shipping zones).
ENABLE SHIPPING ZONES RESTRICTION MODE
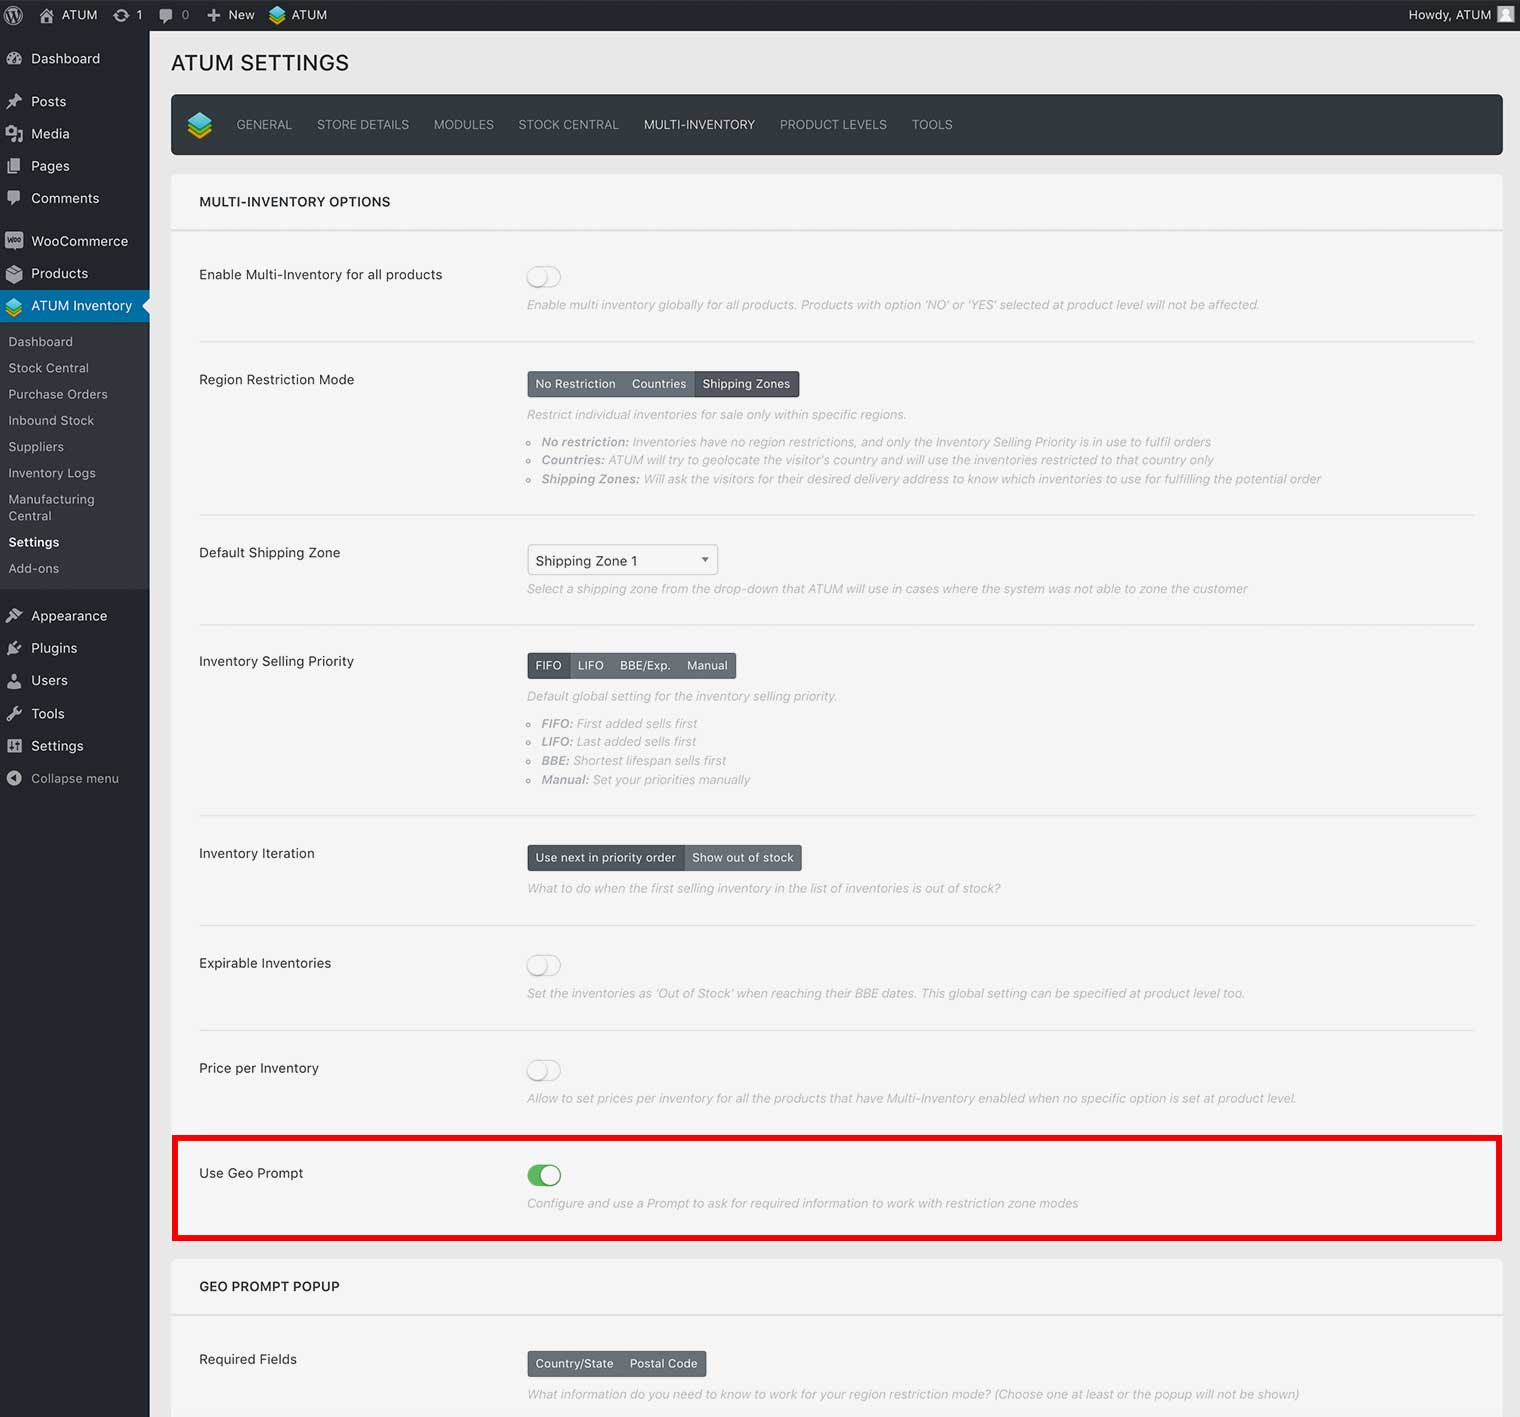
- In WordPress admin panel, go to ATUM Inventory > Settings > Multi-Inventory.
- In Region Restriction Mode select Shipping Zones.
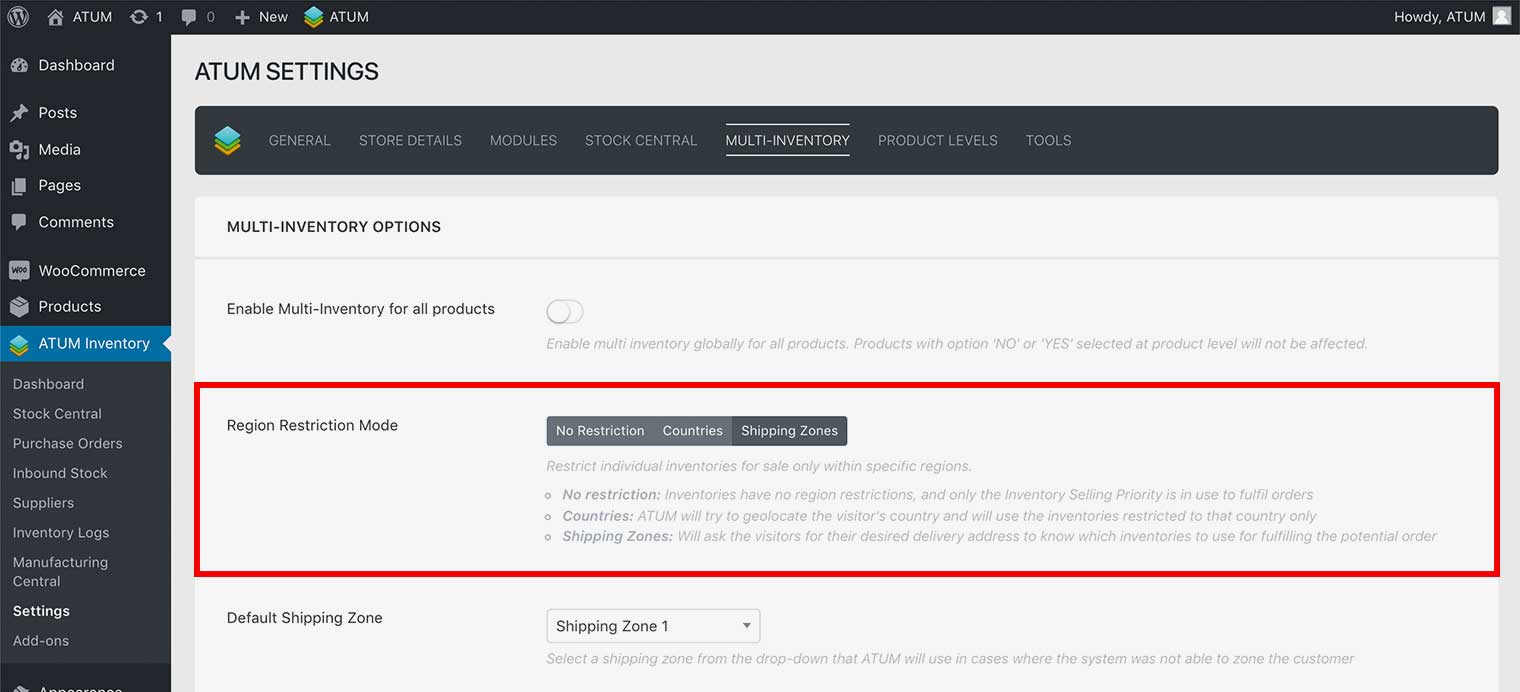
- Click Update Settings.
ADD A DEFAULT SHIPPING ZONE
If you enable the Shipping Zone Restriction Mode, a default shipping zone should be selected. ATUM will use the default shipping zone to the visitors that was not possible to detect the shipping destination from their profile, Geo Prompt popup or user destination widget. To select or change the default shipping zone:
- In WordPress admin panel, go to ATUM Inventory > Settings > Multi-Inventory.
- Select a shipping zone in Default Shipping Zone dropdown (Shipping Zone Restriction Mode must be active for this option to appear).
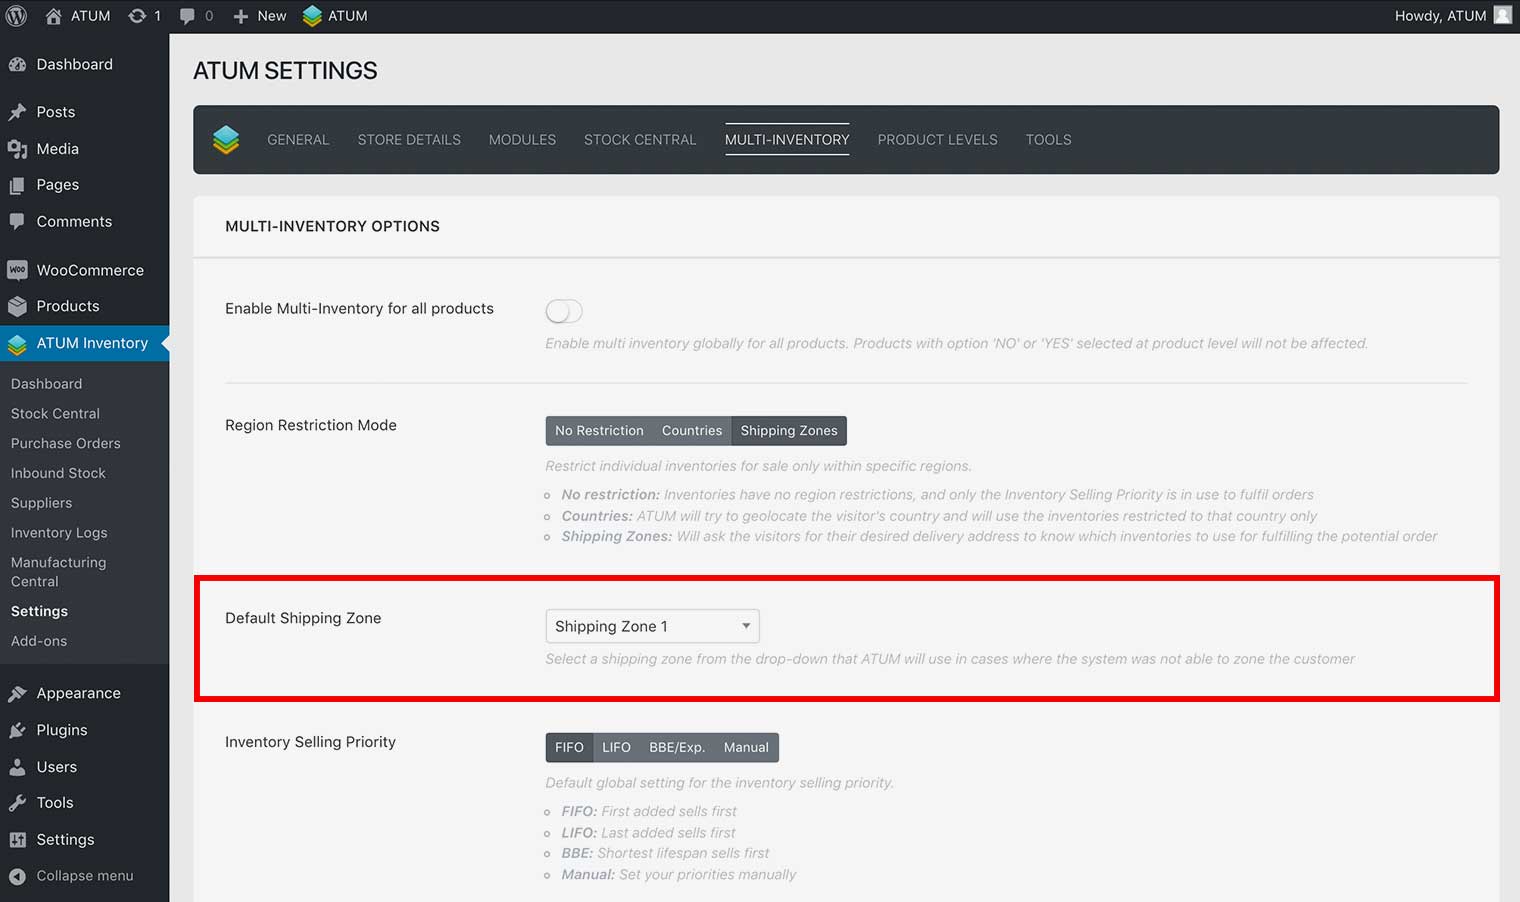
- Click Update Settings.
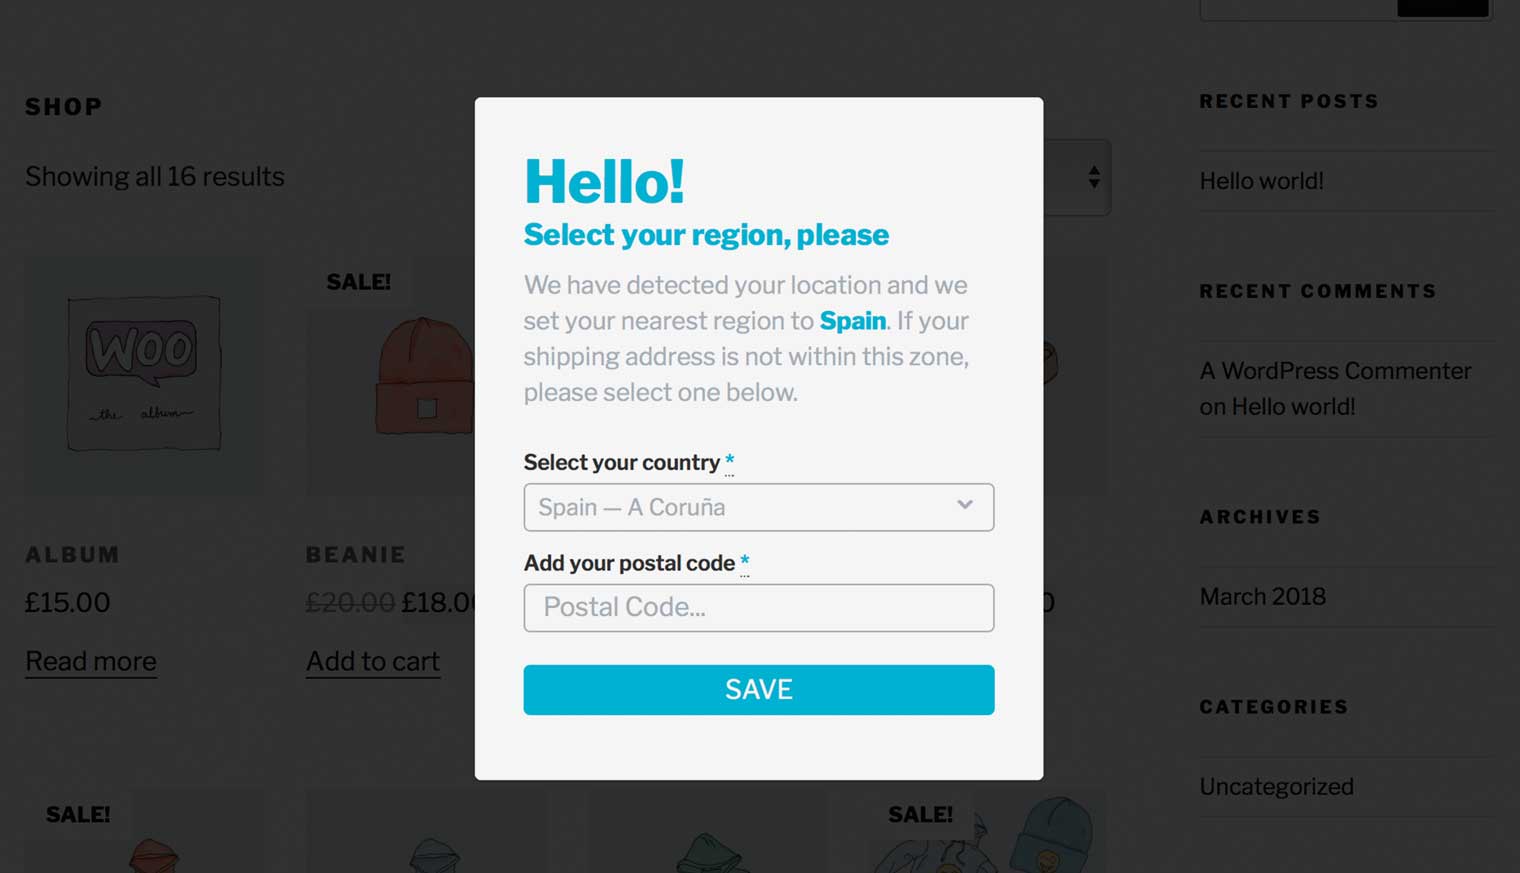
Once you have selected the Shipping Zones Region Restriction mode in ATUM Settings, the Use Geo Prompt option appears and enables automatically. When Use Geo Prompt option is enabled, a GEO PROMPT POPUP will show when customers first visit the site. The popup will ask the visitor for their address details and will adjust the shop accordingly.
ENABLE OR DISABLE THE GEO PROMPT POPUP
When the Shipping Zones region restriction mode is selected the Geo Prompt Pop-Up is enabled by default, but you can enable or disable it.
- In WordPress admin panel, go to ATUM Inventory > Settings > Multi-Inventory.
- Enable or disable the Use Geo Prompt option.
- Click Update Settings.
CUSTOMIZE THE GEO PROMPT POPUP
- In WordPress admin panel, go to ATUM Inventory > Settings > Multi-Inventory.
- Configure the Geo Prompt Pop-Up options. You can set:
- Required Fields: Select what visitor’s information is required to work for your region restriction mode. You can choose between Country/State, Postal Code or both.
WARNING:Choose one at least, or the popup will not display.
- Popup Title: Set the popup title.
- Popup Subtitle: Set the popup subtitle.
- Popup Text: Set the popup description text.
- Border Radius: Select a border radius for the popup corners.
- Background Color: Select a background color for the popup.
- Accent Color: Select an accent color for the popup.
- Font Color: Select a font color for the popup.
- Privacy Link Text: Set the Privacy Policy text for the confirmation checkbox.
WARNING:You need to assign a Privacy Policy page within the WooCommerce settings for the confirmation checkbox to work.
- Required Fields: Select what visitor’s information is required to work for your region restriction mode. You can choose between Country/State, Postal Code or both.
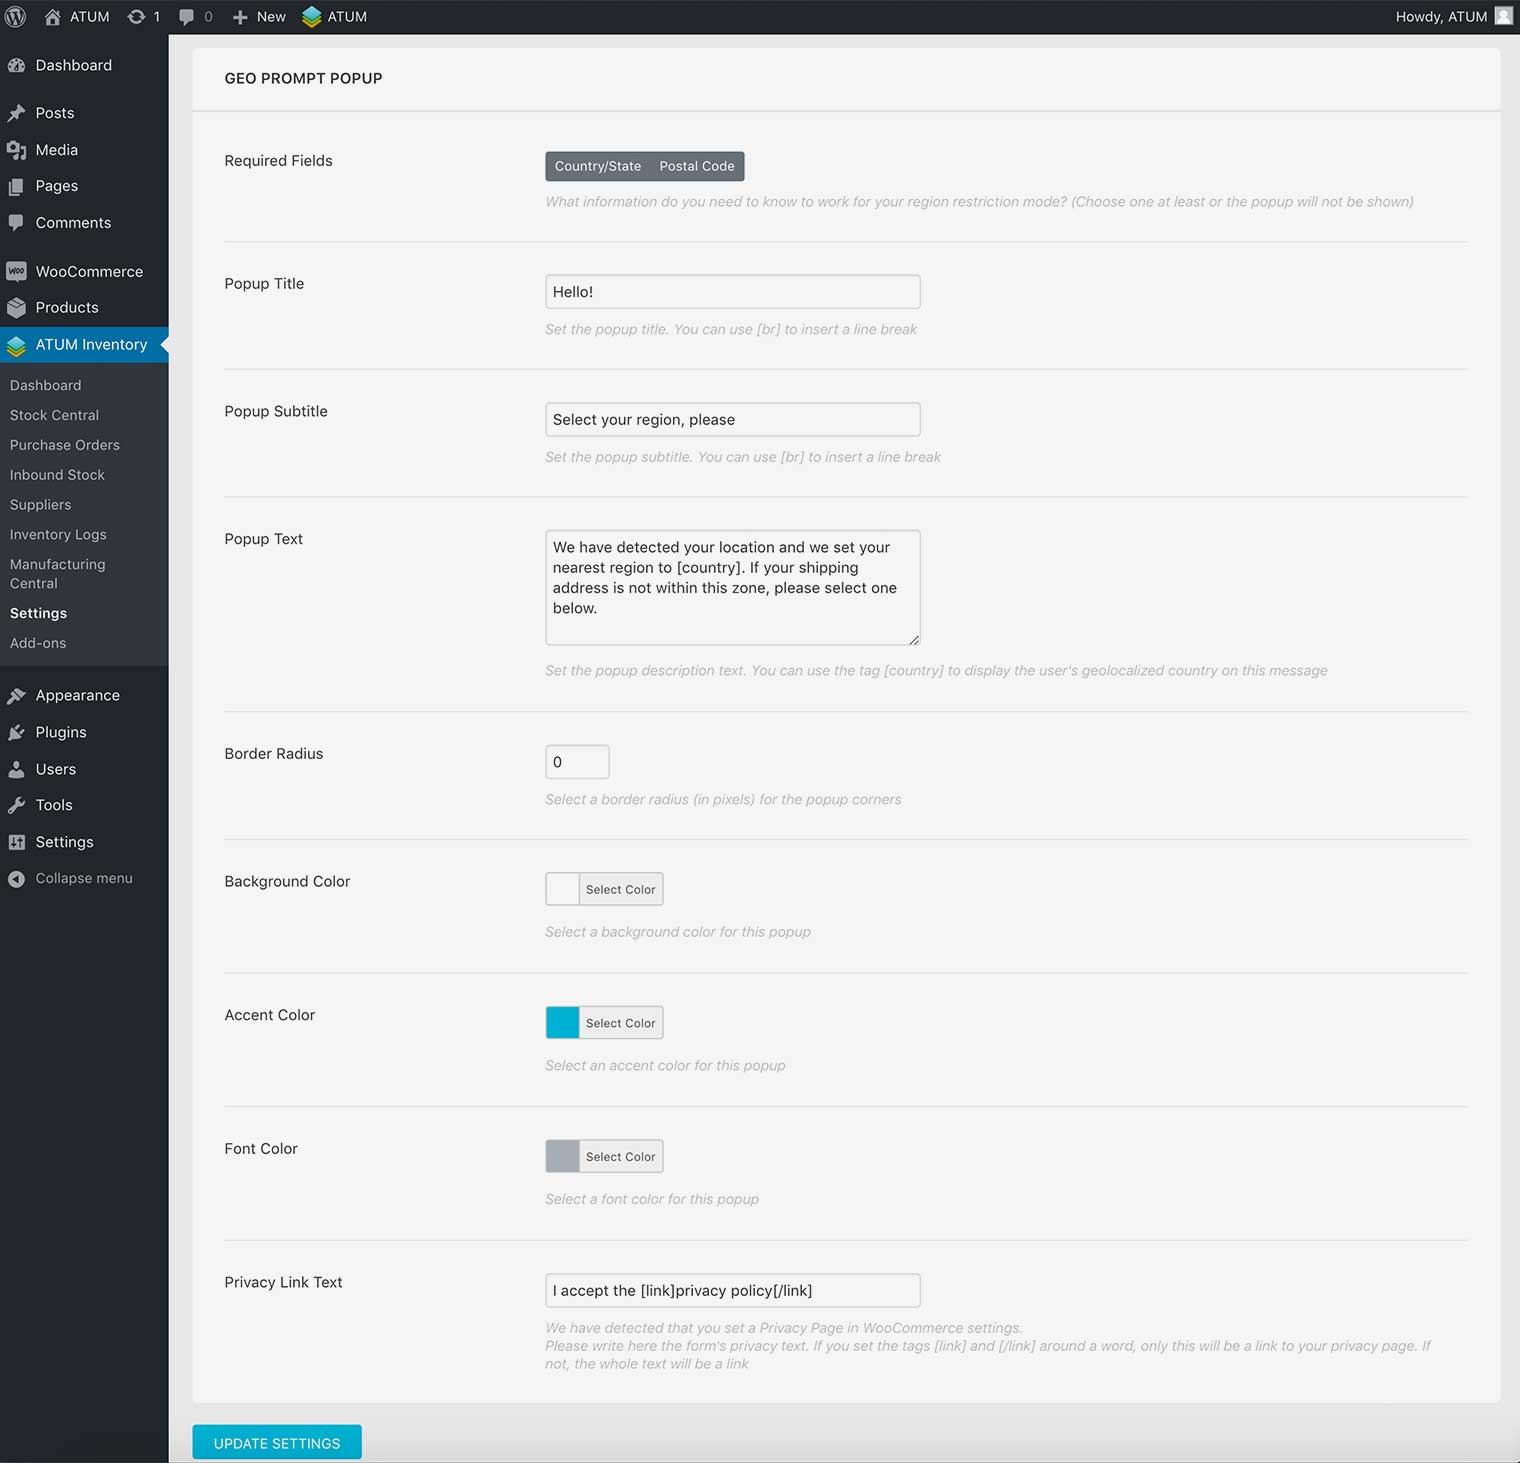
3. Click Update Settings.
ADD A SHIPPING ZONE RESTRICTION TO AN INVENTORY
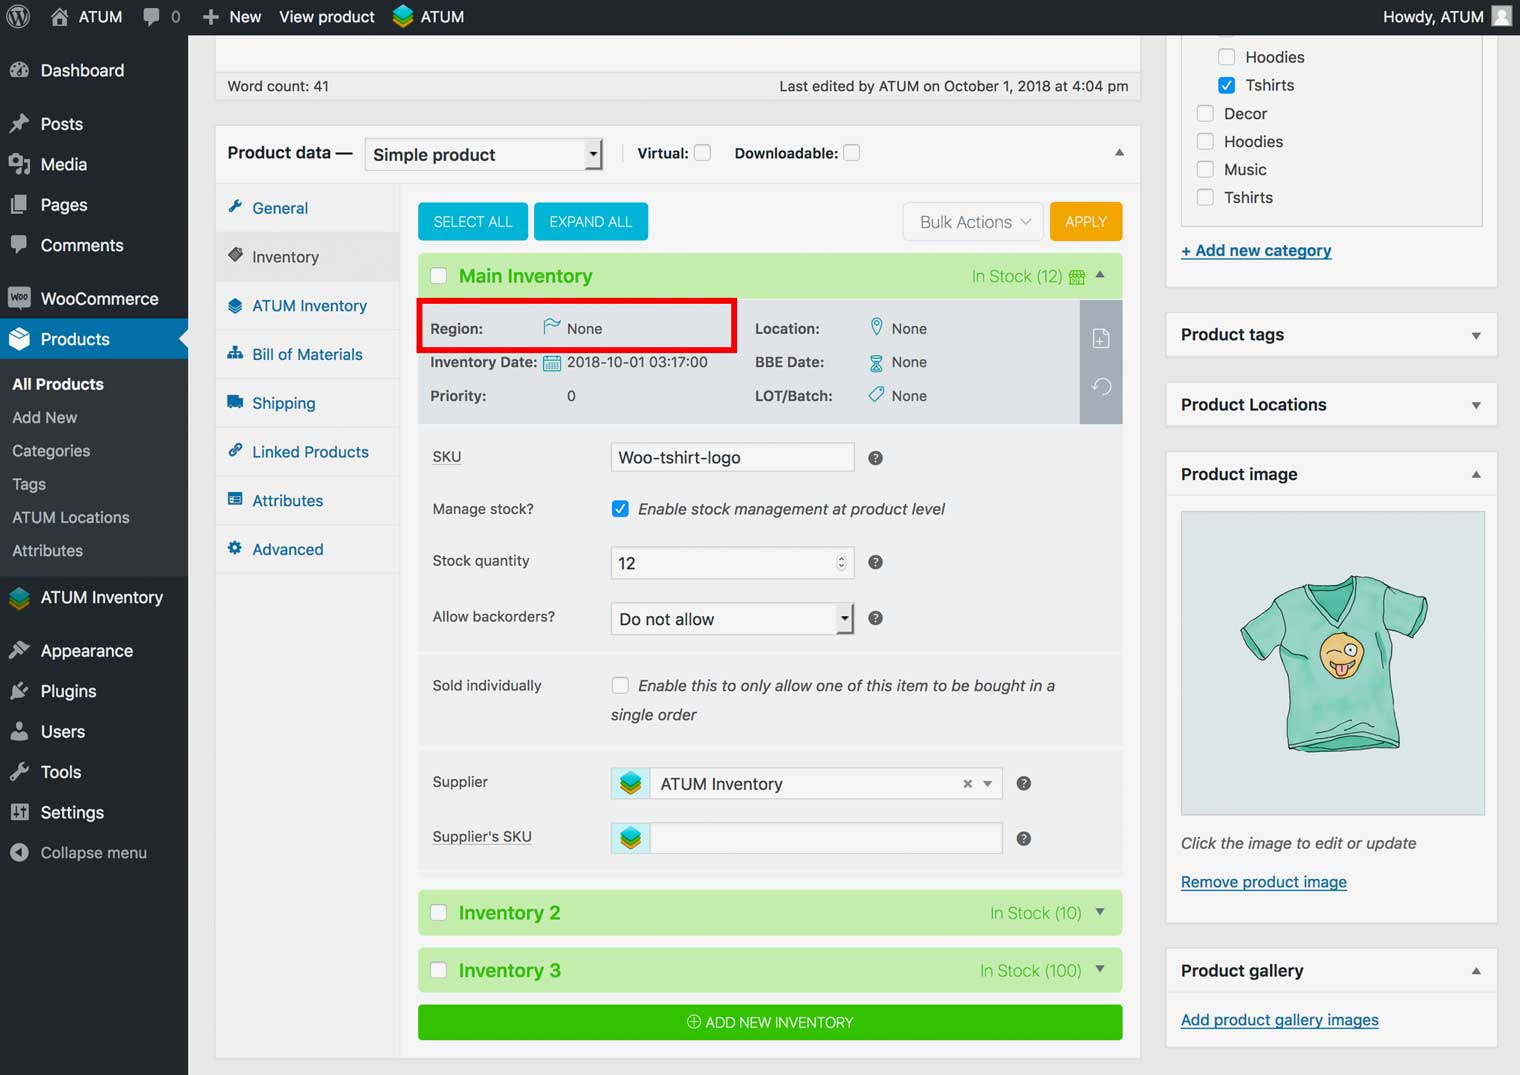
- In WordPress admin panel, go to Products and open-edit the product you want to restrict.
- In the Product’s page navigate to the Product Data section and select the Inventory tab.
- Open the inventory you would like to restrict.
- Click the blue flag Region icon.

- Select one or several shipping zones from the WooCommerce shipping zones list.
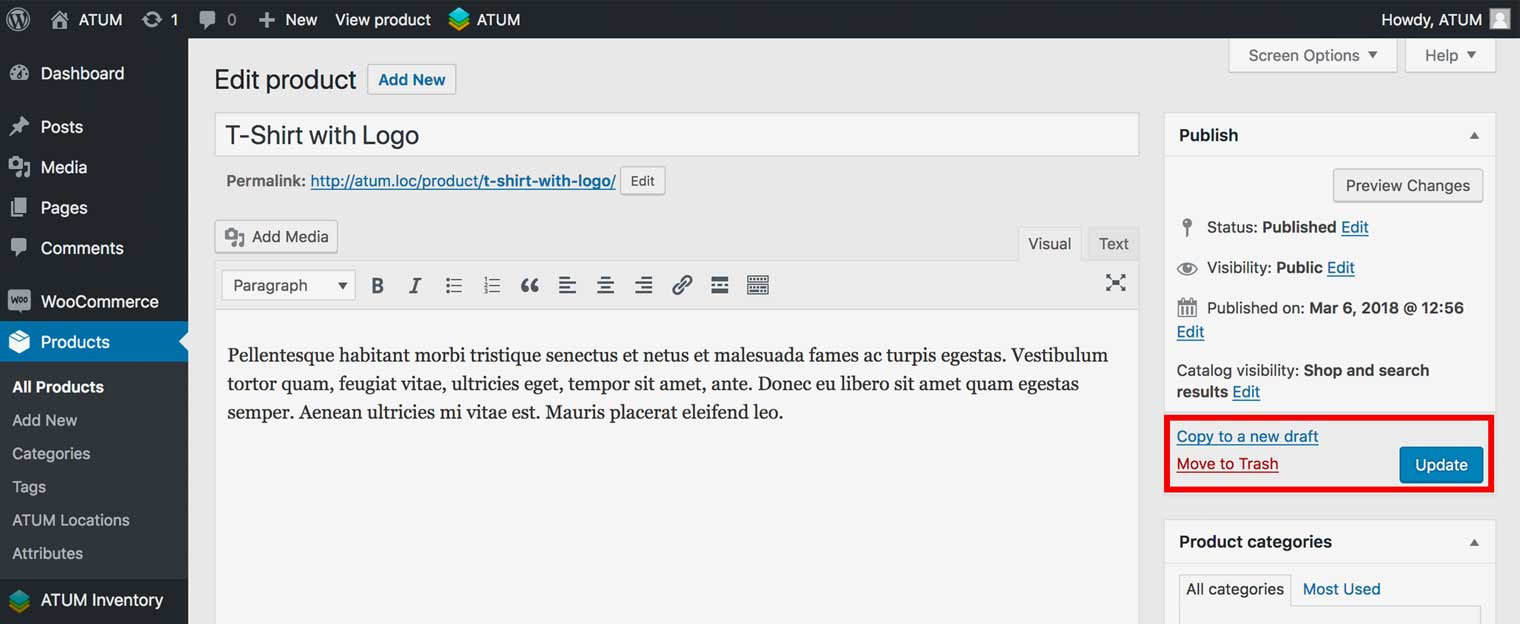
WARNING:The inventory will only be sold in the selected shipping zones. - To activate changes, click the product Update button.

IMPORTANT TO NOTE
When you add a zone restriction to an inventory, only visitors that selected an address from the same zone will see the product In Stock. So will the logged-in users that have their profile address within the selected zone.
Visitors from a different zone or the logged-in users with profile address outside the zone will see the product Out of Stock.
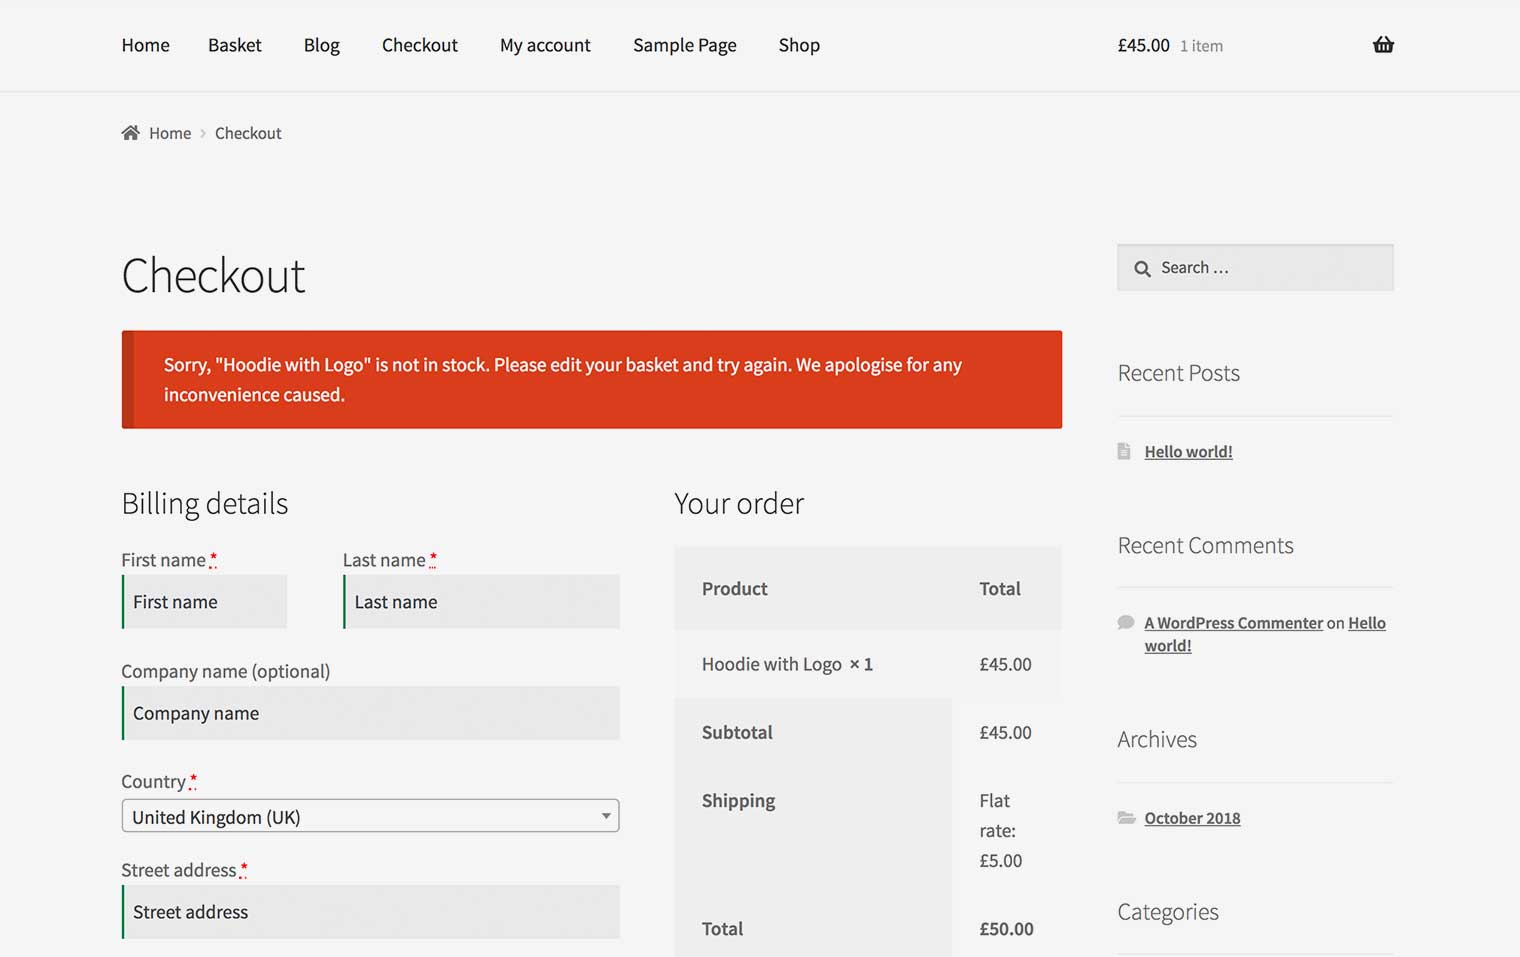
The stock status/count of shopping baskets (shopping cart) could change upon completing the shipping destination details within checkout! In the case of the previously saved shipping destination with the users’ profile or selected zone difference versus the chosen shipping destination, the checkout could fail as the different restriction zone may not have the same inventory available.
Example: Customer wants to buy a product that has inventory restricted to London. The customer has a London address set in their profile and ads the product to cart. Within the checkout page, the customer changes the shipping destination to the Manchester area. WooCommerce will use the default message telling the customer that the product is not available
Our team is working on a notification message that will pop up to customers in the above case, and inform them about the availability of the basket items within their regions.