Premium version settings
How user becomes an affiliate
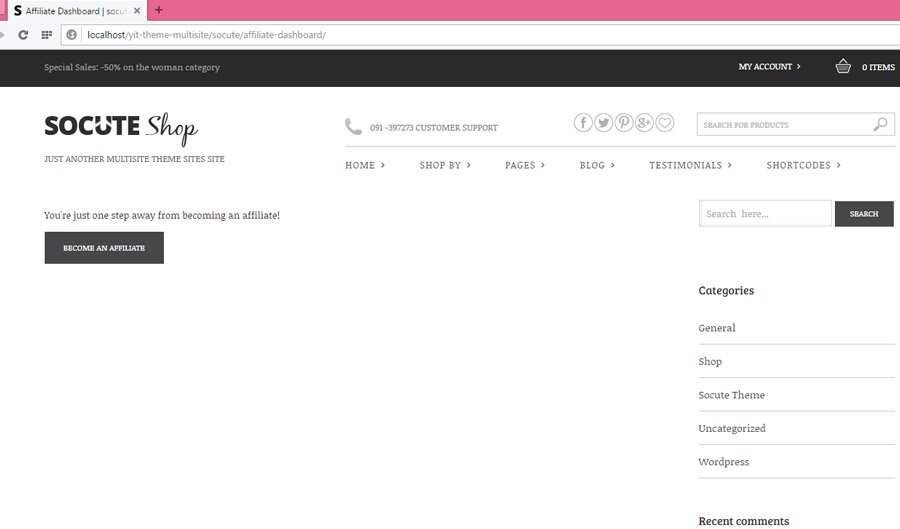
In order to become an affiliate, users need to be registered to your store.
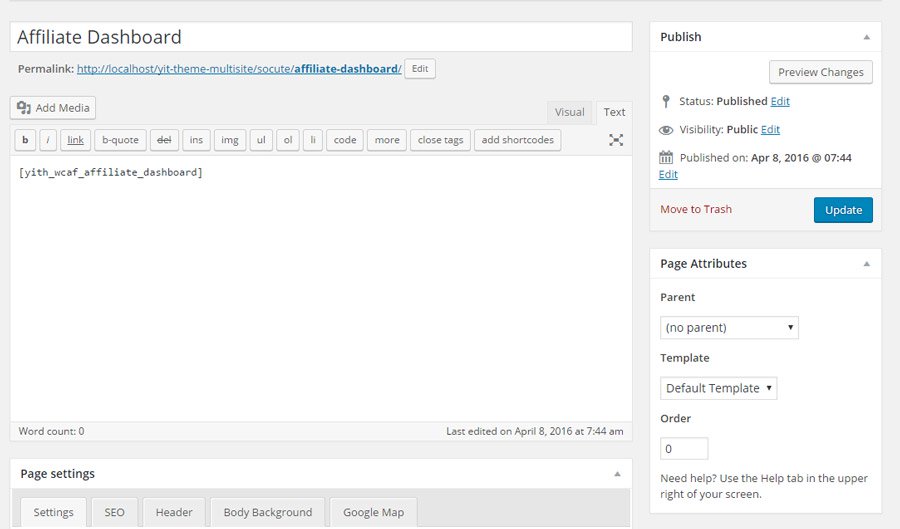
The registration occurs in “Affiliate Dashboard” page that is automatically created after the plugin has been activated. The page contains the shortcode “[yith_wcaf_affiliate_dashboard]”.
Affiliates can submit their application from the registration form, that can:
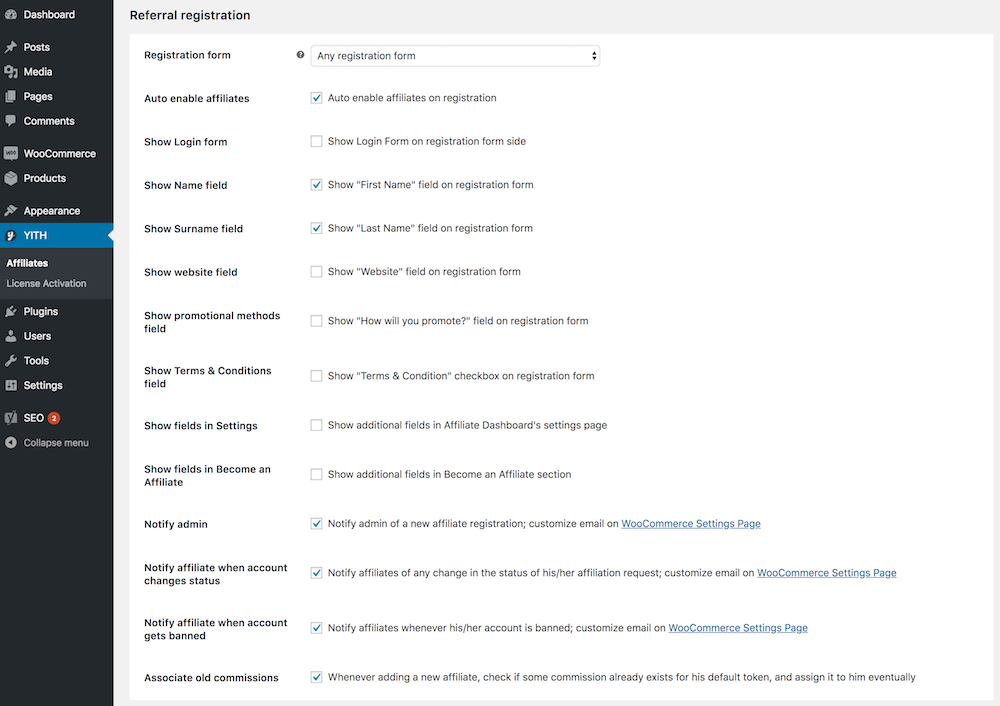
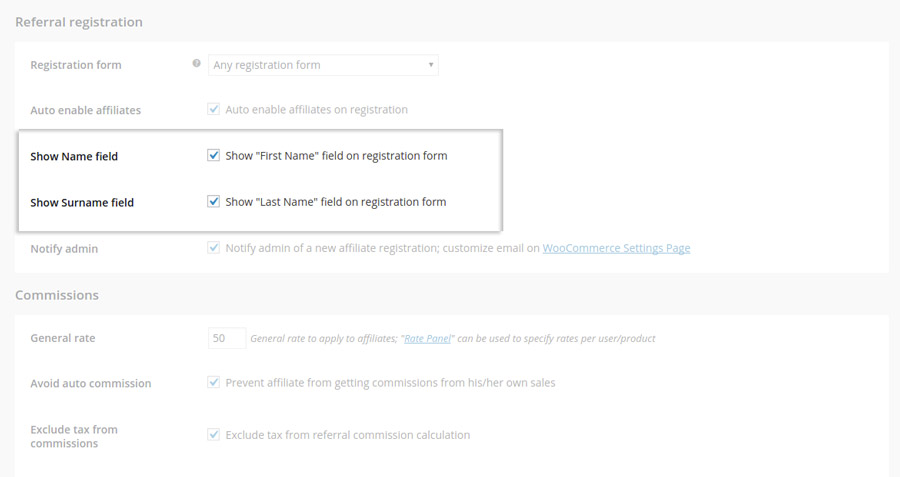
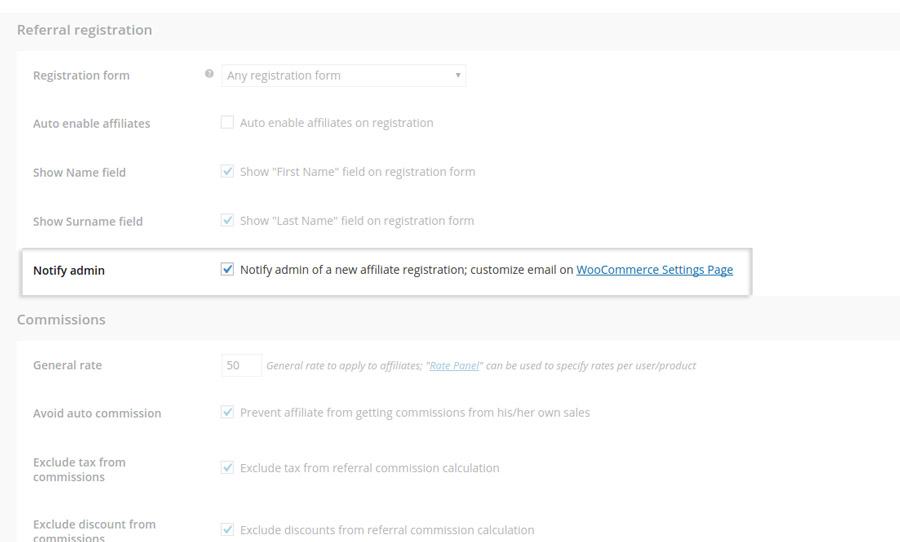
- either be integrated in the default registration form (choose Any registration form in the plugin Settings as shown in the screenshot below) and the affiliate registration fields will be added to this form: everyone who registers can also register as an affiliate;
- or it can be requested through a dedicated form (choose plugin registration form), and have two separate forms, one for user registration and one for affiliate registration. By default, it’s displayed in the Affiliate dashboard, but you can print it on every page using the dedicated shortcode (see more about it here).
Then, check all the options that you want to show in the form, among the ones shown below.
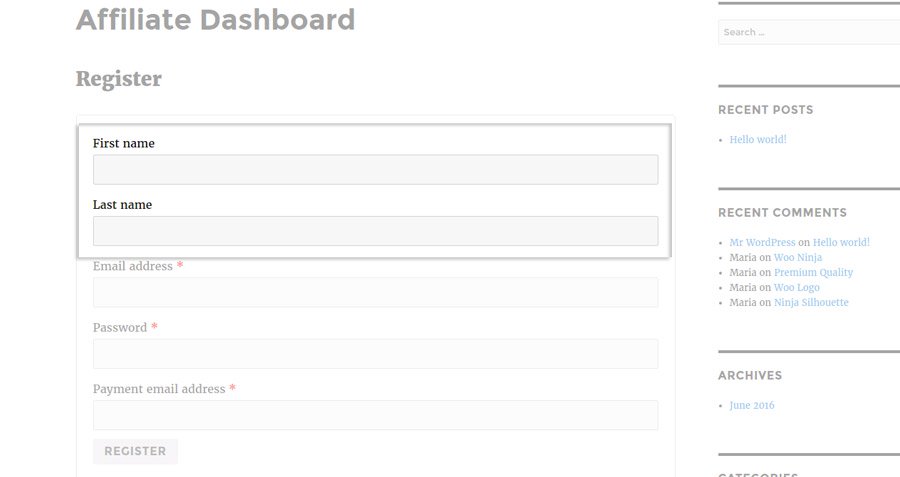
If you have selected the plugin registration form, the affiliate registration will be done from the “Affiliate Dashboard” page form.
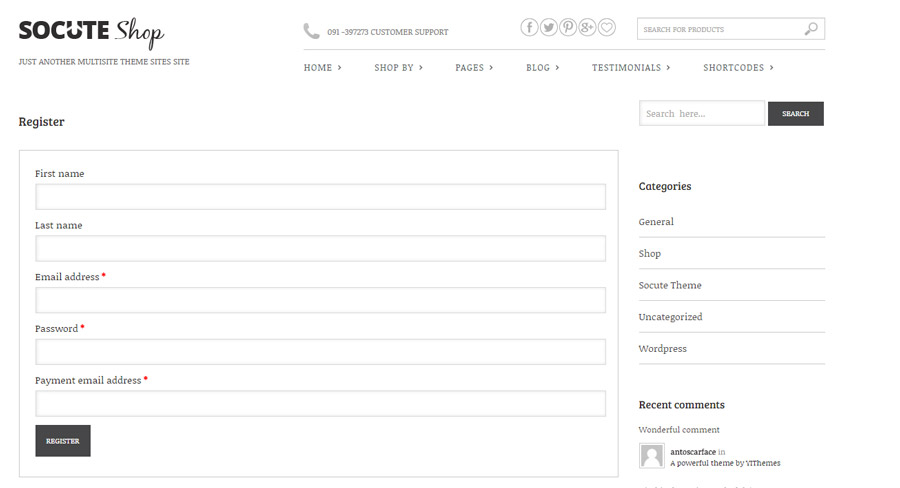
You can hide the “Name” and “Surname” field of the form from the option panel of the plugin.
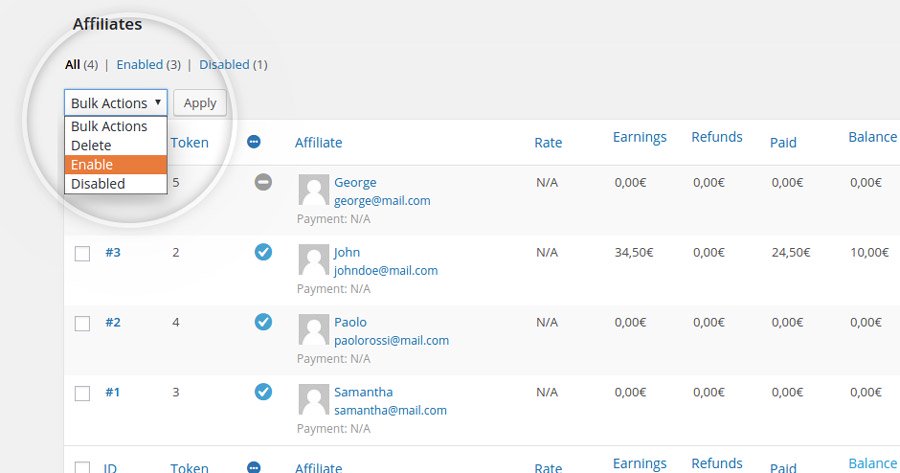
After registering, the new affiliate will be automatically added to the affiliates table, see “affiliates tab“. If you have selected the “auto enable affiliates” option in the general settings page, the user will become an affiliate on registration.
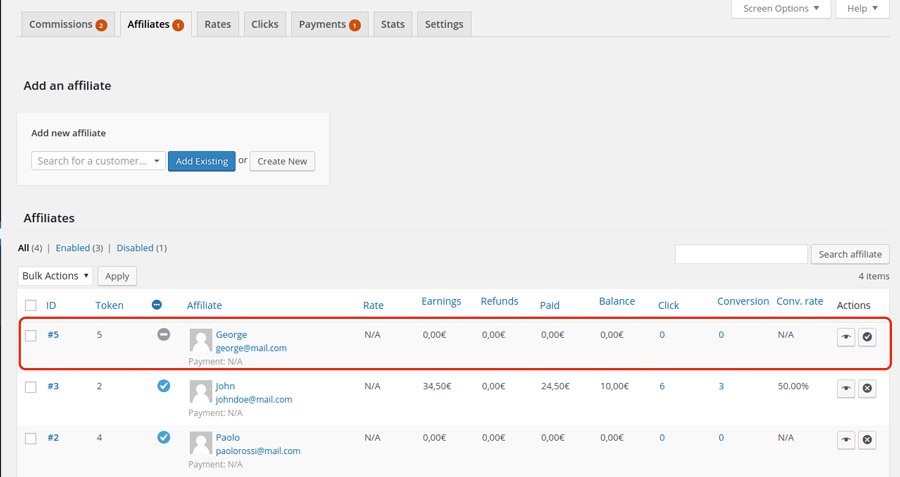
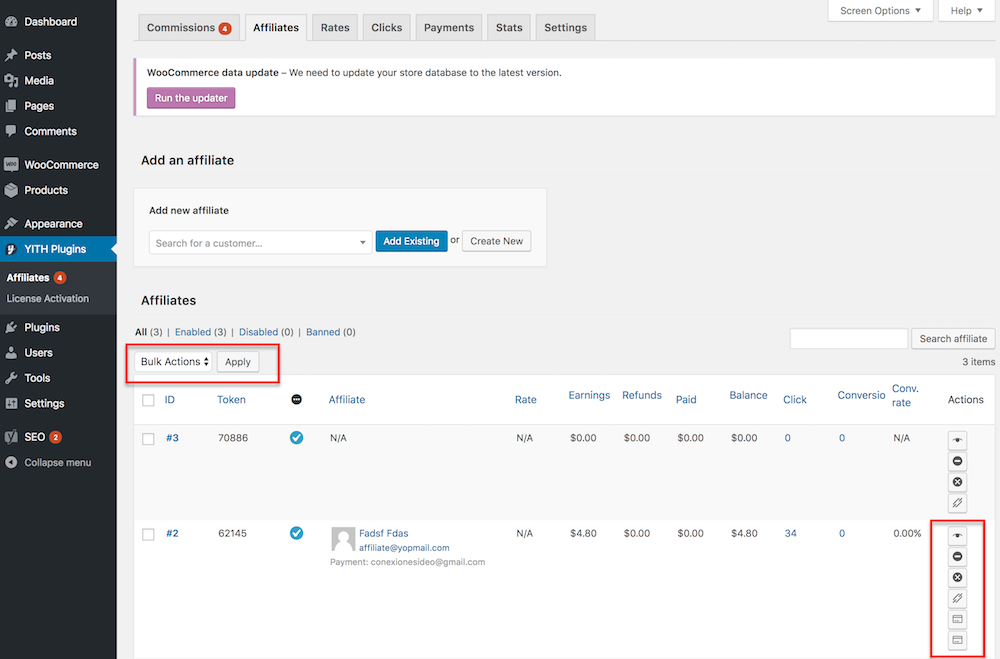
You can use the options in the drop down menu on top of the table, or you use the symbols in the actions column:
- Delete
- Change status to active (you can approve an affiliate)
- Change status to rejected (you can reject an affiliate)
- Ban affiliate
- Unban affiliate
- Process dangling commissions
- Pay commissions
- Pay commissions via PayPal
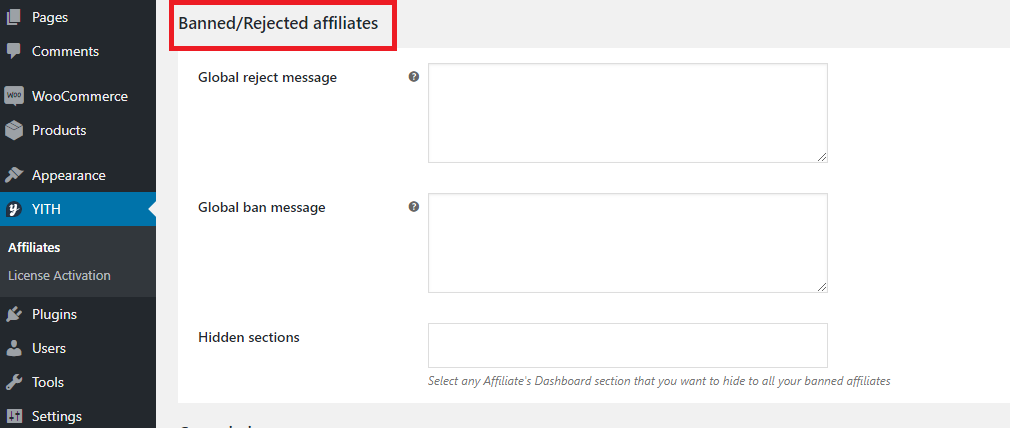
Write a message that will be shown to all rejected users and banned users, you will find this option in the general plugin settings. Using the “Hidden sections” you can select the pages you want to hide for all banned users.
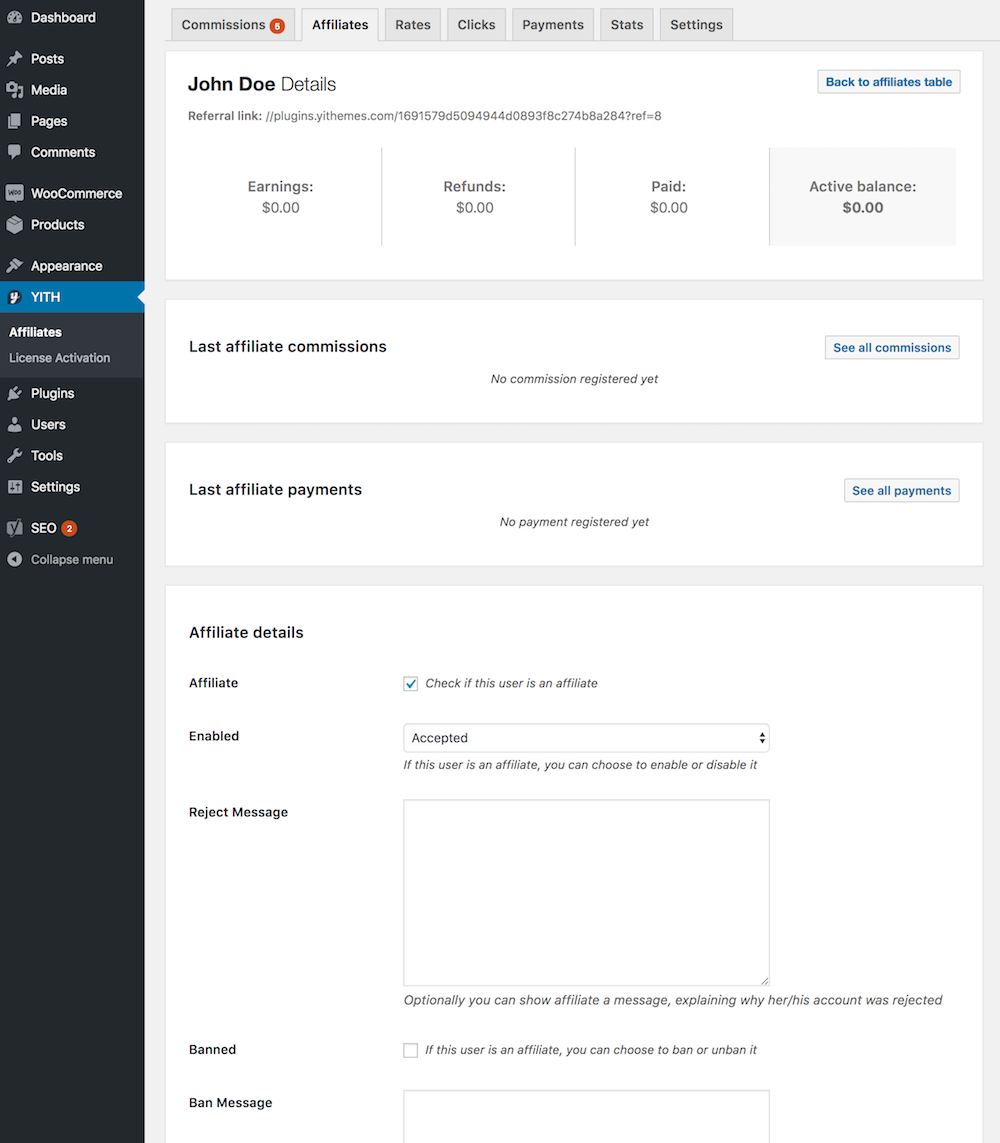
Affiliate details page
By clicking on the affiliate ID number, the plugin will show you a page with all details of that specific affiliate.
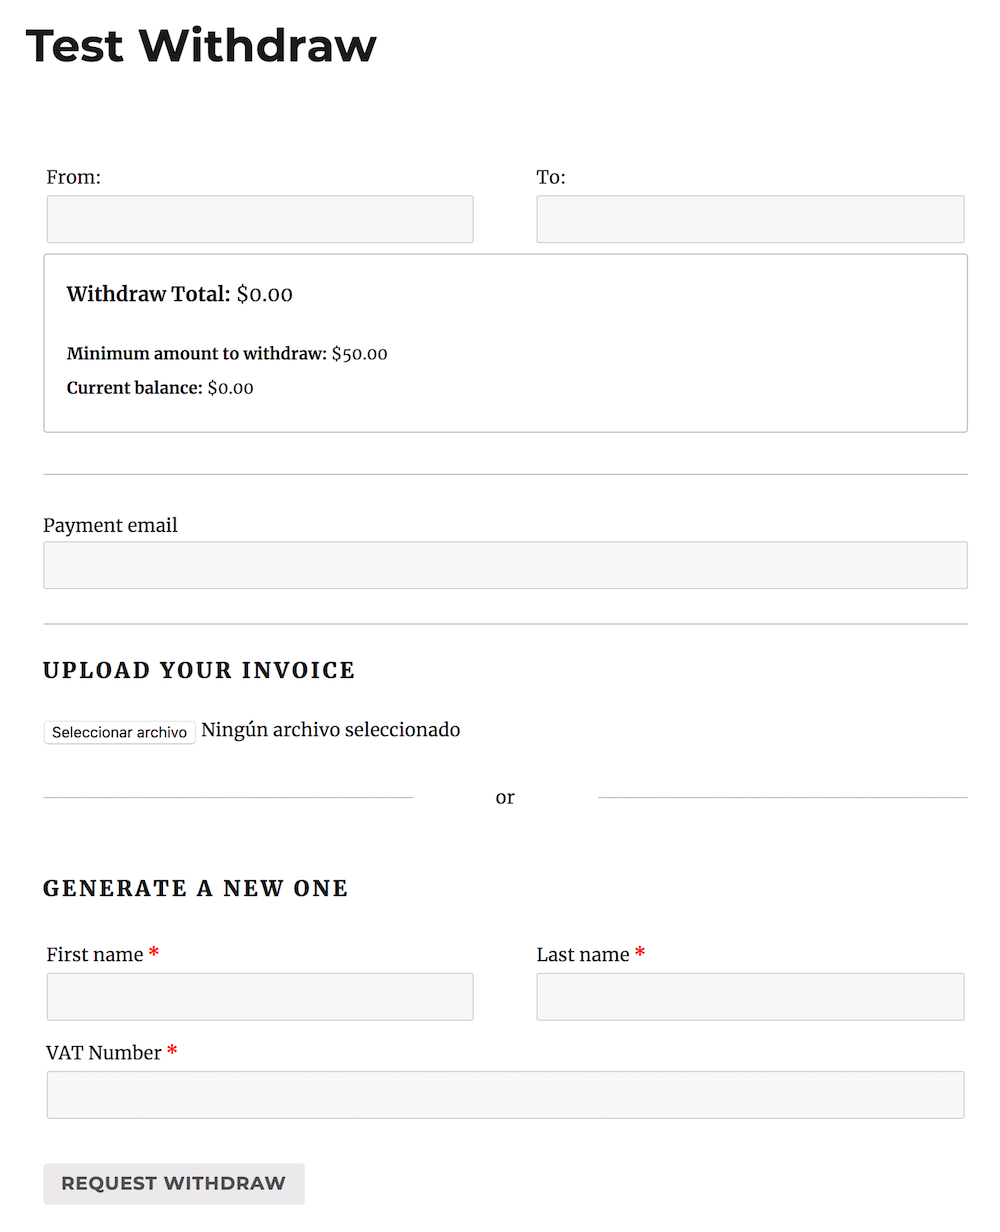
“Withdraw” Shortcode
With this [yith_wcaf_show_withdraw] shortcode, you can add the withdrawal form to the page you want. In the withdraw screen the affiliate can decide from-to which date they want to withdraw their commissions.
Note: make sure that you do not directly call the page ‘withdraw’, because its a reserved word.
Make sure you have enabled the “withdraw” option in the general settings.
How admin adds a new affiliate
Administrators can add a new affiliate at any time from the settings panel of the plugin.
They can choose between existing users and the creation of a new user by clicking on the “Create New” button.
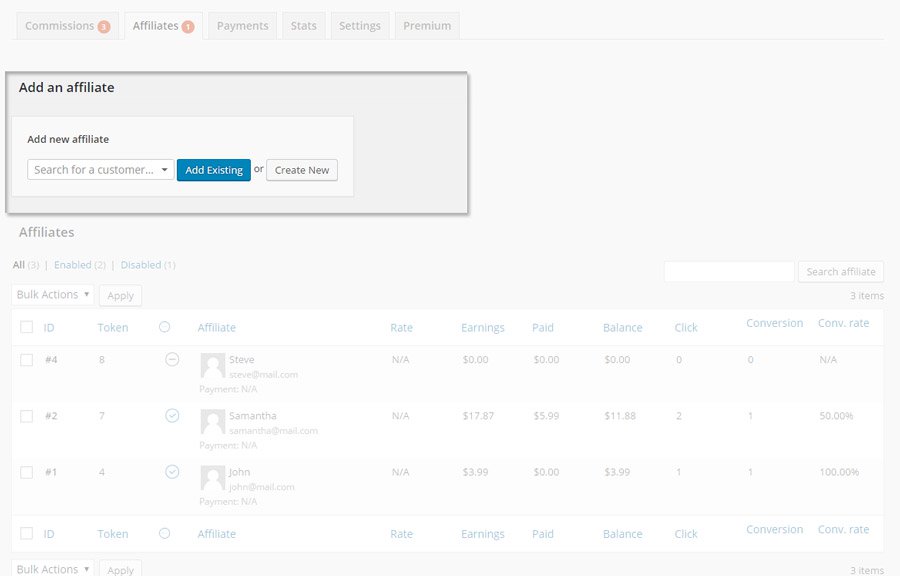

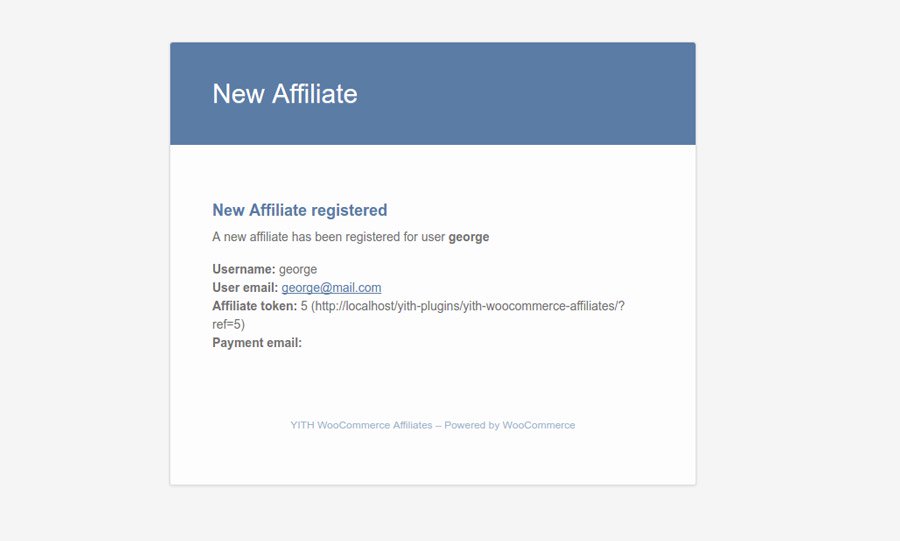
An affiliation token will be assigned to all new affiliates. By default, it is the same as the user’s ID.
From administration side, this value can be edited in the user’s profile.

How to enable affiliate
If the “Auto enable affiliates” option of the plugin has been activated, users will be recognized as affiliates immediately, once they’ve sent the affiliation request or concluded the registration.

If disabled, they will be added to the affiliate user list, in the “Affiliates”section of the plugin, with the Disabled status by default.
The administrator will have to change their status, and activate them as affiliate users of the shop.
The same goes for disabling users or deleting them as affiliates.
Affiliate dashboard
If you enable the option “Show login form” an already registered affiliate can login easily in his affiliate dashboard.

Once logged in, affiliate users can verify their information about affiliation activities consulting the “Affiliate Dashboard” page, or any other page of your shop that contains the [yith_wcaf_affiliate_dashboard] shortcode, indicated as affiliation page in the “Settings” tab of the option panel of the plugin.
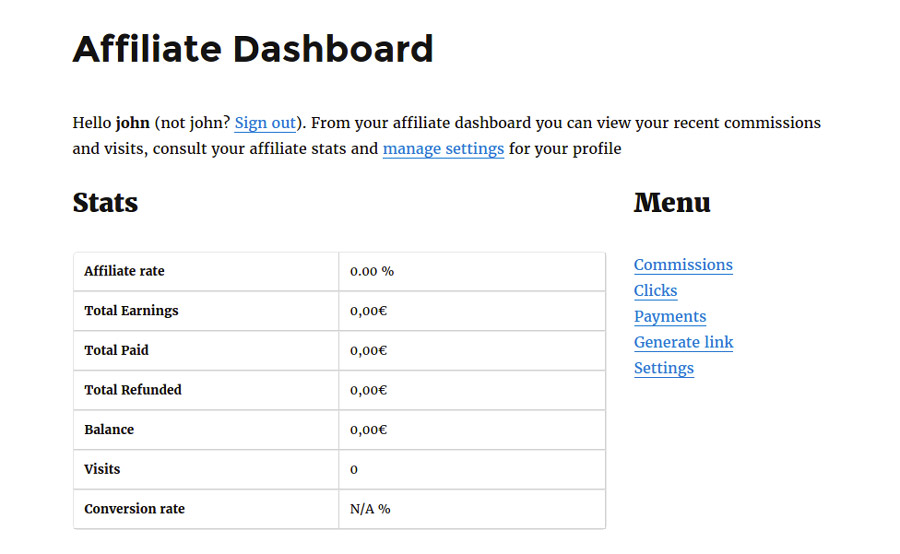
Let’s analyze all the sections to which the affiliate can have access in this page.
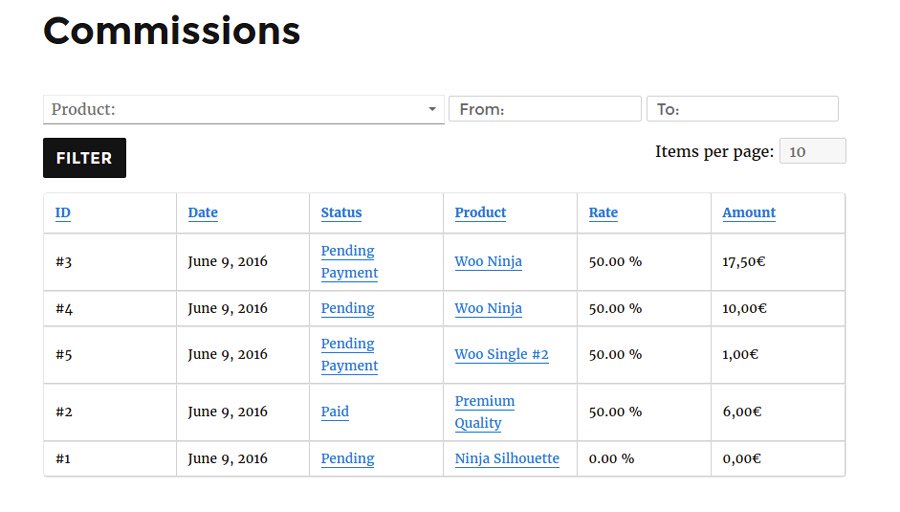
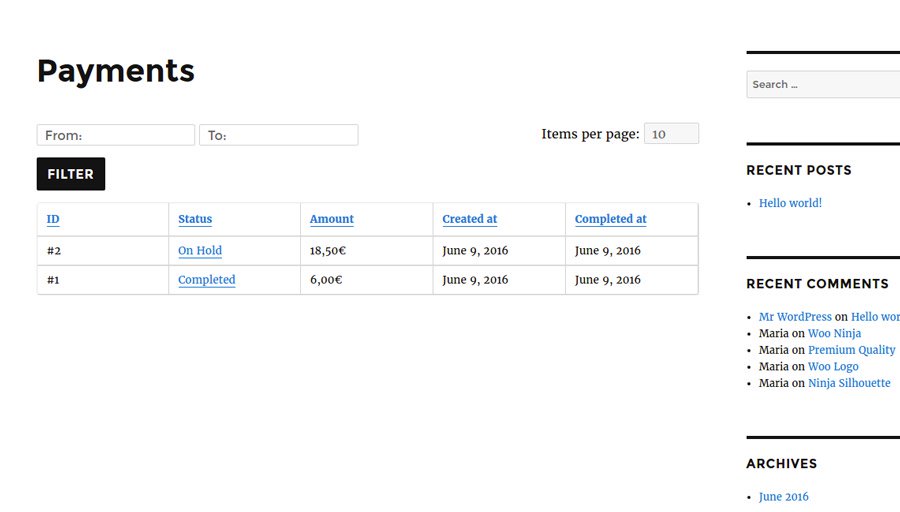
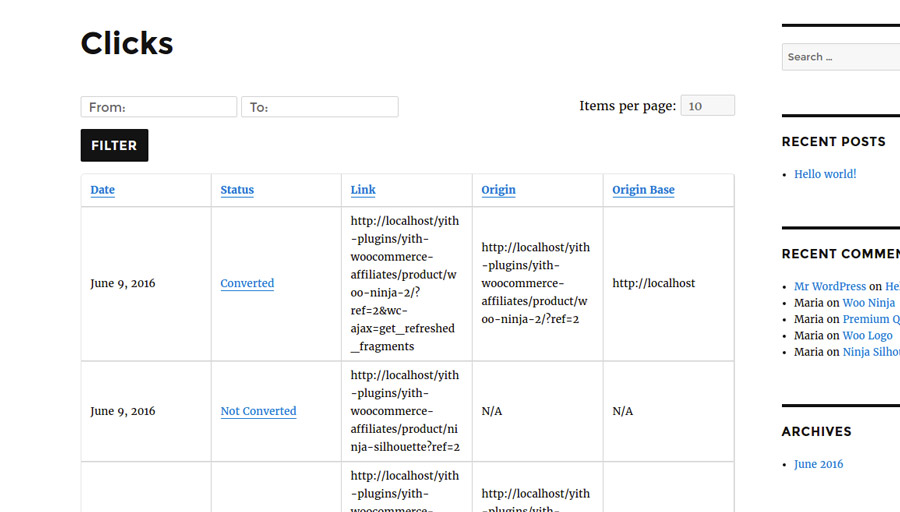
Commissions, Payments and Clicks
Within his/her dashboard, the affiliate can track all the actions related to the refer id: visits, received commissions and related payments.
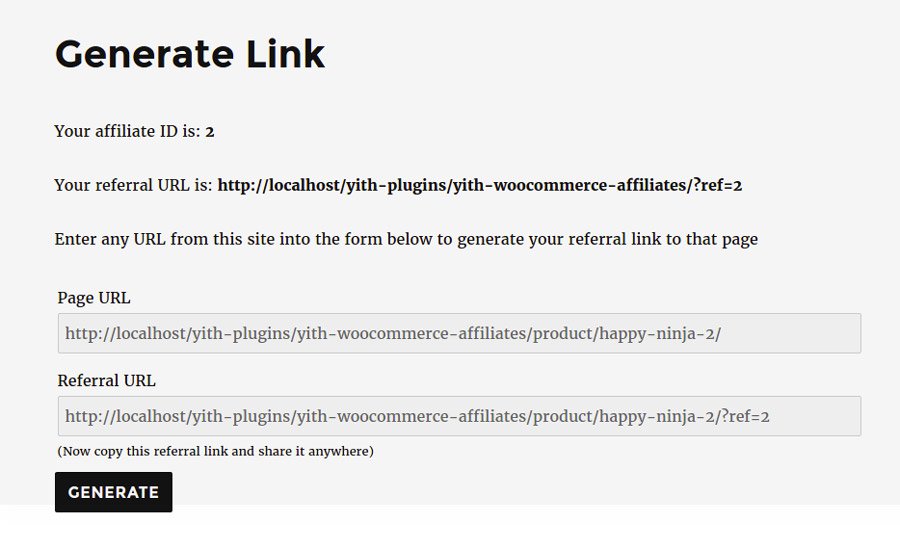
Affiliation link
By clicking on the “Generate link” entry, users will be redirect to a page in which they dynamically obtain the affiliation URL for a specific shop page.
General settings
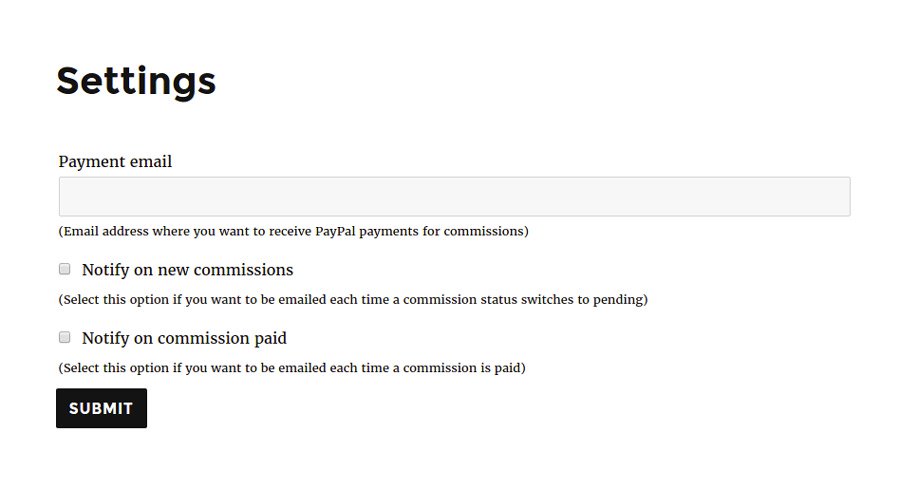
The “PayPal” email address inserted here is the one that will be used by the system to pay the commissions by PayPal.
The two check-boxes allow users to be notified by email every time a commission acquires the “Pending” status or has been paid.
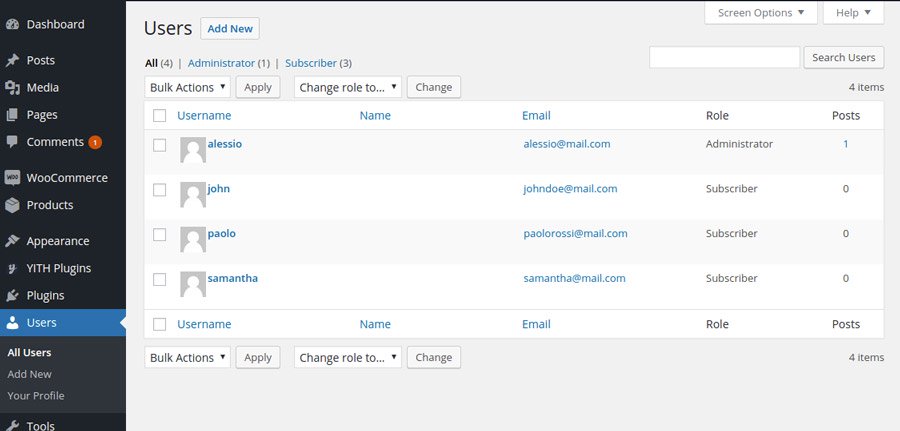
How to set affiliate details for single user
In order to have access and edit the affiliate information, select the user.
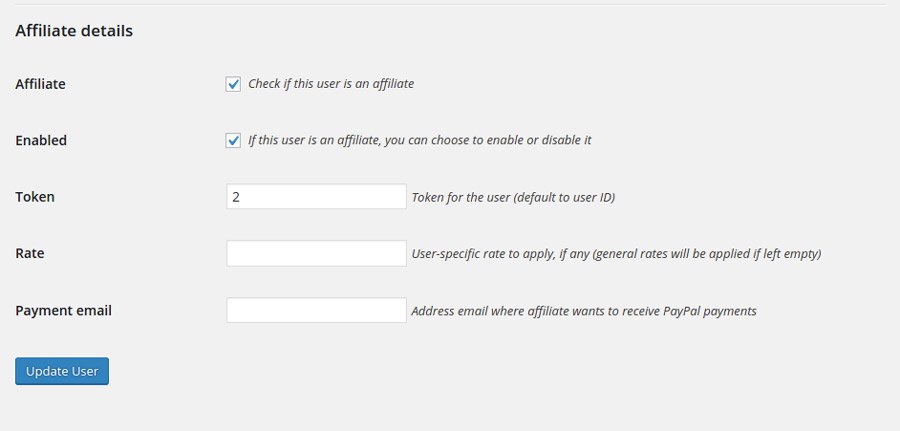
With the fields included in the “Affiliate details” section you can:
- Remove the user from the list of affiliates
- Enable/disable the affiliate
- Edit the affiliation token associated to the user(by default, it matches with the user id)
- Insert a tailored commission percentage for the user, different from the one set in “Affiliates -> General Settings
- Obtain the PayPal email address specified by the user for the payment of their commissions
How the user can generate affiliation link
By clicking on the “Generate link” entry (in the Affiliate Dashboard), users will be redirected to a page in which they dynamically obtain the affiliation URL, for a specific shop page. With the copy button you can easily copy and share the URL wherever you want.

Coupons
The plugin allows creating coupons and assigning them to your affiliates. When the affiliate shares his/her coupon/s, every sale made by using the coupon/s will generate a commission for the related affiliate.
To activate coupons for your affiliates, go to the Settings section of the plugin and enable the option Enable coupon handling.
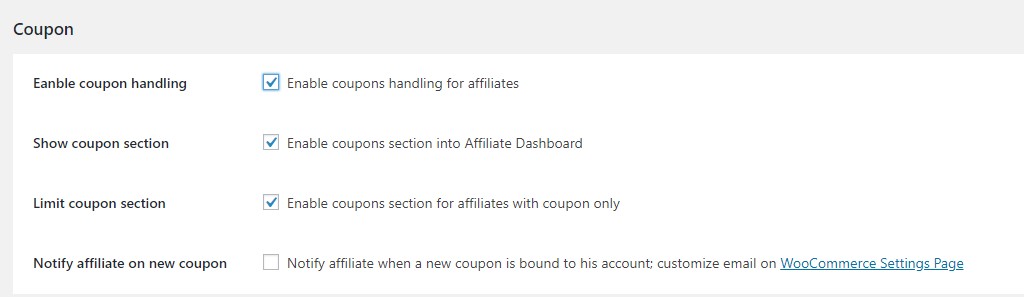
Once enabled, you can decide whether to show the Coupons section in the affiliate dashboard or not by activating Show coupon section. If you want to show this section only to affiliates that have one or more coupons assigned, you can activate the option Limit coupon section.
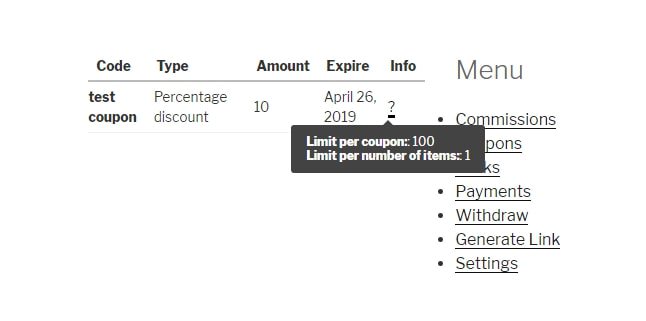
From this section, affiliates can view all the coupon details: coupon code, type and amount of the discount, expiration date, and other informationadded to the tooltip as shown in the image below.
How to assign coupons to affiliates
After enabling the option Enable coupon handling, go to WooCommerce->Coupons to create the coupons to be assigned to your affiliates.
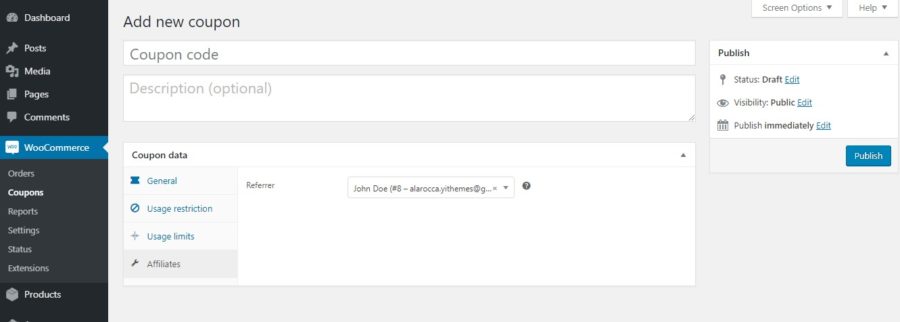
You will find the entry Affiliates in the coupon data from which you will be able to assign the created coupon to a selected affiliate.
Please note – You can assign different coupons to an affiliate but not the same coupon to different affiliates.
Commission settings
Every completed purchase of the shop related to an affiliate user will generate a commission to pay.
The commission concerning the affiliate is the sum of the commissions of all the products added to the cart. To change the general settings of commissions, go the options panel of the plugin, click on the “Settings” tab and scroll the page to the “Commissions” section.
Here you can edit the following options:
-
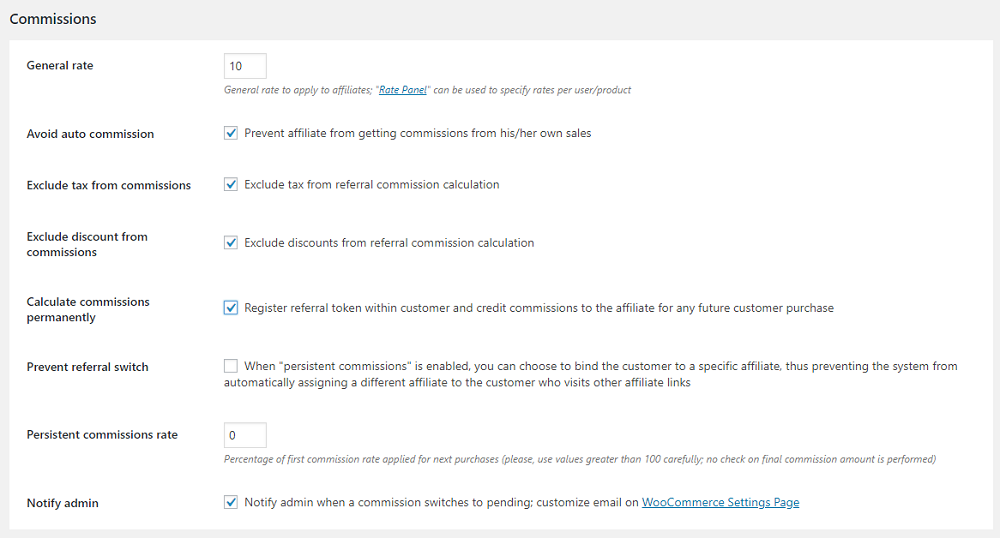
- General rate: general commission percentage related to any product of the shop and any affiliate, except possible commissions set in the Rates section of the plugin.
- Avoid auto commission: if this option is activated, no commissions will be generated for those purchases that have the same refer ID to the user that made the order.
- Exclude tax from commissions: exclude taxes and VAT from the commission amount, so you can choose whether to calculate the affiliate commission before or after VAT.
- Exclude discount from commissions: By enabling this option, the commission will be calculated on the amount of the discount applied.
- Notify admin: this option lets you send notification email automatically when a commission assumes the Pending status.
- Calculate commissions permanently: based on registered cookies, this option stores the commissions of the affiliate, for every purchase the related user will make. If the related user reaches the site from the link of another affiliate, this one will be the next affiliate for which this option will store the commissions.
- Prevent referral switch: by enabling this option, the user will always be associated to the affiliate who led him to purchase on the store (from the moment it has been decided to calculate the commissions in a permanent way), even if he visits a link associated to a different refer ID.
- Persistent commissions rate: commission percentage for all orders after the first one, even if the user visits the site directly (associate affiliate to customer). The amount of the new commission is based on the percentage applied to the old commission. Meaning: if you want to credit the same commission percentage, you’ll need to set the “Persistent commissions rate” to 100%.
Coupon commissions
If you have enabled the coupons management, a commission will be generated automatically every time a sale is made on your store using the coupons shared by the affiliates even without visiting the affiliate link.