Selling physical products? You need to ship them!
To set up shipping in WooCommerce, you first set up shipping zones, then add methods to those zones, and lastly, rates to your methods. You can create as many zones as you like, and add multiple methods and rates to each zone.
A Shipping Zone is a geographical area to which you ship items. You can get as specific as you need, right down to regions and zip codes, or you can leave it more general – whichever suits you best.
Customers only see the methods available for their address and corresponding zone. Each customer matches only one zone.
For example, you could create these zones in WooCommerce:
| Zone name | Region | Shipping methods |
|---|---|---|
| Local | California ZIP 90210 | Local pickup |
| Domestic | All US states | 2 Flat rates named “standard” and “priority” |
| Europe | Countries in Europe | Flat rate shipping |
Add as many zones as you need, with each zone containing multiple shipping methods.
Shipping zones were introduced in WooCommerce 2.6. You can still use things like Flat Rate, Free Shipping, and Local Pickup. After updating to 2.6 you are asked to turn off your legacy shipping methods and switch to shipping zone based methods.
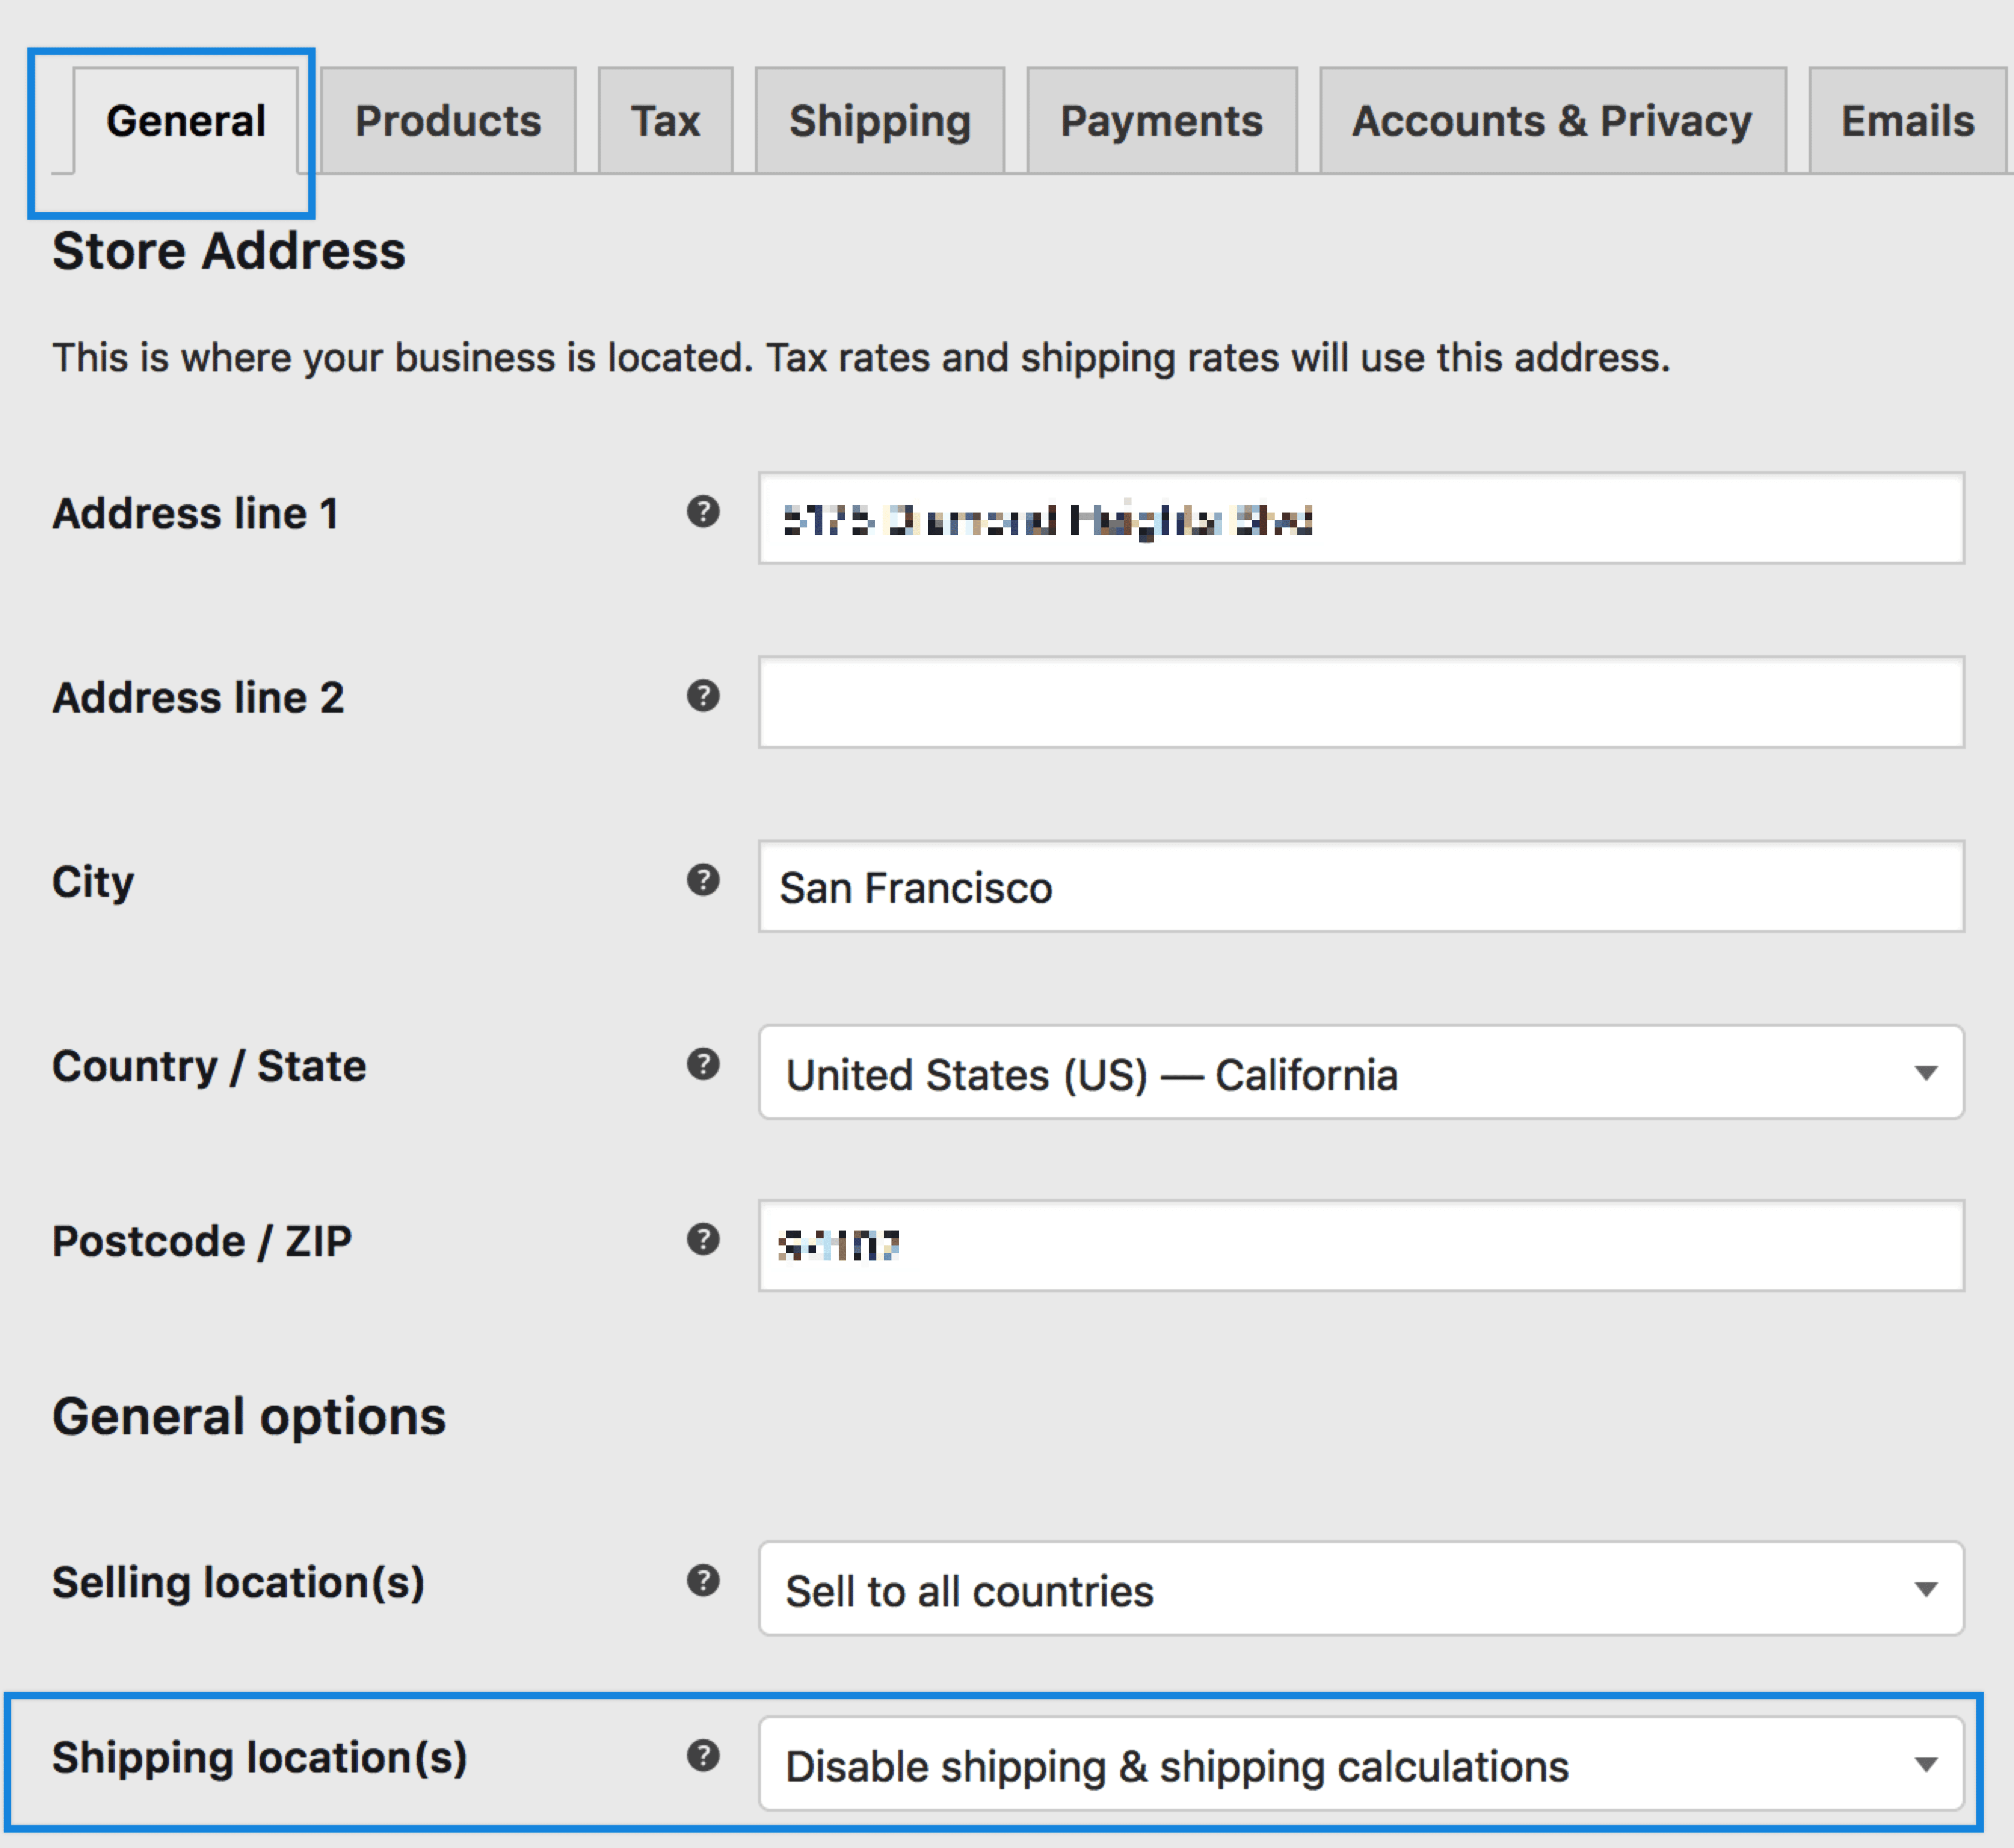
To set up shipping zones, go to: WooCommerce > Settings > Shipping. If you don’t see Shipping as an option, go back to WooCommerce > General and take a look at settings at Shipping Location(s) – you may need to enable shipping settings there!
The first time you visit WooCommerce > Settings > Shipping, there is a prompt to add a new zone, and a default zone.
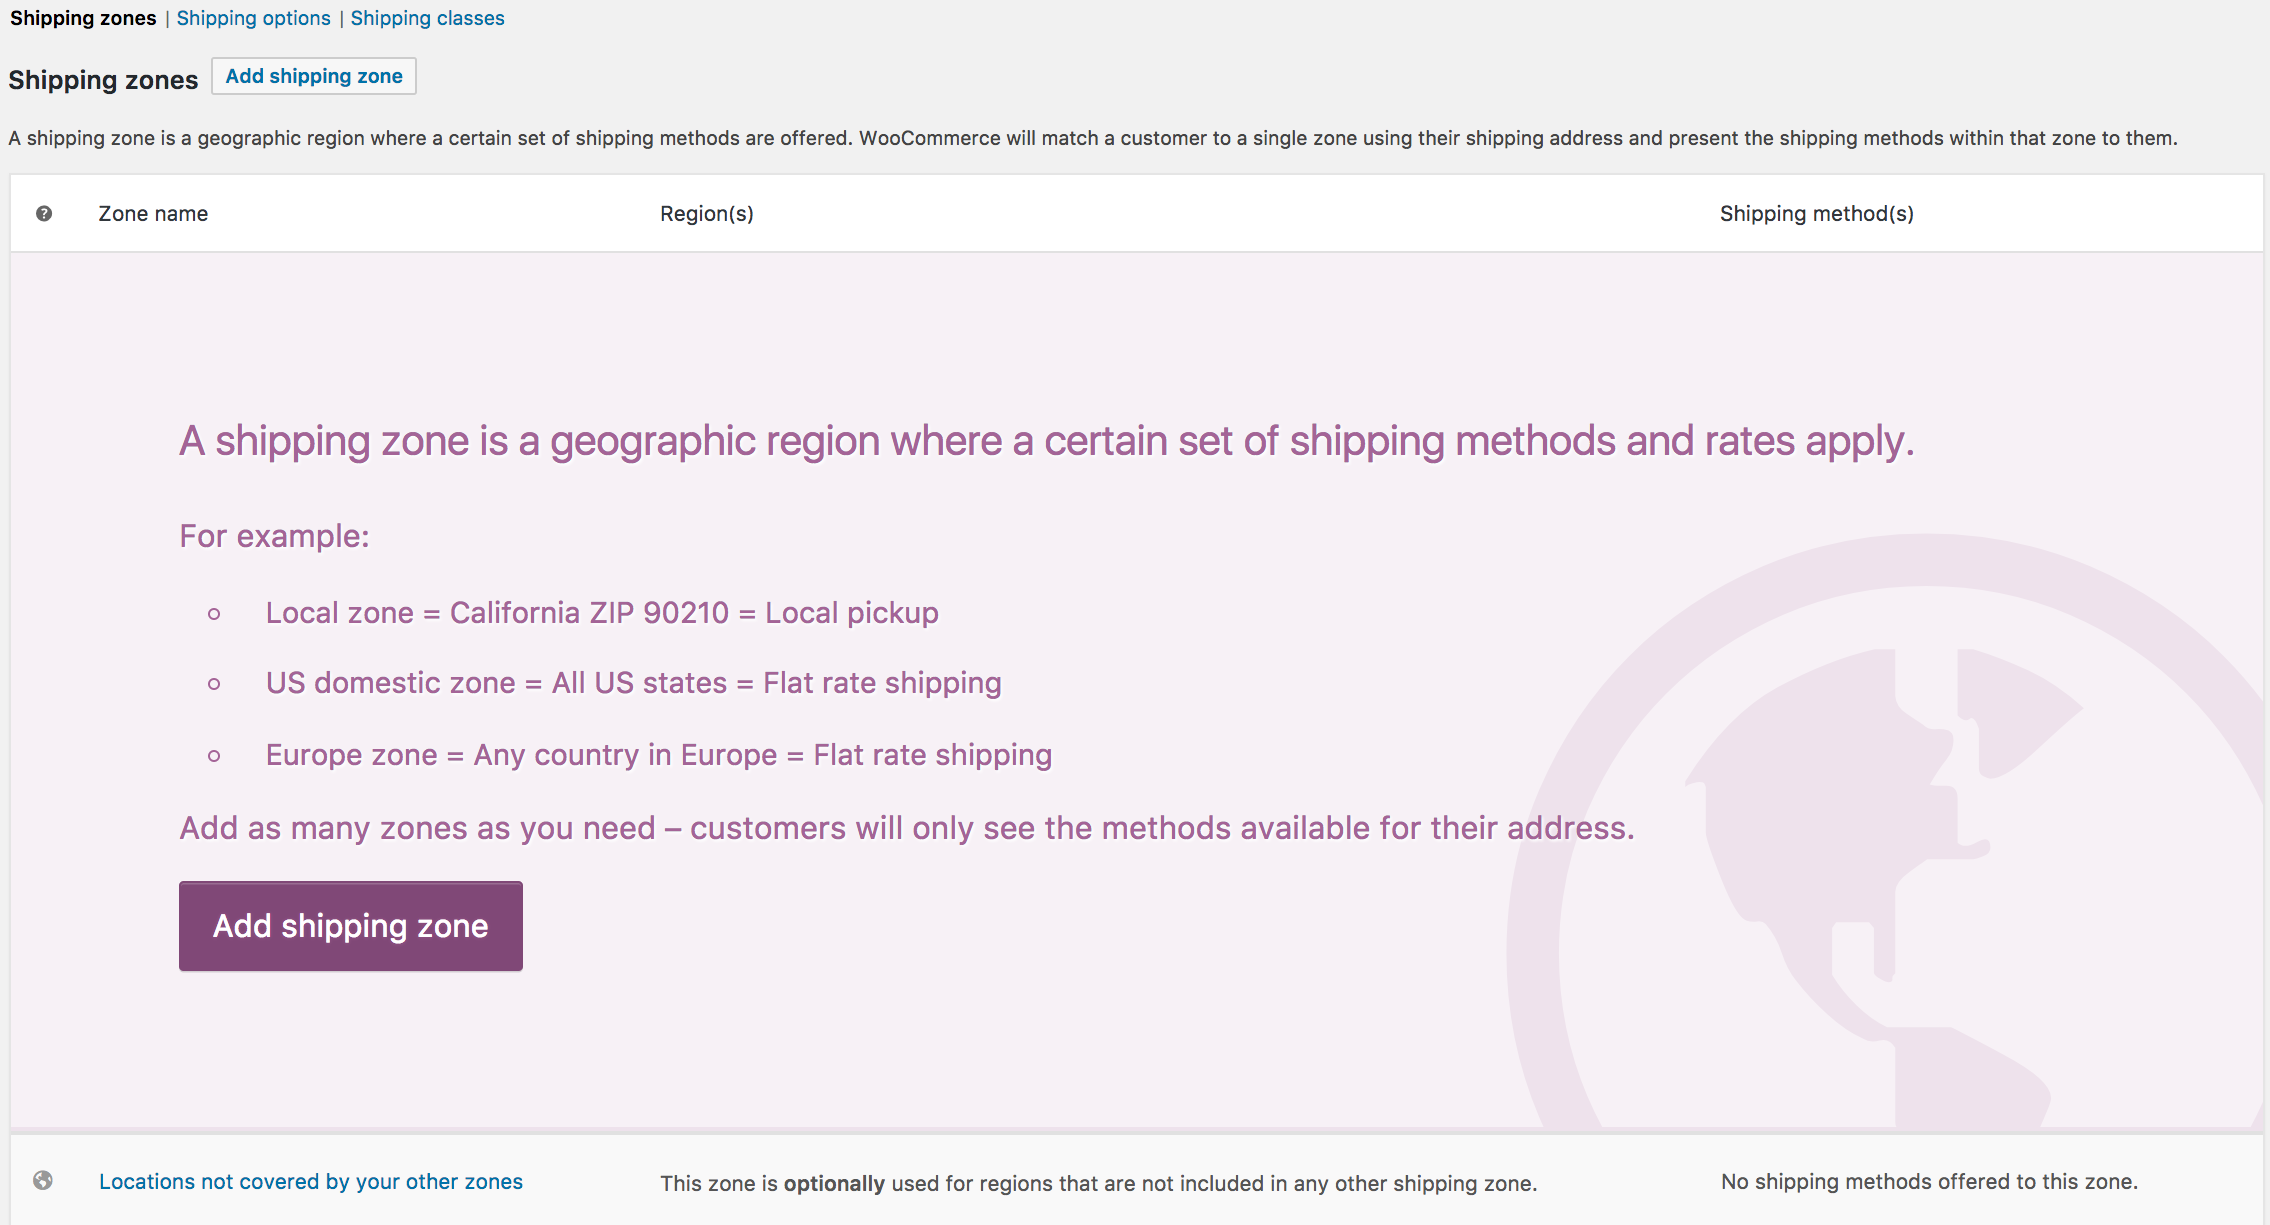
Locations not covered by your other zones is used for customers who do not match any of the custom zones you add. Adding methods to this zone is completely optional, depending on your needs.
If a customer enters a shipping address that is in a zone without shipping methods, they will be informed that no shipping is available.
Since zones match from top to bottom, you can also exclude regions from shipping by adding a zone for that region and assigning no shipping methods to it.
Adding a new zone ↑ Back to top
- Go to: WooCommerce > Shipping > Shipping Zones.
- Click the Add shipping zone button at the top.
- Enter a descriptive Zone Name, and select Zone Regions that apply. Regions can consist of: a) Countries, b) States, c) Continents.

- Select Limit to specific zip/postcodes (if applicable) to further narrow which customers match this zone. For example, you can set a local zone with a specific set of postcodes (one per line); a range of postcodes (e.g. 90210…99000), or use wildcards (e.g. CB23*).
- Select which Shipping Methods are available to this zone.
- Save changes.
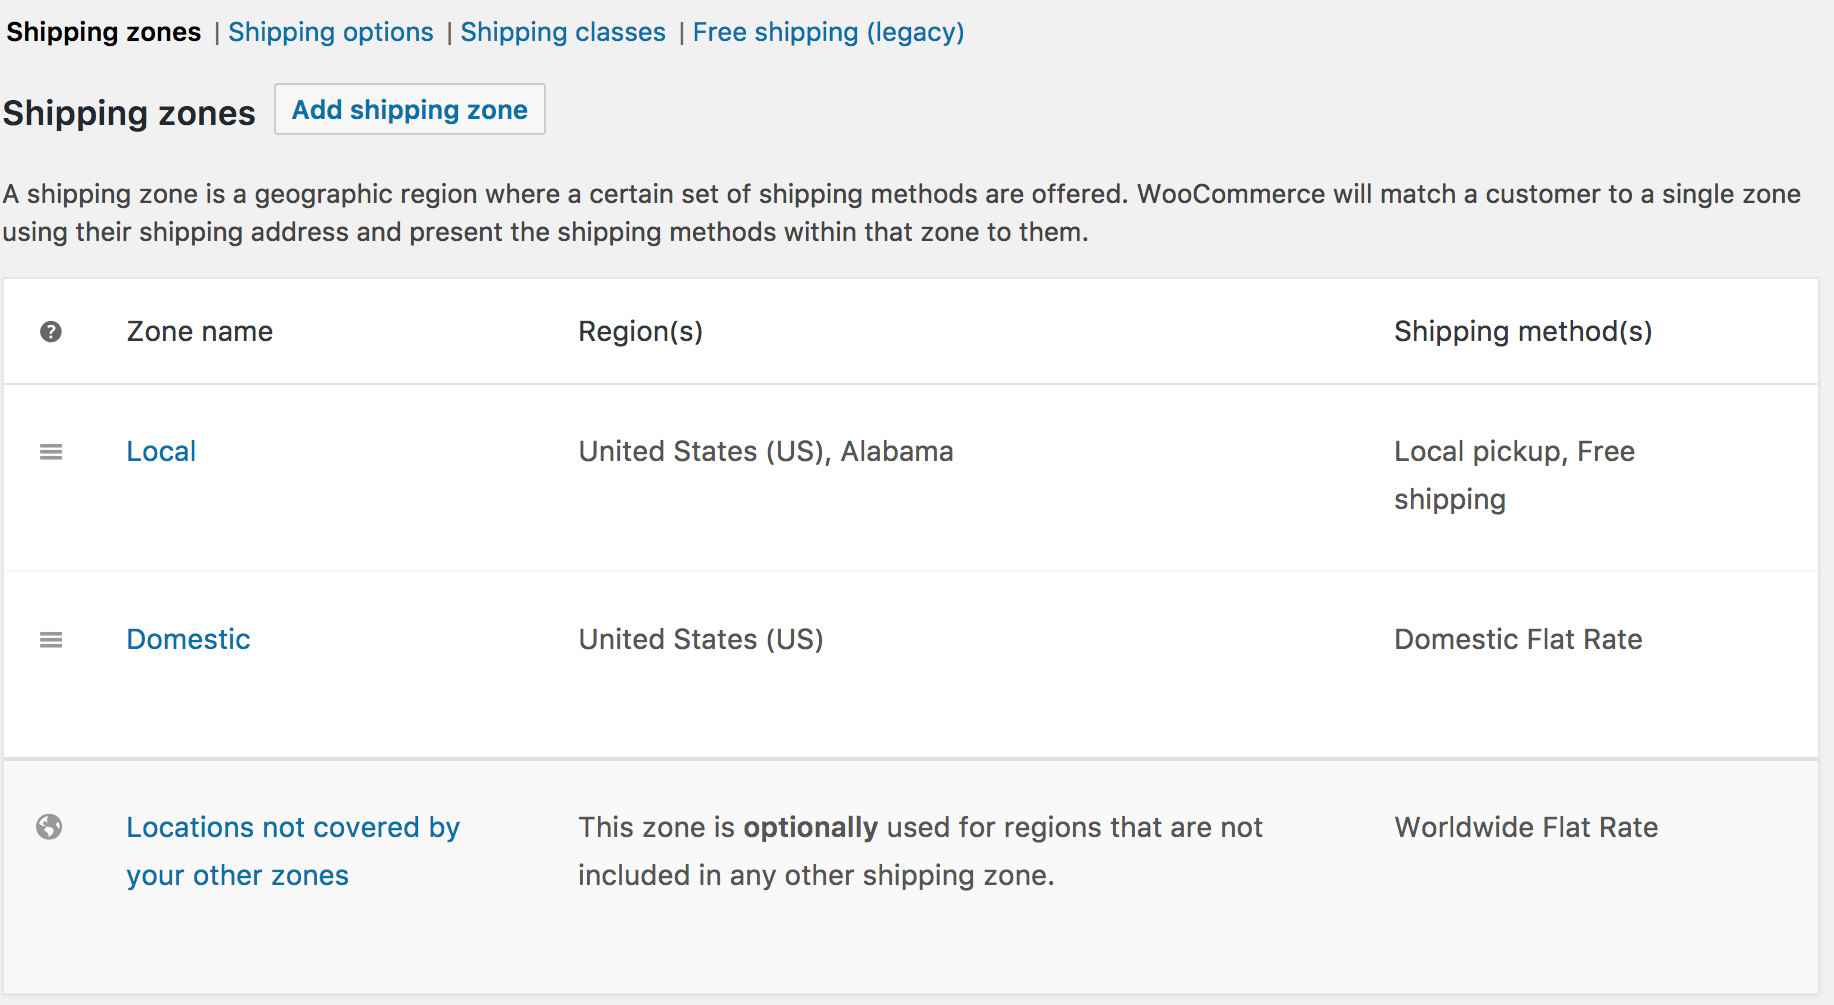
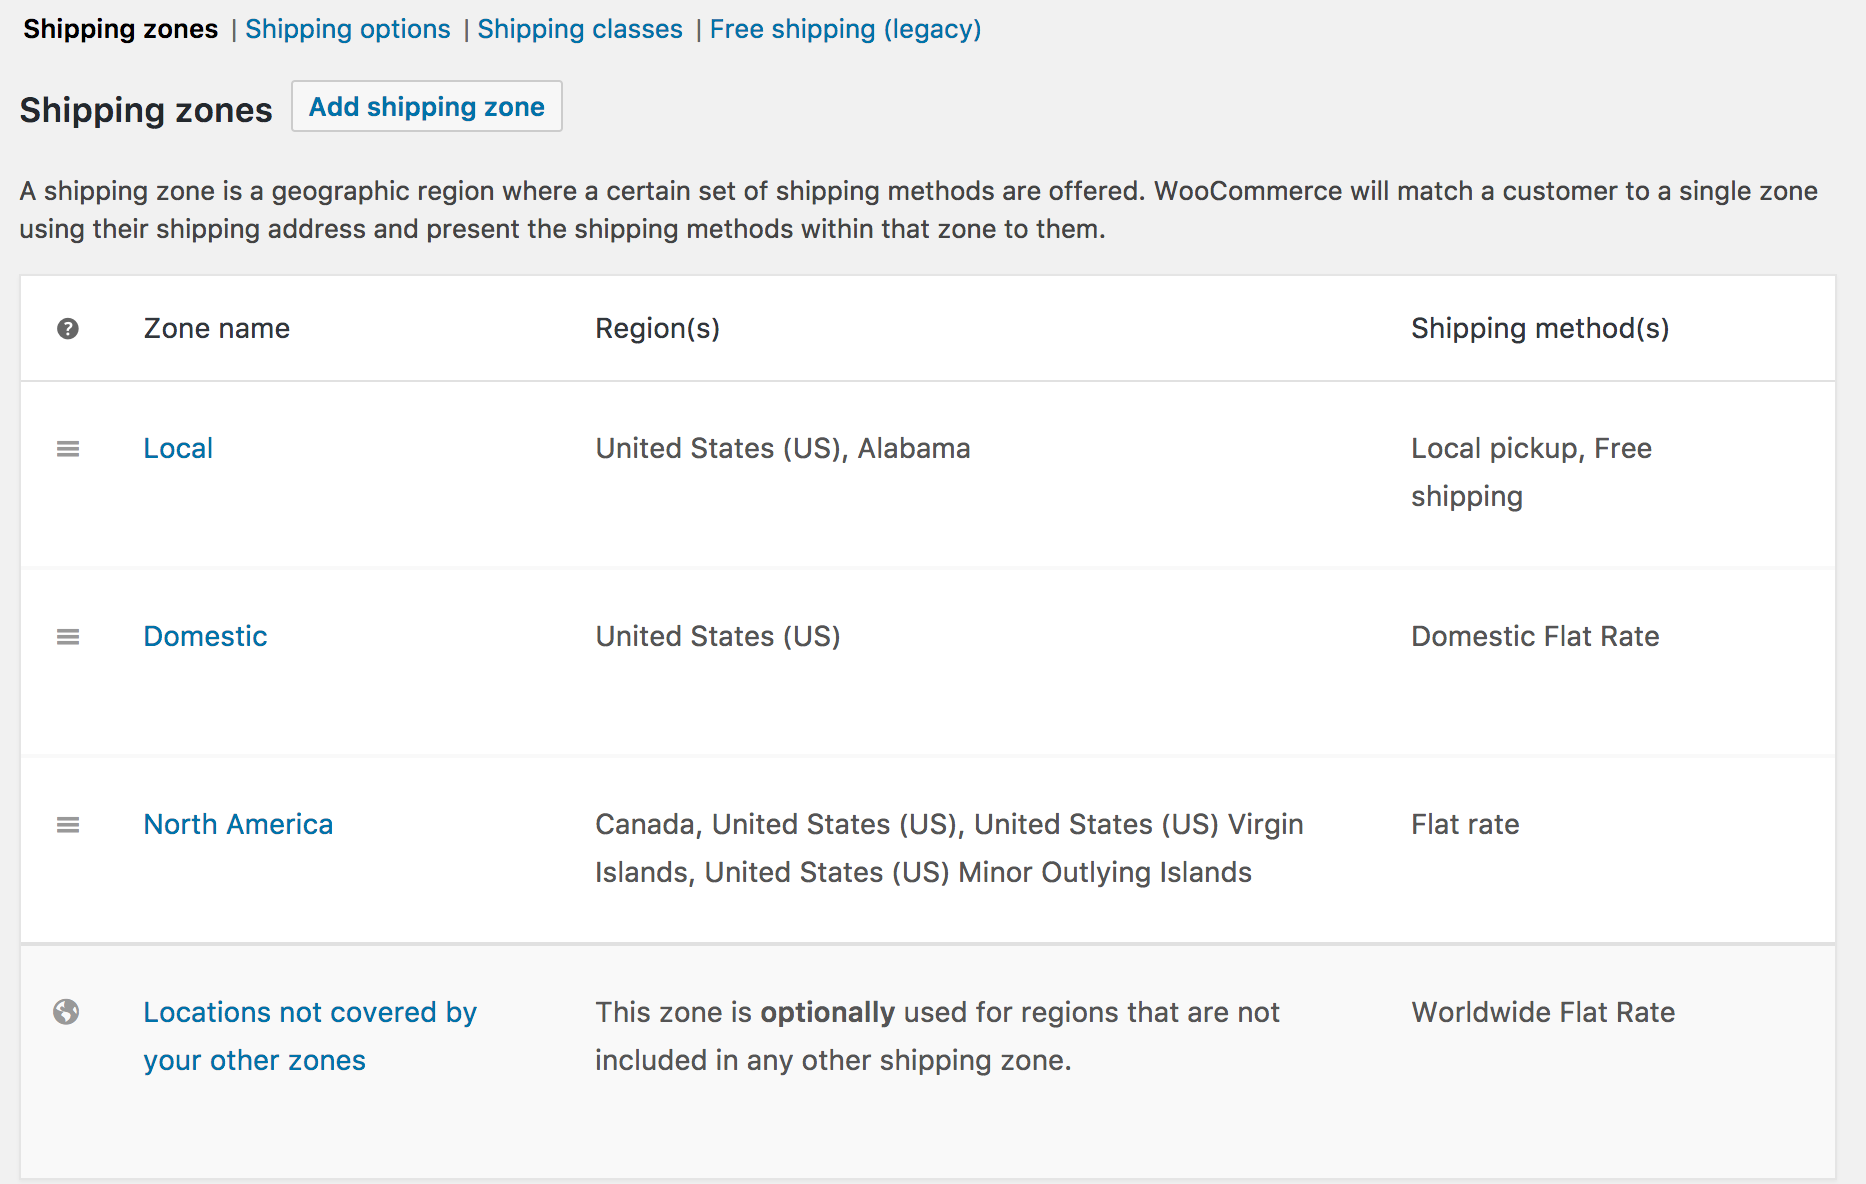
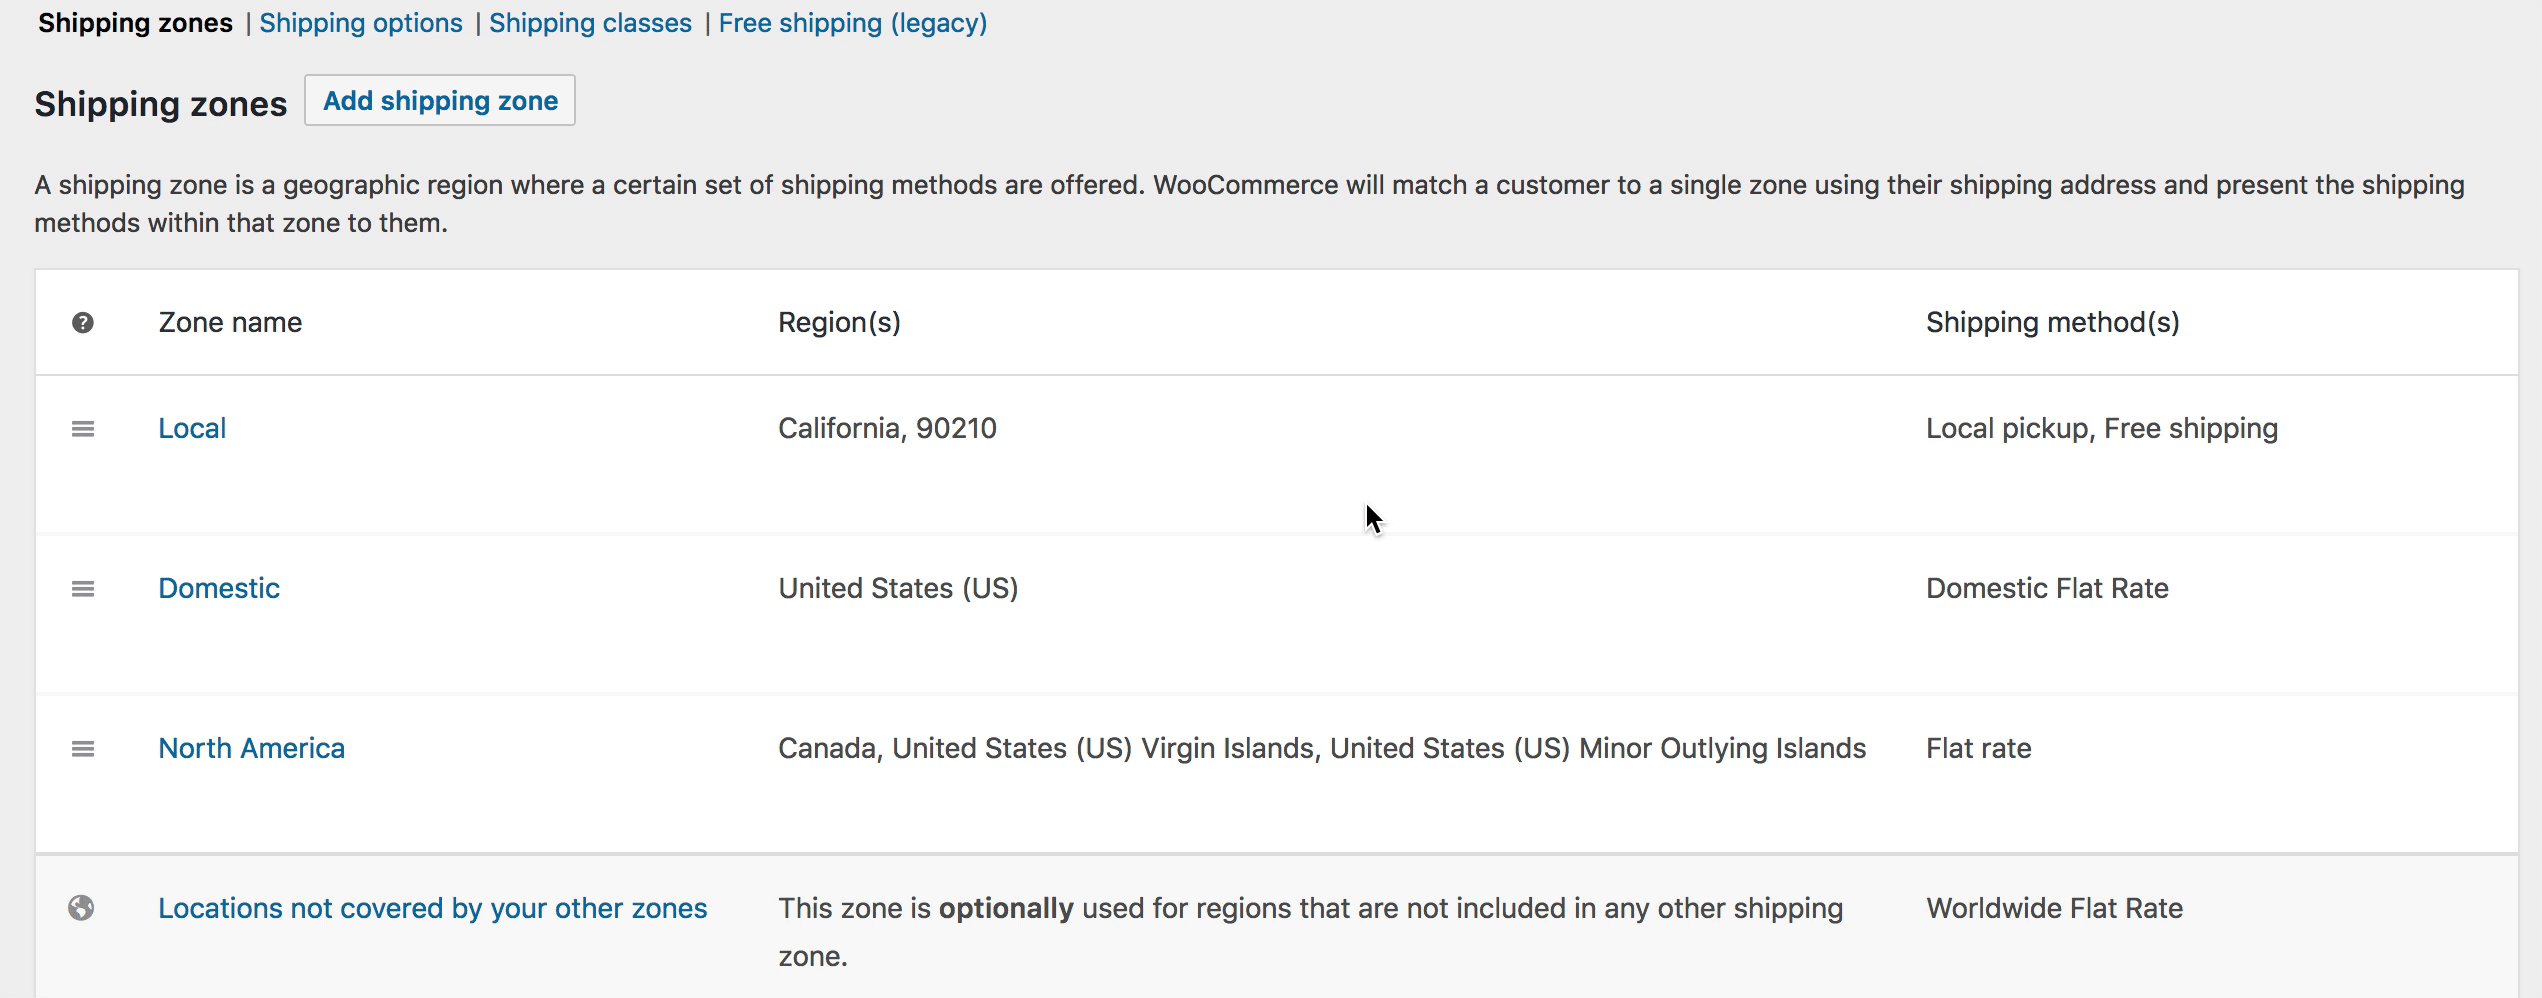
In the below example we created three zones – Local, Domestic, and North America to demonstrate how zones can be set up.
Sorting shipping zones ↑ Back to top
Shipping zones match customer address from top to bottom — the first to match the customer address is always used. If no custom zones match, then Locations not covered by your other zones is used.
To sort and reorder zones:
- Go to: WooCommerce > Shipping > Shipping Zones.
- Hover and click on the far left handles. A four-point icon appears on screen.
- Drag and drop.
- Save changes.
Editing shipping zones ↑ Back to top
To edit a shipping zone:
- Go to: WooCommerce > Shipping > Shipping Zones.
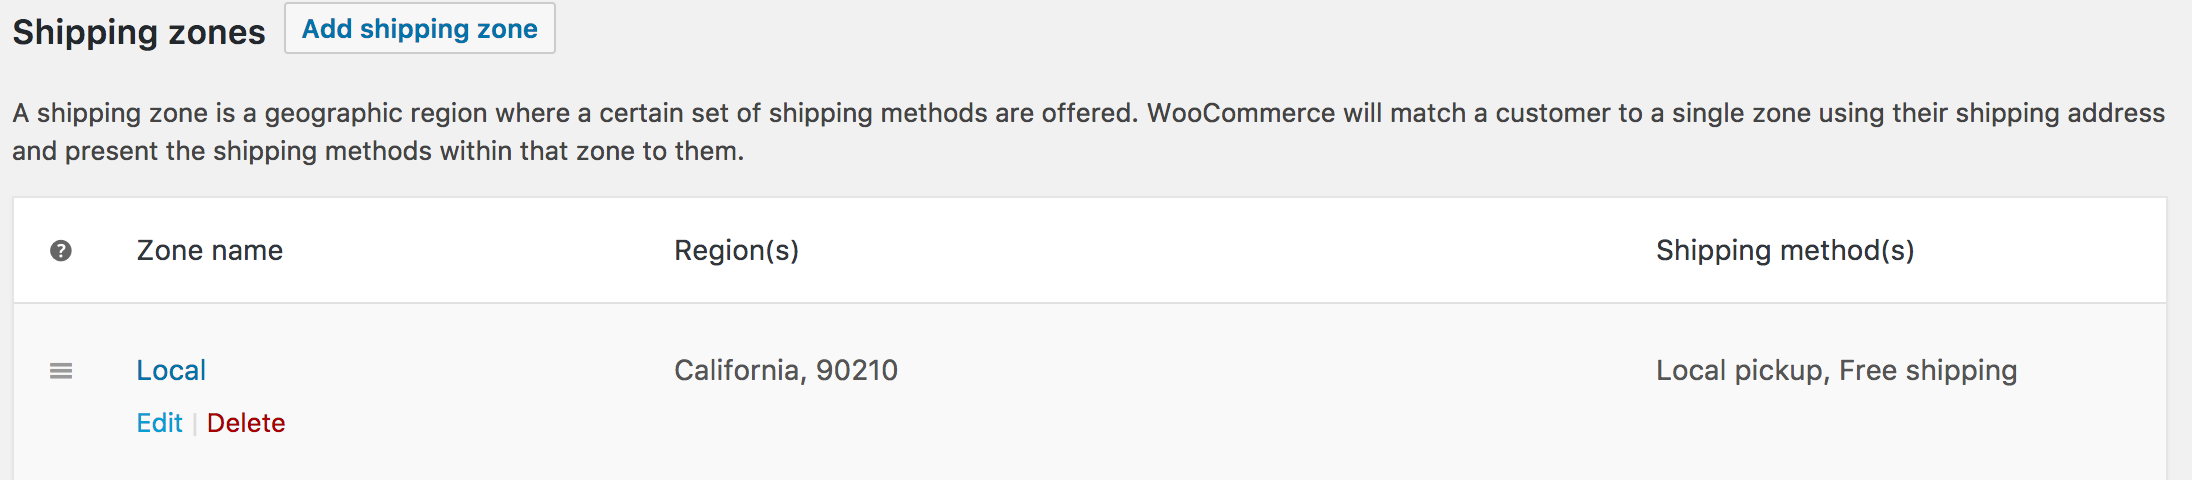
- Hover over Zone Name, and the option to Edit and Delete appear.
- Select Edit, and a screen appears so you can change the name, regions or shipping methods.
- Save changes.
The Locations not covered by your other zones section cannot be moved, renamed or deleted because it acts as a default when no other zones apply.
To delete a shipping zone:
- Go to: WooCommerce > Shipping > Shipping Zones.
- Hover over Zone Name, and the option to Edit and Delete appear.
- Select Delete, and the Shipping Zone is deleted.
Adding shipping methods to zones ↑ Back to top
To add a shipping method to an existing Shipping Zone:
- Go to: WooCommerce > Shipping > Shipping Zones.
- Hover over the Shipping Zone you wish to change, and select Edit.
- Scroll down to Shipping Methods on the screen that appears.

- Disable an existing Shipping Method by using the button. Or select Add Shipping method to use a different one.
- Save changes.
Only shipping methods that support Shipping Zones are listed. If you have a method that does not support Shipping Zone, it is shown in the navigation menu and works globally/independent of Shipping Zones.
For more information about configuring the core shipping methods, see the following related docs:
Removing shipping methods from zones ↑ Back to top
To remove a shipping method from a Shipping Zone:
- Go to: WooCommerce > Shipping > Shipping Zones.
- Hover over the Shipping Zone you wish to change, and select Edit.
- Scroll down to Shipping Methods on the screen that appears.
- Hover over the Shipping Method you wish to remove, and select Delete.
- Save changes.
Control the shipping method selected by default ↑ Back to top
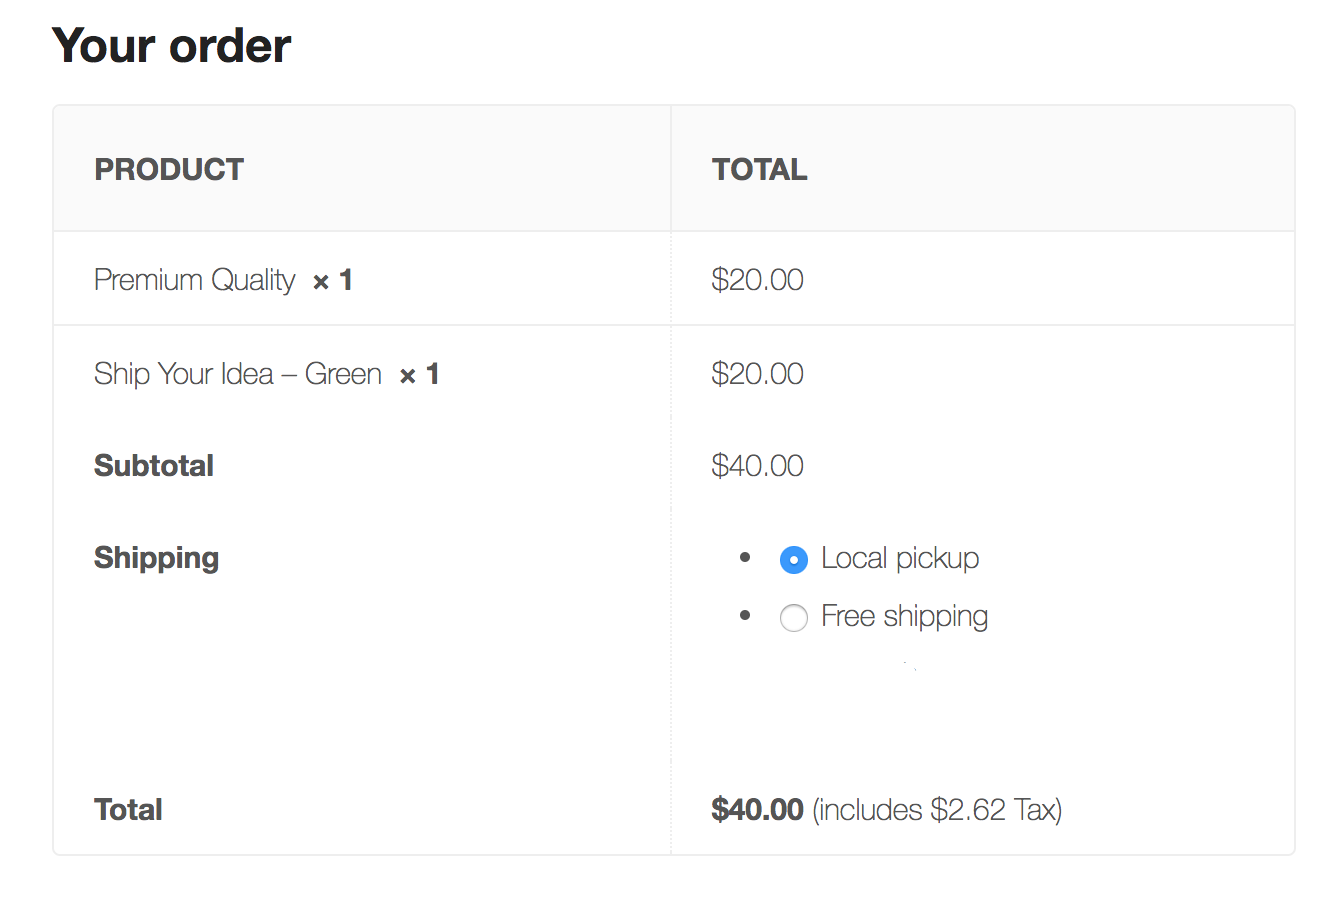
The default Shipping Method for customers is the top listed, enabled shipping method in the zone that they match.
In this screenshot example, Local Pickup is chosen for customer that matched the Local Shipping Zone.
Drag and drop to reorder shipping methods using the handles on the left, then Save Changes.
You can also control how shipping methods are ordered in the cart page, in the same screen. All the selected shipping methods will be sorted in the cart page, in the same order you followed, to arrange them in this screen.
For customers matching the Local shipping zone parameters, shipping methods appear in the cart in the same order:
Using these shipping zones and methods:
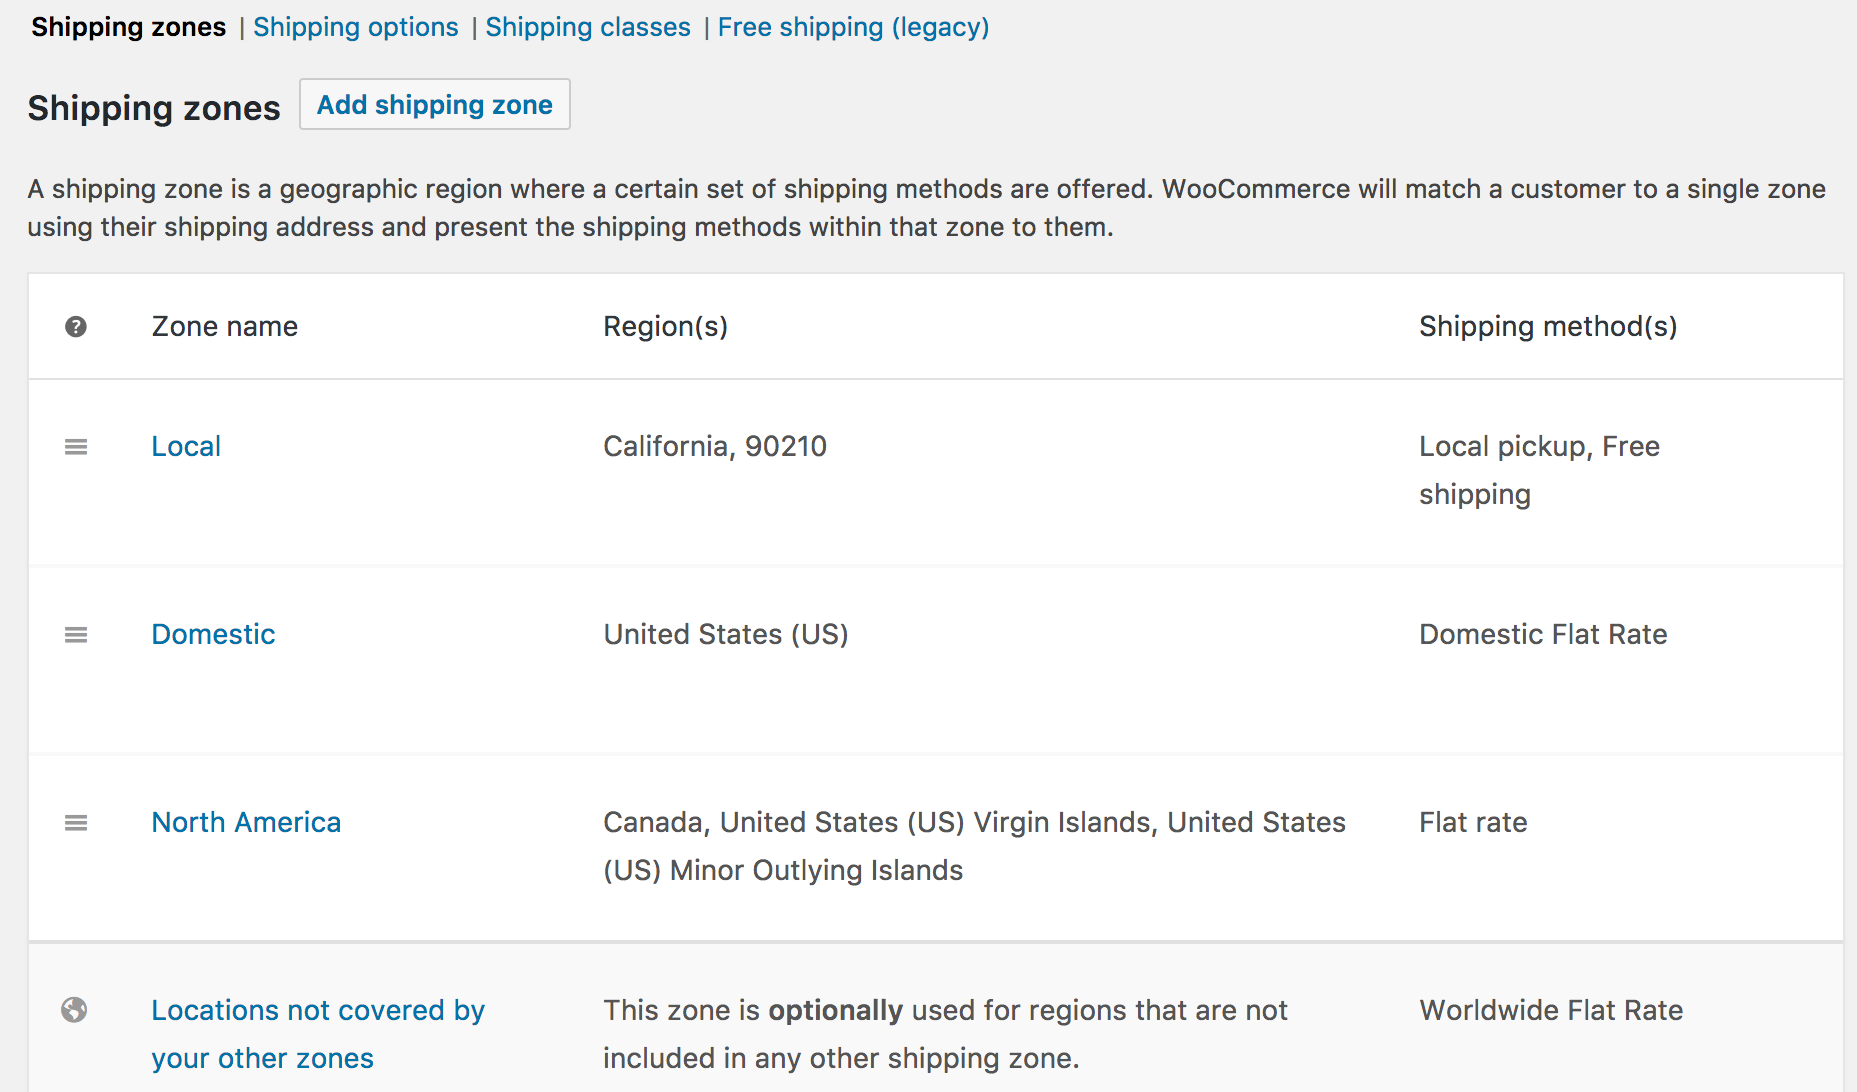
- In the 90210 zip code in California, I offer Local Pickup and Free Shipping.
- In the United States, I offer a Domestic Flat Rate.
- In Canada and U.S. regions, I offer a different Flat Rate.
This is what your customers would see if they use the Calculate Shipping option:
| Californian customer | Non-Californian, U.S. customer | International customer |
|---|---|---|
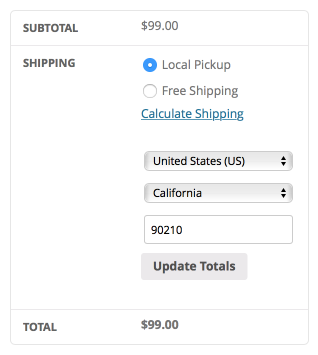 |
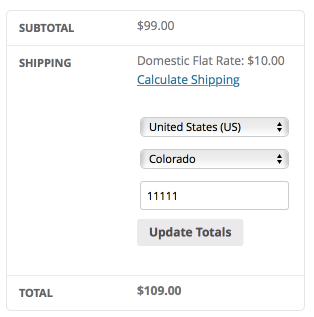 |
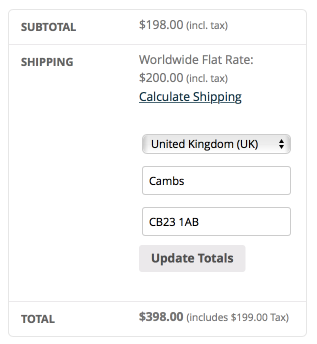 |
Snippet: Only show free shipping if available ↑ Back to top
By default, all methods in a zone are presented to the customer. If you have conditional free shipping and want it to be the only shown method if it’s available, you can use the following snippet to hide other methods: